
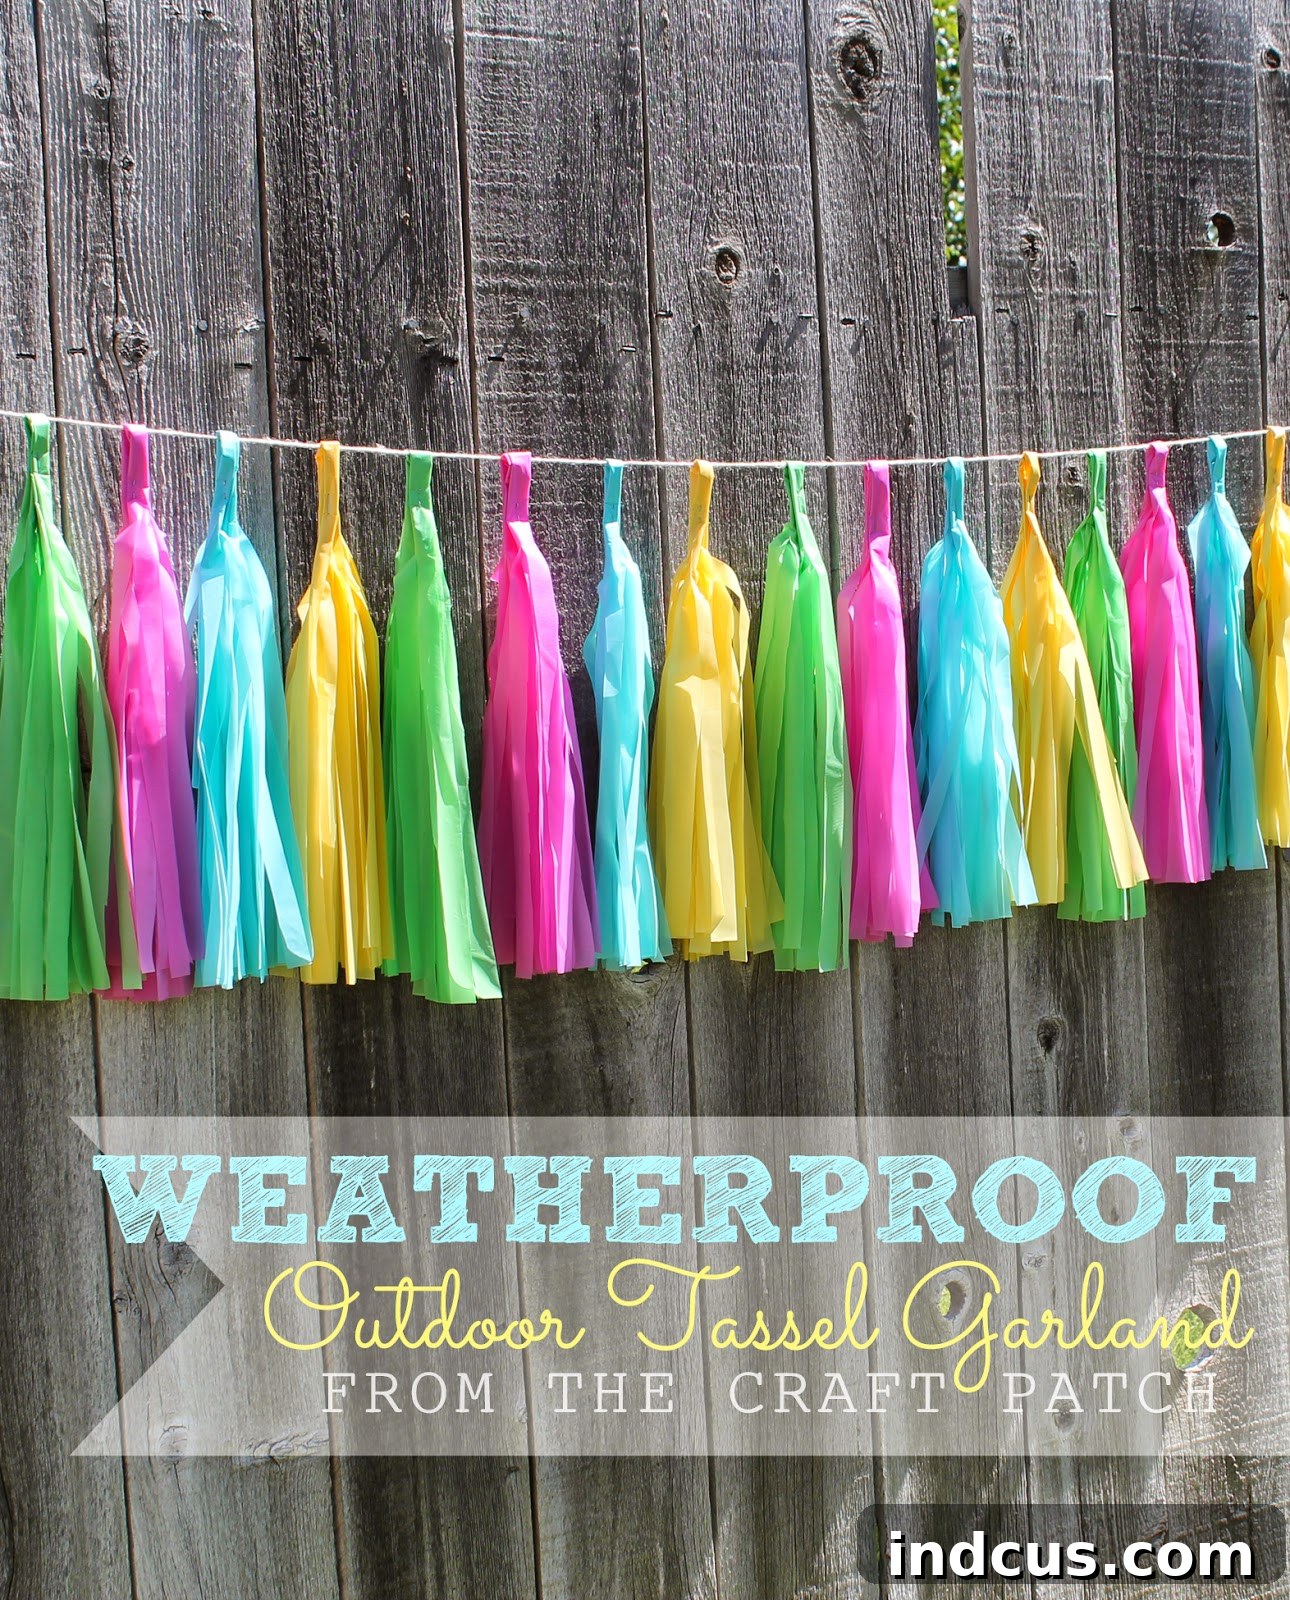
Transform Your Party: DIY Weatherproof Tassel Garlands from Plastic Tablecloths
Are you searching for that perfect party decoration that combines whimsical charm with unparalleled durability? Tassel garlands have captivated hearts across the DIY and party planning world, bringing a joyful flutter to any celebration. While traditional tissue paper tassels are undeniably beautiful, their delicate nature often means a short lifespan, especially when faced with unpredictable outdoor elements like rain or strong winds. What if we told you there’s a brilliant, budget-friendly hack to create stunning tassel garlands that can withstand the weather and last all season long? Get ready to discover how to craft vibrant, weatherproof tassel garlands using an unexpected hero: everyday plastic tablecloths! Perfect for birthdays, garden parties, or just adding a splash of color to your backyard, these durable garlands offer a fantastic solution for decor that truly lasts.
Why Choose Plastic Tablecloths for Your DIY Tassel Garland?
The secret to our long-lasting, vibrant garlands lies in a simple, affordable material readily available at almost any store: plastic tablecloths. Forget the flimsy tissue paper that wilts at the first drop of rain or tears in a breeze. Plastic tablecloths offer a robust, waterproof, and surprisingly versatile alternative. Not only are they incredibly inexpensive, often costing just a dollar or two per cloth, but they also come in a dazzling array of colors, allowing you to match any party theme or seasonal decor palette. Their inherent durability means your beautiful creations won’t just be a one-day wonder; they can serve as charming outdoor decor for weeks or even months, making them an eco-friendlier choice in the long run as they can be reused multiple times. This ingenious swap transforms a common household item into a fantastic craft material, proving that stunning decor doesn’t have to break the bank or succumb to the weather.
Gather Your Supplies: Essential Materials for Your Weatherproof Garland
Before diving into the creative process, let’s ensure you have all the necessary items at hand. The beauty of this project is its simplicity and reliance on readily available materials. You won’t need any fancy tools or expensive craft supplies, making it perfect for crafters of all skill levels, even those new to DIY decorations. Here’s a detailed list of what you’ll need to transform ordinary plastic tablecloths into extraordinary outdoor decor:
- Plastic Tablecloths: The star of our show! Choose colors that complement your party theme or outdoor aesthetic. Stores like Walmart, various party supply outlets, or even dollar stores often have a great selection of hues. For a typical garland length, aim for 3-5 tablecloths, depending on how full you want your tassels to be and how many colors you’re incorporating into your design.
- Sharp Scissors: A good pair of sharp scissors will make cutting through multiple layers of plastic much easier and result in cleaner, crisper tassels. This is a key tool for achieving a professional finish.
- Ruler or Measuring Tape: Essential for accurate measurements, ensuring your tassels are uniform in size and appearance. Consistency in length contributes significantly to the garland’s overall aesthetic appeal.
- Stapler and Staples: Used to securely fasten the loops of your tassels. This creates a sturdy attachment point for the string, crucial for durability, especially in outdoor conditions.
- Twine, Ribbon, or Strong String: To thread your finished tassels onto, forming the complete garland. Choose a durable material that can withstand outdoor conditions without fraying or breaking. Fishing line can also be a discreet and robust option for a nearly invisible hanging effect.
- Optional: Cutting Mat and Rotary Cutter: For those who prefer precision and speed, especially if you’re planning to make a large quantity of tassels, a self-healing cutting mat and a rotary cutter can make the fringe-cutting process much faster and more accurate.
- Optional: Clothesline Clips or Binder Clips: These can be incredibly helpful for holding multiple layers of tablecloths steady while you’re cutting, preventing slipping and ensuring straighter lines, particularly when working with larger or more unwieldy sections of plastic.
With these simple tools and materials, you’re well-equipped to create a stunning, long-lasting decoration that will impress your guests and brighten your outdoor space for any occasion!
Step-by-Step Guide: Crafting Your Own Durable Tassel Garland
Ready to get started on your creative journey? This project is not only easy to execute but also incredibly satisfying, yielding beautiful results with minimal effort. Follow these detailed instructions to create your beautiful outdoor tassel garland. Remember, while precision in cutting will lead to the most professional-looking results, don’t be afraid to embrace a little handmade charm – slight variations can add character to your unique decor!
Step A: Prepare Your Tablecloth Section
Begin by carefully removing one plastic tablecloth from its packaging. The crucial part here is to keep it folded exactly as it comes out of the wrapper – resist the urge to unfold it completely. This pre-folded state is essential because it provides multiple layers of plastic, allowing for efficient cutting and producing a thicker, fuller tassel. Gently unroll just one end of the tightly folded tablecloth. Using your ruler or measuring tape, measure in approximately 8 to 10 inches from this unrolled end. This measurement will ultimately determine the length of your individual tassels. If you desire longer, more dramatic tassels, you can increase this measurement; conversely, decrease it for shorter, denser tassels. Once you’ve marked your measurement, carefully cut straight through all the layers of the tablecloth at that designated point. You should now have a thick, multi-layered strip of plastic tablecloth, still in its folded state.
Pro Tip: For a full-looking garland, you’ll need multiple tassels. Each 8-10 inch section you cut will typically yield two tassels. Plan how many tassels you want based on your desired garland length and fullness. Generally, a 6-foot garland might require 15-20 tassels for a lush appearance, meaning you’d start with 8-10 such sections.
Step B: Divide Your Section for Tassel Creation
Take the thick section you just cut in Step A. This section will likely still have several factory folds. Locate the main, central fold line running lengthwise along the plastic. Carefully cut along this fold line. This action will effectively divide your multi-layered strip into two separate, long, and skinny rectangular pieces. Each of these rectangles will then be used to create one full, individual tassel. This step is important for making the plastic more manageable for the subsequent cutting steps and ensuring your tassels have the right amount of fullness without being overly bulky or difficult to handle during the fringing process.
Consideration: If you desire thinner, less voluminous tassels, you could even cut these rectangles in half again lengthwise, giving you four thinner pieces per initial cut from Step A. This offers a great degree of flexibility in customizing your tassel’s final appearance and density.
Step C: Create the Tassel Fringe
Now it’s time to create the signature fringe that gives tassels their characteristic playful and flowing look. Take one of the long, skinny rectangles you prepared in Step B. Fold it neatly in half lengthwise. This fold will ultimately become the top of your tassel, the point where it will eventually attach to the garland string. Starting from the open end (the edge opposite the folded edge, where the plastic layers are separate), begin cutting strips approximately 1/2 inch wide. It’s crucial to stop cutting about one or two inches short of the folded line. This uncut section at the top is vital; it holds all the individual fringe pieces together and forms the sturdy base of your tassel, which you’ll later use to create the hanging loop. Aim for consistent strip width to create a uniform and appealing tassel. However, don’t worry if they’re not perfectly even; a little variation often adds to the charming, handmade quality!
Tip for Speed: If you’re tackling a large project and making many tassels, consider stacking 2-3 of your folded rectangles (from Step B) and cutting them simultaneously. Just ensure your scissors are sufficiently sharp to handle the combined thickness without snagging or tearing the plastic, which can lead to uneven cuts.
Assembling Your Tassels: The Final Steps to Creation
Once you’ve meticulously cut all your fringe, it’s time for the exciting transformation: turning these fringed rectangles into beautiful, fluffy tassels that are ready for hanging. This assembly process is quick, simple, and crucial for perfecting the shape and adding the essential loop for your garland string.
- 1. Unfold and Observe: Carefully unfold the rectangle you just fringed so that all the cut tassels are now gracefully fanned out on either side. At this stage, with its many dangling strands, it might playfully remind you of a vibrant octopus! This visual helps ensure all fringes are separated and perfectly aligned for the next crucial folding step.
- 2. First Fold and Roll: Fold the entire piece in half lengthwise again, bringing the two fringed sides together. Now, starting from one end of this folded and fringed strip, begin rolling the plastic tightly towards the other end. This rolling motion is key to creating the initial volume and defining the overall shape of your tassel.
- 3. Continue Rolling for Fullness: Keep rolling the plastic firmly and neatly until it’s transformed into a nice and skinny, yet full-looking, bundle of fringe. The tighter and more consistently you roll, the denser and more robust your finished tassel will appear. This also helps to give it a more refined and professional finish.
- 4. Create the Hanging Loop: Take the entire rolled and fringed piece and carefully bend it in half, ensuring you create a sturdy loop at the top. This loop is fundamentally what you will use to thread your finished tassel onto the main garland string. Make sure this loop is robust enough to comfortably hold the weight of the tassel without tearing.
- 5. Secure with a Staple: Hold the newly formed loop firmly in one hand and carefully staple the plastic together below the loop but distinctly above where all the fringe pieces begin to splay out. This staple is absolutely crucial for securing the loop in place and preventing the rolled tassel from unraveling over time. For maximum durability, especially if your garland will be exposed to strong winds or regular movement, use a strong, heavy-duty staple.
That’s it! You’ve successfully created your first weatherproof plastic tablecloth tassel, a vibrant and durable piece of decor. Now, simply repeat this entire process for each remaining fringed rectangle until you have enough tassels to create a vibrant and full garland of your desired length. Feel free to mix and match colors for a truly festive and eye-catching look, or opt for a monochromatic scheme for an elegant and understated simplicity.
Assembling Your Garland: Bringing It All Together
Once you have a collection of beautifully crafted plastic tassels, the final exciting step is to string them together to form your magnificent garland. This part of the project is incredibly straightforward and offers another opportunity for personalization regarding spacing and overall arrangement. Grab your chosen twine, durable ribbon, or strong string. Decide on the overall length of your desired garland and cut your string a bit longer than needed; this extra length will allow for comfortable handling and for tying secure loops at each end for easy hanging. Begin threading your tassels onto the string through the sturdy loops you created with the stapler. You have complete creative control over their spacing: you can place them closely together for a dense, lush, and dramatic look, or spread them out more for a minimalist, airy aesthetic. If you’ve made tassels in multiple hues, now is the time to experiment with captivating color patterns – ombre effects, alternating vibrant colors, or a charming random assortment all look fantastic and can greatly enhance your decor. Once all your tassels are threaded onto the string and arranged to your liking, tie a secure loop at each end of the string. Double-check that all tassels are firmly in place and well-distributed before you proudly display your creation.
Creative Ideas & Tips for Your Weatherproof Tassel Garland
These plastic tablecloth tassels are incredibly versatile, offering endless possibilities for customization and use beyond just a simple, linear garland. Their durability and vibrant colors make them a fantastic foundation for a myriad of decorative ideas. Here are some inspiring tips and creative ideas to unleash your imagination and make your weatherproof tassel garland truly unique:
- Vary Tassel Lengths: Don’t feel confined to uniform sizes! Instead of sticking to standard 8-10 inch tassels, try making some shorter (e.g., 6 inches) and some significantly longer (e.g., 12-14 inches) for a dynamic, multi-dimensional garland that adds visual interest and playful movement.
- Mix Colors and Textures: Embrace a spectrum of colors! Create a stunning ombre effect by gradually transitioning between shades, or go bold with high-contrast color blocking for a modern touch. For an extra sparkle, you could even incorporate strips cut from other weatherproof materials, such as metallic Mylar balloons or reflective foil, to add a touch of glamour and texture.
- Alternative Decorative Uses: Beyond traditional garlands, individual tassels can be repurposed creatively. Use them as festive balloon tails, tie them to chair backs for instant party flair, use them as unique gift toppers for special presents, or simply hang them individually from tree branches for an impromptu, whimsical outdoor festive touch in your garden.
- Illuminate Your Garland: For evening events or to add a magical ambiance, string a delicate, battery-operated LED fairy light strand along with your tassels. The soft glow of the lights will beautifully illuminate the translucent plastic, creating a captivating and enchanting display as dusk settles.
- Layering for Impact: To create a rich, luxurious backdrop or a stunning focal point, hang multiple garlands at varying heights. This layering technique works wonderfully behind a dessert table, as a vibrant photo booth backdrop, or to define a specific area within your outdoor space.
- Effortless Storage and Reuse: One of the greatest advantages of using plastic tablecloths is their resilience. Because they’re made from durable plastic, these garlands are incredibly easy to store and reuse. Gently coil them up and keep them in a dry, protected place, and they’ll be perfectly ready for your next celebration, holiday, or to simply brighten your summer season year after year.
- A Fun, Kid-Friendly Craft: With appropriate supervision for cutting, older children can easily participate in various stages of making these tassels. This makes it a fantastic, engaging, and creative family activity, allowing everyone to contribute to the festive decor.
The Perfect Outdoor Decoration: Durable and Delightful
What began as a clever, practical solution for a cherished baby’s first birthday party quickly transforms into a wonderfully versatile, long-lasting decoration that brings joy beyond a single event. Imagine these vibrant, cheerful tassels swaying gently and gracefully in the warm summer breeze, instantly adding a festive, celebratory touch to your patio, enhancing a lively garden party, or bringing a pop of color to your casual backyard BBQ. Unlike their delicate, often short-lived tissue paper counterparts, these ingenious plastic garlands will bravely face the elements – enduring sun, wind, and rain – while holding their vibrant shape and dazzling color beautifully. They are more than just ephemeral decorations; they are a brilliant testament to creative problem-solving, smart budgeting, and a desire for sustainable party solutions. Whether you’re celebrating a significant milestone, hosting a casual get-together with friends and family, or simply wanting to inject some enduring, cheerful color into your outdoor living space, this DIY weatherproof tassel garland is your ultimate go-to project.
So, gather your colorful plastic tablecloths, unleash your inner crafter, and prepare to create stunning, durable decorations that will delight for more than just a fleeting moment. This simple yet brilliant DIY project proves that beautiful, robust, and budget-friendly party decor is not only achievable but also incredibly fun to make. Once the birthday cake is eaten, the gifts are unwrapped, and the last guest has departed, you’ll have the perfect spot, perhaps above a vibrant flower bed, along a fence line, or adorning your porch, to hang this “pretty girl” and let her sparkle and celebrate all summer long. Happy crafting, and enjoy your wonderfully weatherproof tassel garland!







