
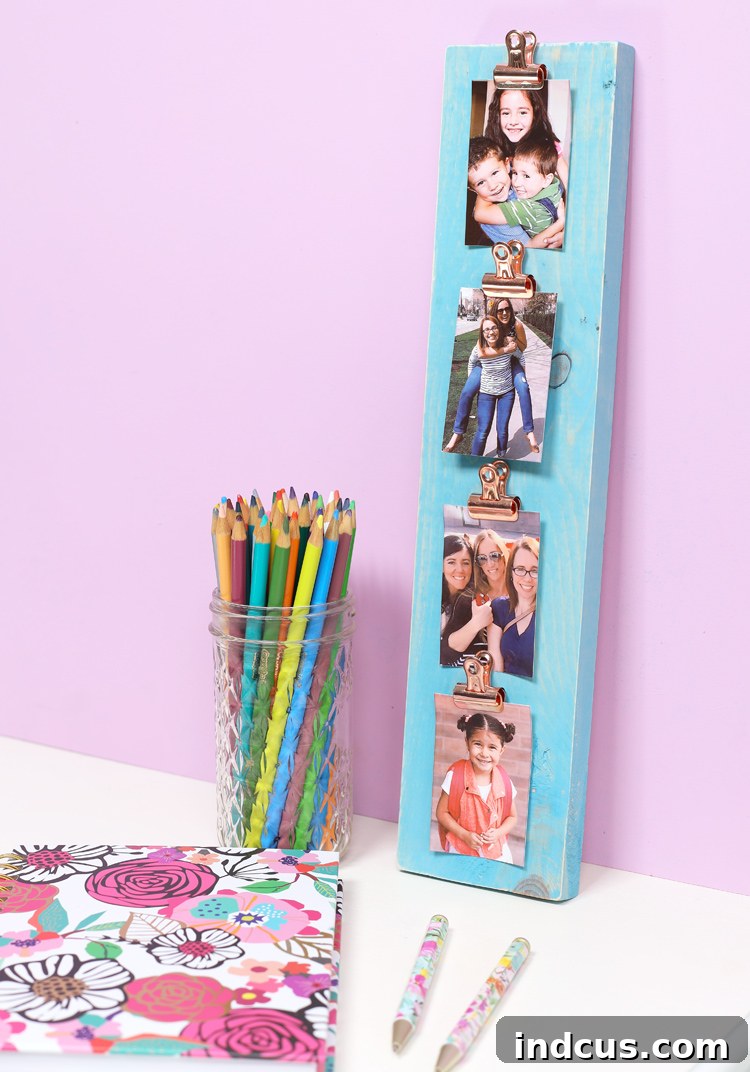
Craft Your Perfect Memory Board: An Easy DIY Wood Photo Display from a Single Plank
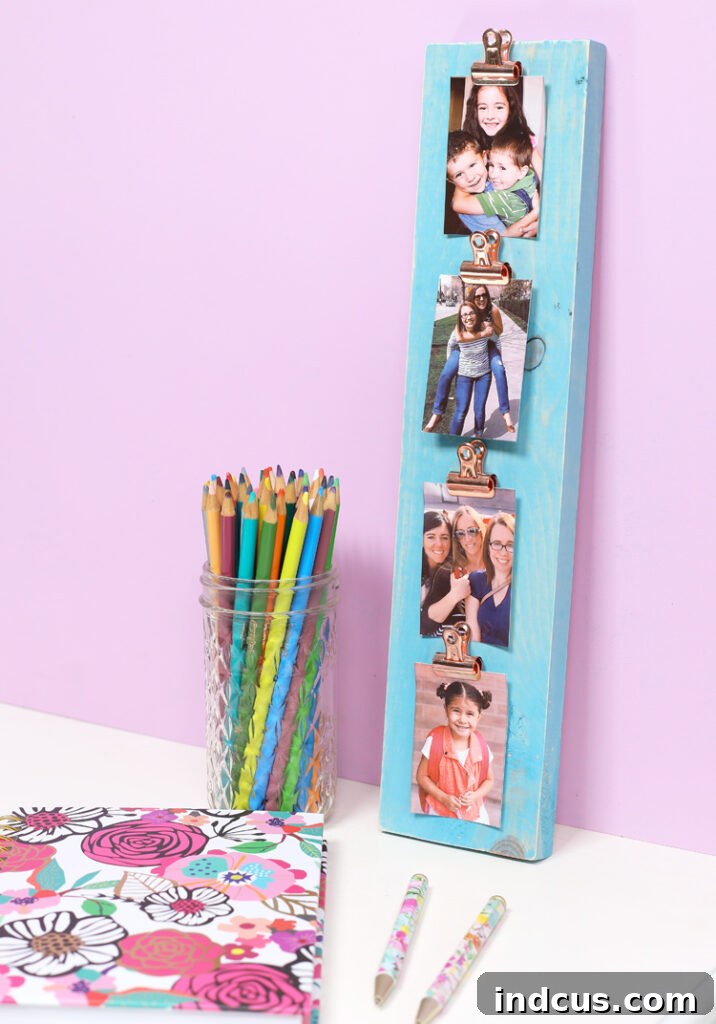
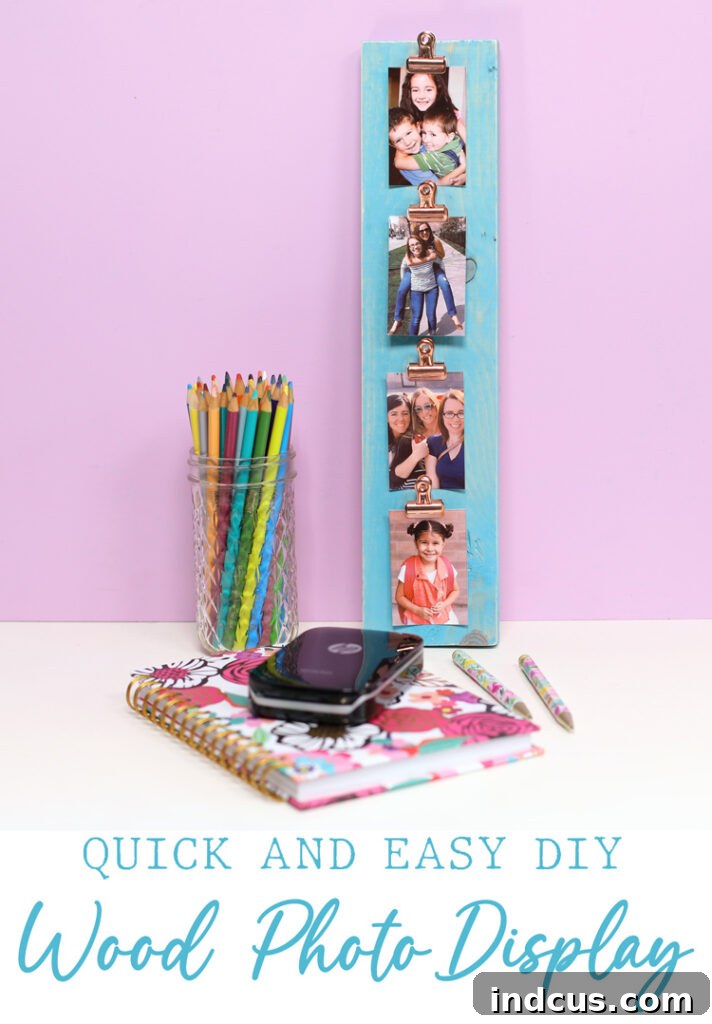
In a world filled with digital photos, there’s a unique charm in tangible prints, especially when they tell a story and bring warmth to your living space. Do you ever find yourself wishing for a simple yet stylish way to showcase your favorite snapshots? Perhaps you have a collection of mini photos from an instant camera, or simply want an easy method to rotate cherished memories without committing to permanent frames. Look no further! This comprehensive guide will walk you through creating a beautiful and functional DIY wood photo display board using just a single piece of 1×4 wood and a few basic supplies. It’s an incredibly rewarding project that’s not only budget-friendly but also offers endless possibilities for personalization.
Whether you’re decorating a teenager’s bedroom, adding a personal touch to a home office, or creating a unique gift, this easy-to-make photo display is an ideal solution. It allows you to effortlessly swap out photos whenever inspiration strikes, keeping your decor fresh and your memories front and center. Forget about complicated tools or extensive crafting experience; if you can paint and use a glue gun, you can absolutely create this charming piece.
This post contains affiliate links, which help support this blog at no extra cost to you.
For enthusiasts of instant cameras like the Instax, Sprocket, or Ivy, this wooden display offers the perfect canvas for those adorable mini prints. It transforms loose photos into a cohesive and eye-catching arrangement. And if you’re still contemplating a small photo printer for a tween or teenager in your life, consider this project a compelling reason to make that purchase! These printers are incredibly fun, encouraging creativity and instant gratification, making them a fantastic gift idea for birthdays or holidays. Pair it with this DIY display, and you’ve got a winning combination!
Why Choose a DIY Photo Display Board?
There are countless reasons why a homemade photo display outshines store-bought alternatives:
- Cost-Effective: Utilizing a common piece of lumber and affordable clips makes this project incredibly economical compared to purchasing multiple frames or specialized display units.
- Complete Customization: From the paint color to the type of clips, every element can be chosen to perfectly match your existing decor and personal style.
- Effortless Photo Swapping: The clip design means you can change photos in seconds, ideal for showcasing new prints, seasonal images, or evolving memories.
- Eco-Friendly: It’s a fantastic way to repurpose scrap wood that might otherwise go to waste, giving it a new purpose and reducing landfill waste.
- Sense of Accomplishment: There’s immense satisfaction in creating something beautiful and functional with your own hands.
- Perfect Gift Idea: A personalized photo display makes a thoughtful and unique present for friends, family, or teachers.
Materials Needed for Your DIY Photo Display
Gathering your supplies is the first exciting step in bringing your vision to life. Most of these items can be found at your local hardware store, craft store, or even in your garage!
- 1×4 Wood Board, any length: The length will determine how many photos you can display. A common choice is 2-4 feet, but feel free to choose based on your space and needs. You might even find a suitable scrap piece!
- Paint or Stain: This is where your personal style truly shines. Consider acrylic paint, spray paint, wood stain, or even chalk paint for different effects.
- Paint Brush or Applicator: Depending on your chosen finish, you’ll need a brush, foam applicator, or staining rag.
- Cute Metal Clips: Mini bulldog clips or small clothespins work wonderfully. Look for ones that are aesthetically pleasing and sturdy enough to hold your photos securely.
- Glue Gun + Glue Sticks: A hot glue gun provides quick and strong adhesion, perfect for this project.
- Optional (but Recommended): Sandpaper (fine-grit), measuring tape or ruler, pencil, protective topcoat (e.g., clear sealer, polyurethane).
Step-by-Step Instructions: Creating Your Wood Photo Display
Follow these simple steps to transform a plain piece of wood into a captivating display for your cherished photographs. Remember to allow adequate drying time between steps for the best results.
Step 1: Prepare and Finish Your Wood Board
The foundation of your photo display is the wood board itself. Preparing it properly ensures a beautiful and lasting finish.
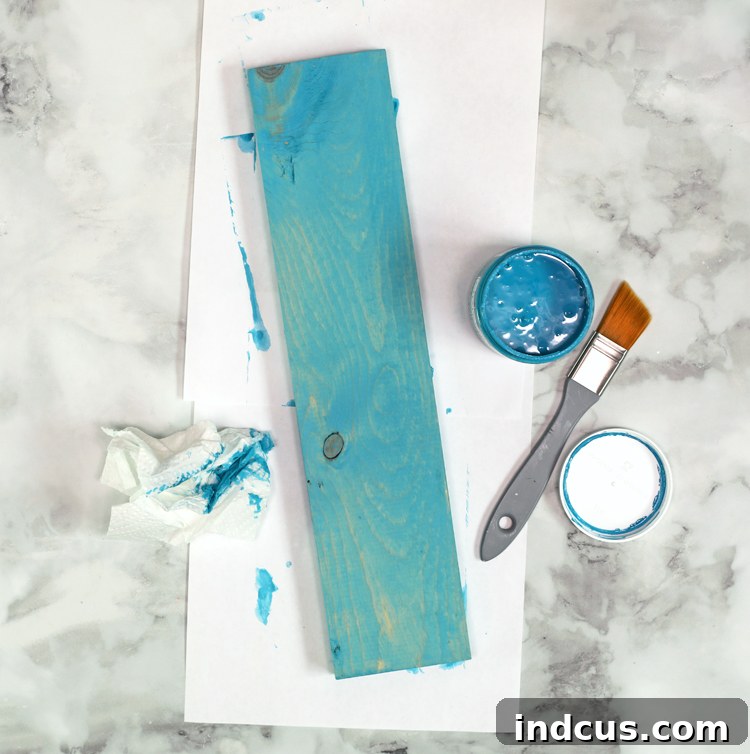
Start by assessing your 1×4 wood board. If you’re using a scrap piece, it might have rough edges, splinters, or old paint. Gently sand any rough areas using a fine-grit sandpaper (around 180-220 grit) until the surface feels smooth to the touch. This not only makes the board safer to handle but also helps the paint or stain adhere more evenly for a professional-looking finish. After sanding, wipe down the board with a clean, damp cloth to remove any dust and allow it to dry completely.
Now, it’s time to add color! Choose your desired paint or stain. If painting, apply a thin, even coat using your paintbrush. For a vibrant and opaque finish, you may need two or more coats, allowing each coat to dry thoroughly according to the product’s instructions before applying the next. If staining, apply the stain with a brush or rag, allowing it to penetrate the wood for the desired amount of time before wiping off any excess. Staining enhances the natural wood grain, while paint offers a bolder color statement. Consider applying a protective clear coat or sealant once the paint or stain is completely dry. This will protect your display from wear and tear, making it more durable and easier to clean.
Step 2: Attach the Metal Clips
This is where your display truly takes shape, ready to hold your precious memories.
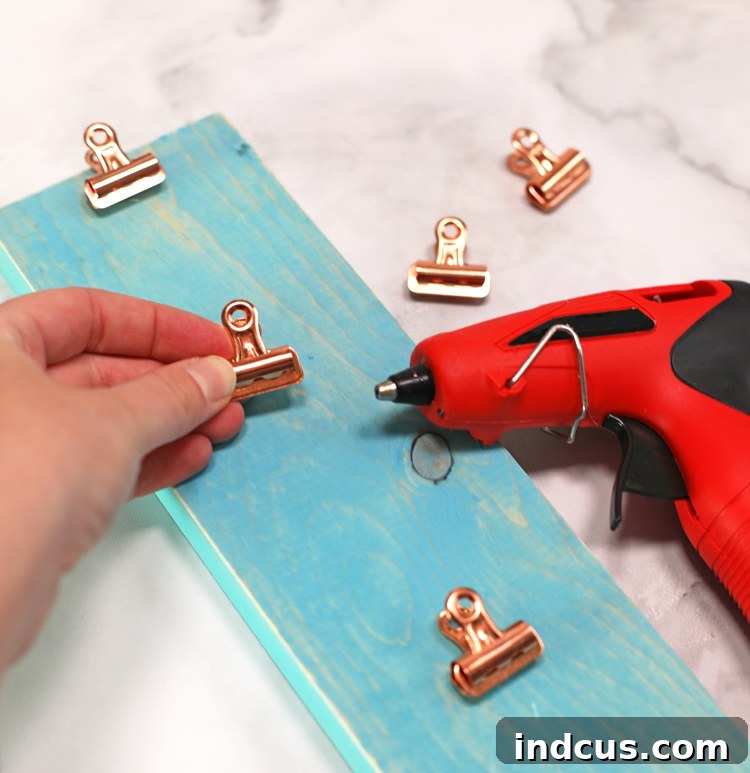
Once your paint or stain (and any topcoat) is absolutely dry and cured – this can take anywhere from a few hours to 24 hours depending on the product and humidity – you can begin attaching your clips. Lay your board on a flat surface. Using a measuring tape or ruler and a pencil, lightly mark out where you want each clip to be placed. Consider the size of the photos you plan to display. For mini Instax photos, spacing them approximately 4-5 inches apart generally works well, allowing a little breathing room between each photo. Ensure your marks are centered along the width of the 1×4 board for a balanced look.
Now, grab your hot glue gun. Apply a small but generous dab of hot glue to the back of each metal clip. Quickly and firmly press the clip onto your marked spot on the board, holding it in place for a few seconds until the glue sets. Repeat this process for all your clips, ensuring they are evenly spaced and straight. Work carefully but efficiently, as hot glue dries quickly. Take care to avoid touching the hot glue gun nozzle or fresh glue. Once all clips are attached and the glue has fully cooled, your display board is ready for action!
Displaying and Personalizing Your Photo Board
The beauty of this DIY project lies in its versatility. Once completed, you have several options for how to showcase your new photo display. You can simply prop it up against a wall on a dresser, shelf, or desk. This offers maximum flexibility, allowing you to move it around as often as you like. For a more permanent fixture, consider adding picture hanging hardware to the back, such as D-rings, sawtooth hangers, or even heavy-duty Command strips. This transforms it into a wall-mounted art piece, perfect for accentuating any room.
Don’t stop at just paint and clips! This project is a fantastic canvas for additional personalization. Here are some ideas to make your display uniquely yours:
- Embellishments: Add small artificial flowers, decorative buttons, twine, fairy lights wrapped around the board, or even vinyl decals with quotes or names.
- Distressed Look: After painting, lightly sand the edges and corners to give it a rustic, shabby-chic feel.
- Stencils: Use stencils to paint patterns, words, or designs onto the board before attaching the clips.
- Varying Clips: Mix and match different styles or colors of clips for an eclectic look.
- Different Sizes: Create a series of boards in varying lengths to display different photo sizes or create a gallery wall effect.
This quick and easy craft is incredibly stress-free and satisfying. It’s a wonderful way to unleash your creativity without a huge time commitment, resulting in a charming and functional piece that you’ll love to look at every day. From cherished family moments to inspiring quotes, your new DIY photo display is the perfect place to curate your visual story.
Like this idea? Pin it to save it for later!
Expand Your Creativity: More Uses for Your DIY Board
While designed primarily as a photo display, this versatile wooden board can serve many other purposes around your home or as a thoughtful gift:
- Kids’ Artwork Display: Encourage your children’s creativity by giving them a dedicated space to show off their latest drawings and paintings.
- Memo Board/Inspiration Board: Clip important notes, to-do lists, recipes, or inspiring images in a home office or kitchen.
- Event Decor: Create themed displays for parties, weddings, or baby showers, showcasing event photos, guest notes, or seating arrangements.
- Gift Card Holder: During the holidays, create a festive board and clip gift cards to it for a unique presentation.
- Recipe Holder: Hang your favorite recipes in the kitchen for easy access while cooking.
- Small Business Display: Showcase product photos or customer testimonials in a craft fair booth or small shop.
Troubleshooting Tips for a Perfect Finish
Even simple DIY projects can sometimes present small challenges. Here are a few tips to ensure your photo display turns out beautifully:
- Uneven Paint/Stain: If your finish looks streaky, apply thinner coats and allow ample drying time between each. For paint, consider sanding lightly with fine-grit sandpaper between coats for a super smooth finish.
- Clips Not Sticking: Ensure the surface of your wood board is clean and dry. If hot glue isn’t holding, try a stronger adhesive like E6000 or a wood-specific glue, allowing it to cure completely.
- Wood Warping: Store your wood in a dry, stable environment before working with it. If using very thin or low-quality wood, it might warp slightly with paint/stain; a protective topcoat can sometimes help minimize this.
- Safety First: Always work in a well-ventilated area when painting or staining. Use caution with hot glue guns to prevent burns.
Final Thoughts on Your Easy DIY Photo Display
This project is a testament to the fact that you don’t need to be an expert crafter or spend a fortune to add meaningful, personalized touches to your home. With just a single 1×4 wood board and a bit of creativity, you can create a beautiful and ever-evolving display for your most cherished memories. It’s an ideal project for beginners, a fun activity to do with kids, or a quick weekend craft for experienced DIYers. So, grab your materials, unleash your inner artist, and get ready to transform a simple piece of wood into a functional work of art that celebrates your life’s precious moments. We can’t wait to see what you create!







