
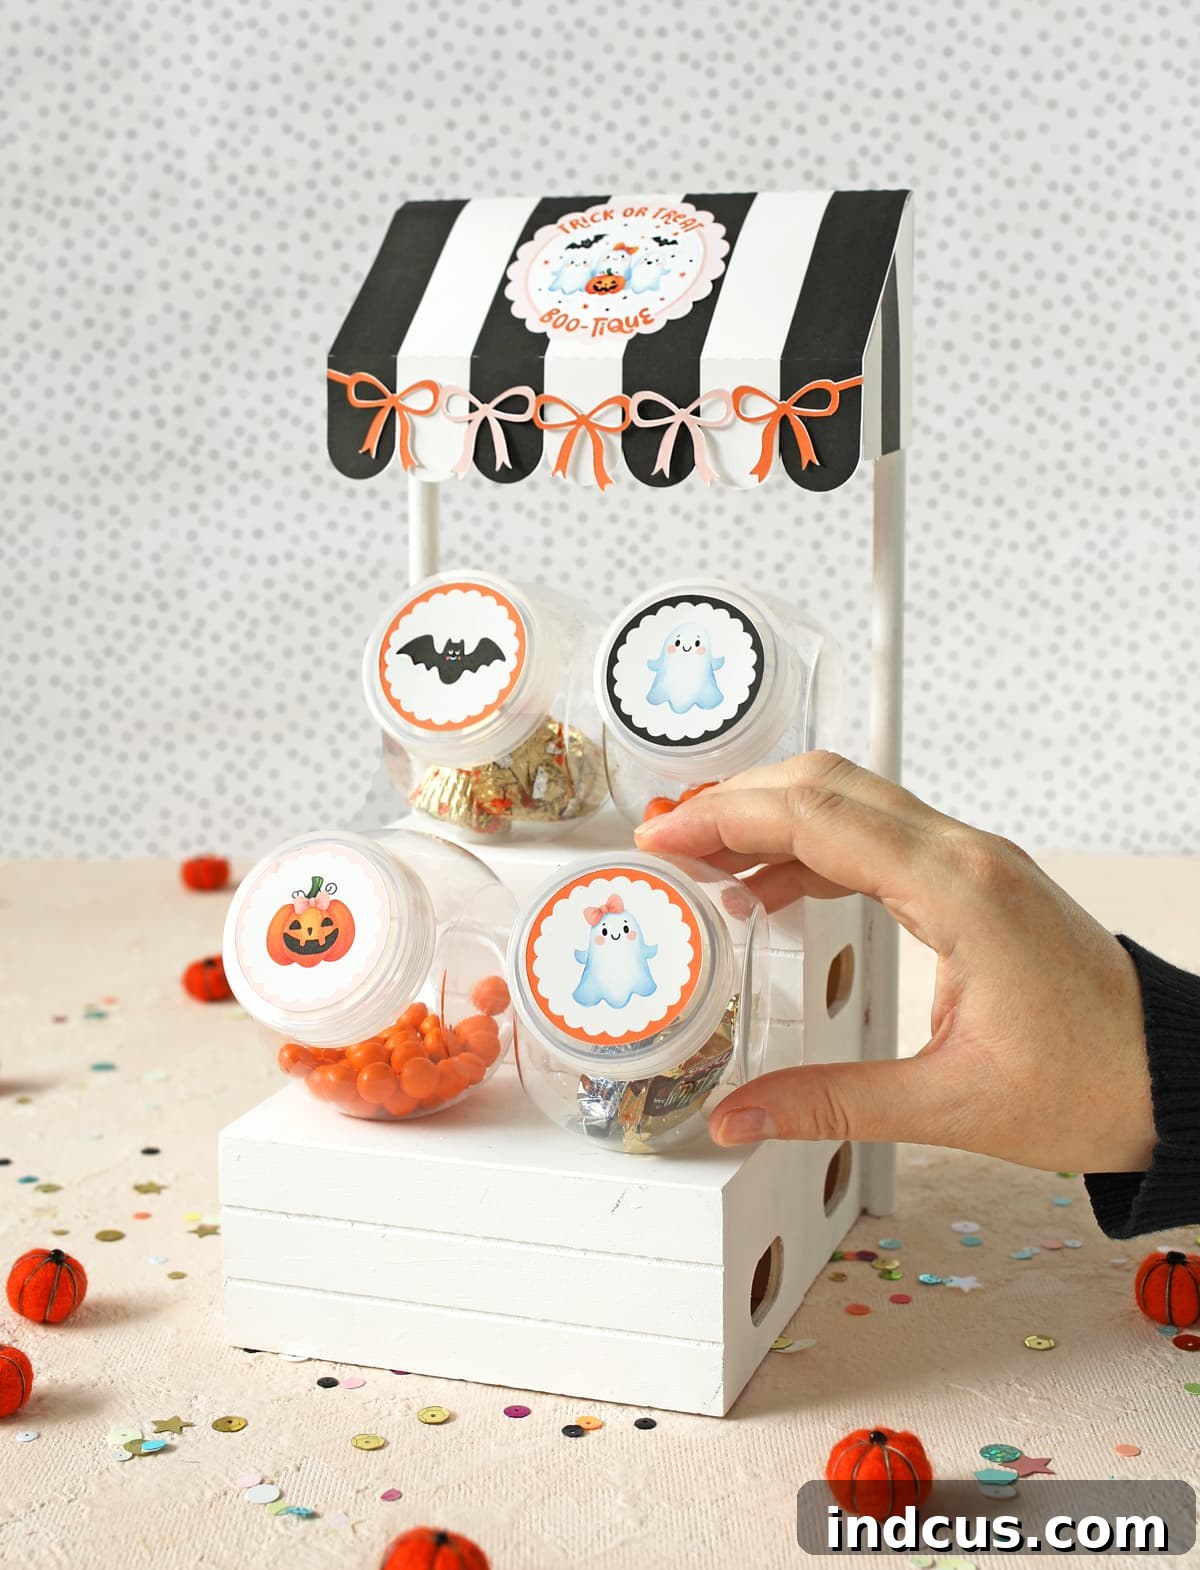
Craft Your Own Spooky Sweetness: An Easy DIY Trick or Treat BOO-tique Mini Candy Shop from Dollar Tree
Get ready to infuse your home with delightful Halloween charm! This year, we’re sharing a fantastic DIY project that’s not only incredibly fun but also remarkably affordable: a mini Halloween candy shop we affectionately call the “Trick or Treat BOO-tique.” Following the overwhelming success and joy of our seasonal candy shop series—featuring versions for Valentine’s Day, St. Patrick’s Day, Easter, Fourth of July, and Summer—it was only natural to create a spooktacular edition for Halloween. Prepare to be enchanted by this charming display!
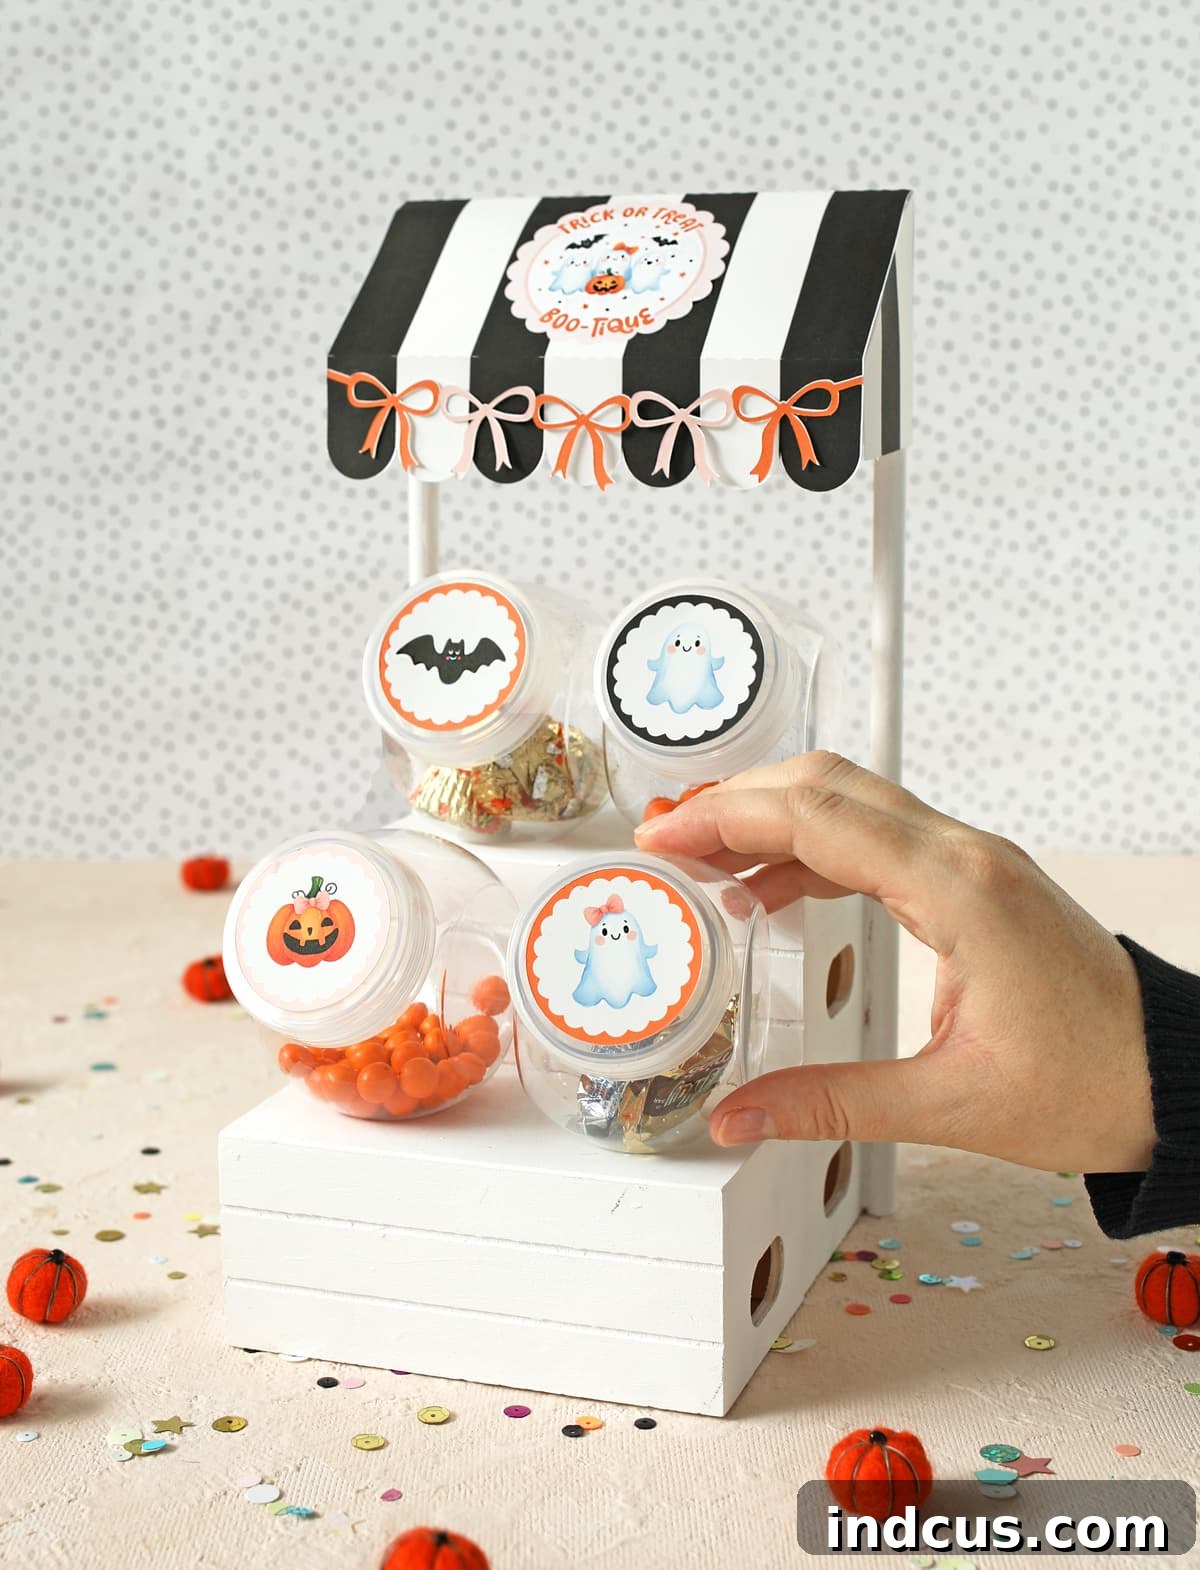
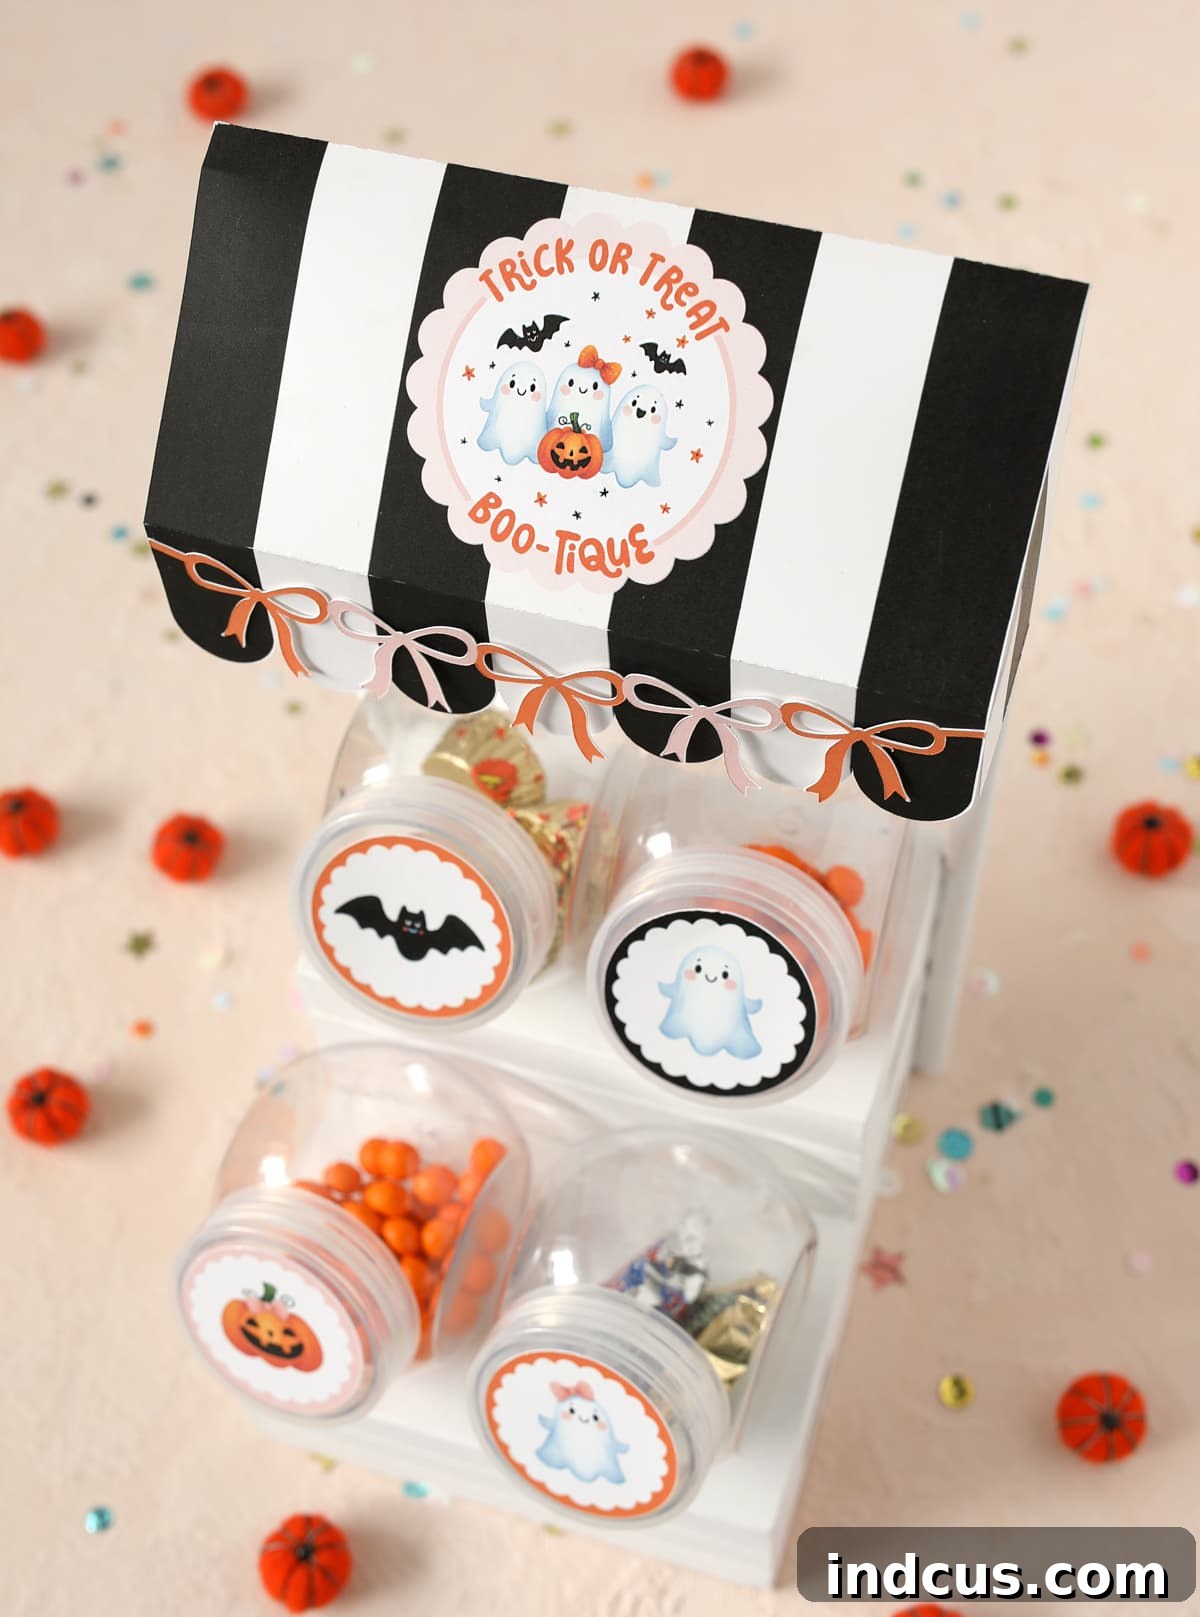
This Trick or Treat BOO-tique has quickly become a favorite in our collection. The playful pun in its name, combined with the utterly adorable ghost accents, makes it an irresistible piece of Halloween decor. Imagine the delight this darling little Halloween candy stand will bring to your family, especially the kids! It’s designed to be a centerpiece of joy, sparking imagination and adding a touch of personalized charm to your holiday festivities. Whether you’re looking for a unique decoration for a Halloween party, a fun project to do with children, or a charming way to present treats, this DIY mini candy shop is sure to impress.
The best part? You can create this entire enchanting display using supplies readily available at your local Dollar Tree. This makes it an incredibly budget-friendly craft, proving that stunning holiday decor doesn’t have to break the bank. We’re excited to walk you through each step of the process, ensuring you can replicate this charming project with ease. Let’s gather our materials and start crafting your very own Dollar Tree mini candy shop!
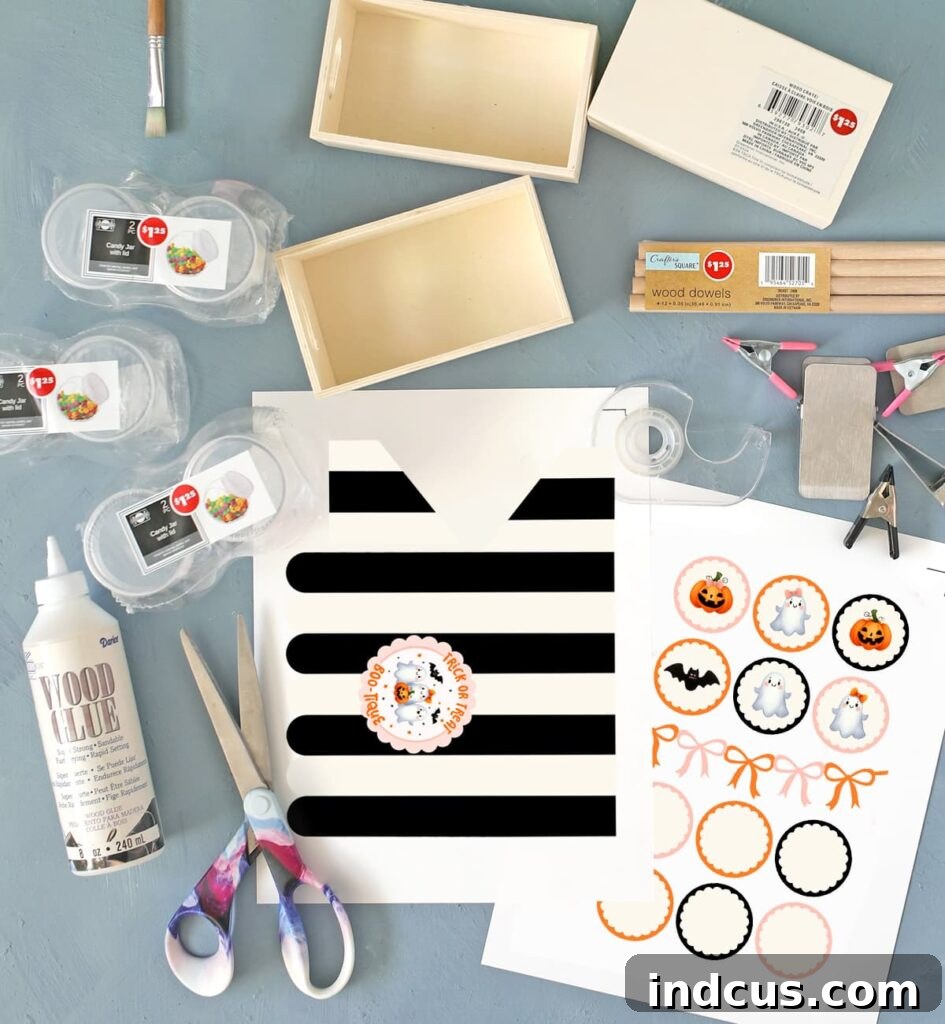
Essential Materials for Your Halloween Candy Shop
One of the true joys of this project is its accessibility. Every single item on this list can be found at Dollar Tree, making it a truly budget-friendly and convenient craft. While we’ve provided direct links to the items on the Dollar Tree website for easy identification, remember that most of these items are sold in bulk online. For individual purchases, a quick trip to your local Dollar Tree store is the most practical and cost-effective option.
- Printable Halloween Candy Shop Awning: This is the custom touch that truly brings your Boo-tique to life! You’ll find the download link at the bottom of this post.
- 3 Wooden Crates: These form the sturdy base and structure of your candy shop. Look for the “Crafter’s Square Wood Crate with Handles” at Dollar Tree. You’ll need three of these versatile crates. Shop Crates Online
- Wooden Dowels: Essential for supporting the awning, these dowels add height and character. A pack of “Crafter’s Square Wood Dowels” should provide plenty for your project. Shop Dowels Online
- Small Candy Jars with Lids (4 total): These adorable mini jars are perfect for holding small candies and treats. We initially bought six but found four to be ideal for the display, allowing for creative arrangement. Shop Candy Jars Online
- White Cardstock: For printing your awning and optional jar lid labels. Cardstock provides the necessary durability and crisp finish.
- Wood Glue: For a strong and lasting bond between the wooden crates. This ensures your candy shop stand is stable and robust.
- Clamps: Crucial for holding the wooden crates securely in place while the wood glue dries. “Crafter’s Square Metal Craft Clamps” work perfectly. Shop Clamps Online
- Hot Glue Gun + Glue Sticks: Your secret weapon for quick and strong adhesion, especially for the dowels.
- Clear Tape: For attaching the awning and jar labels in a way that allows for easy future changes.
- White Craft Paint + Paint Brush: To give your candy shop a clean, uniform base coat, perfect for highlighting your Halloween theme.
While you might be tempted to grab extra candy jars, we found that four creates a balanced and appealing display on the main counter. Of course, feel free to add more if you plan to incorporate them into the front display or other areas!
Step-by-Step Instructions: Building Your Trick or Treat BOO-tique
Creating this Halloween mini candy shop is a straightforward and enjoyable process. Take your time with each step, and don’t be afraid to add your own personal flair! Remember, crafting is about creativity and fun.
Step 1: Assemble the Crate Foundation
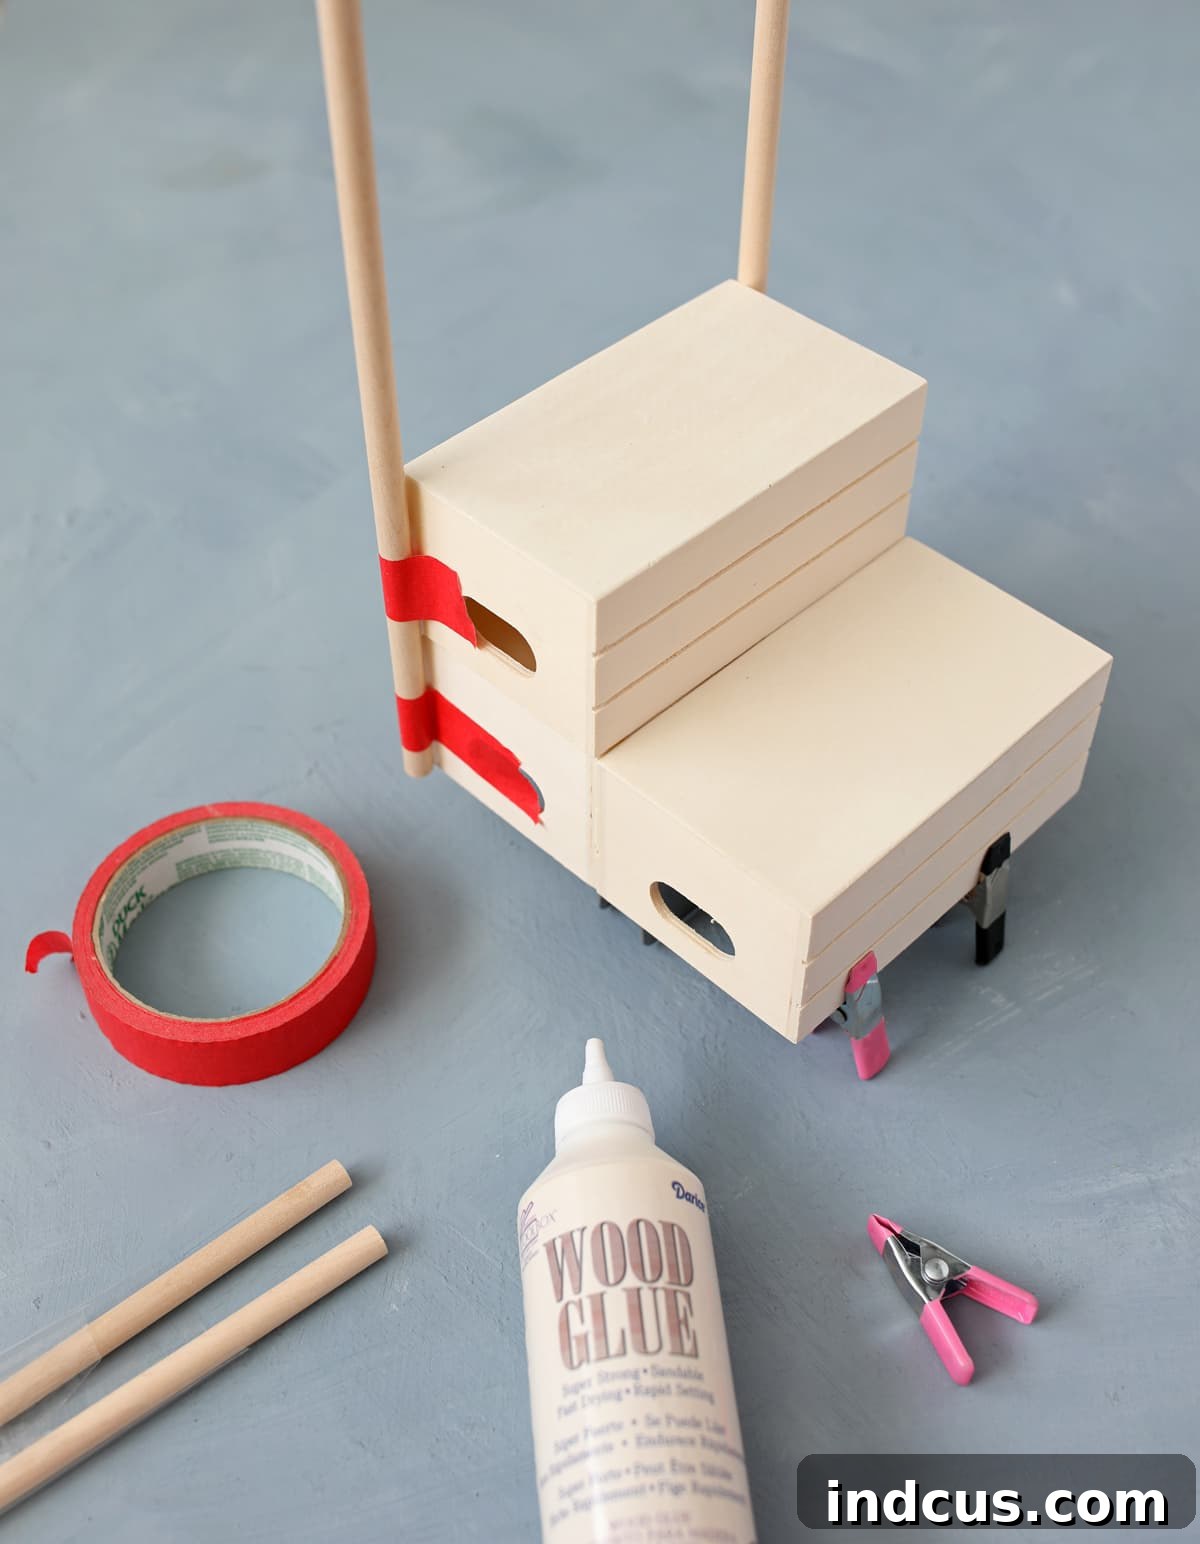
Begin by carefully removing any store stickers or labels from all three wooden crates. This ensures a clean surface for gluing and painting. Once clean, arrange two crates side-by-side on your work surface. These will form the bottom tier of your candy shop. Next, place the third crate directly on top, centered above the two bottom crates. Crucially, you want all crates positioned upside down, so their solid bottom sides face upwards, creating a flat and stable surface for your display. Apply a generous, even layer of wood glue to the joining surfaces where the crates meet. Press them firmly together, then secure them with clamps. Adequate clamping is vital for a strong bond. Allow at least one hour for the wood glue to dry completely. For optimal stability, consider letting it cure for several hours or even overnight, especially if you plan for little hands to interact with the shop frequently.
Step 2: Secure the Dowel Supports
Once your crate base is thoroughly dry and stable, it’s time to attach the wooden dowels. Position one dowel vertically on each side of the top crate, aligning them with the back edge. While wood glue might seem like the logical choice here, our experience proved that hot glue is superior for this specific task. Hot glue excels at filling in any slight gaps or uneven surfaces between the round dowel and the flat crate, providing immediate and incredibly strong adhesion. Apply a bead of hot glue along the contact points and firmly press the dowels into place. Hold them steady for a few seconds until the hot glue sets. The instant bond of hot glue means you won’t need clamps here, allowing you to quickly move to the next step.
Step 3: Paint Your Candy Shop Base
Now that your structure is fully assembled, it’s time to add a fresh coat of paint! You have the option of using spray paint for a quick, even finish, or traditional craft paint applied with a brush. For a truly versatile candy shop that can be adapted for future holidays, we highly recommend painting the entire structure white. A crisp white base provides a clean canvas, allowing your themed awnings and decorations to truly pop, regardless of the season. Apply multiple thin coats, allowing each layer to dry completely, to achieve a smooth, professional finish. This attention to detail will elevate the overall look of your Boo-tique.
Step 4: Craft Your Spooktacular Awning
The awning is the focal point of your Trick or Treat BOO-tique, giving it that unmistakable mini shop charm. You’ll need to print our specially designed awning template onto white cardstock. Cardstock is essential here as it provides the necessary stiffness and durability for the awning to hold its shape beautifully.
To cater to various crafting preferences, we’ve prepared two distinct file types for your convenience: an SVG file, perfect for those with electronic cutting machines like Silhouette or Cricut, and a PDF version for crafters who prefer to cut by hand. Both files are available in the download folder at the bottom of this post, so ensure you select the one best suited for your tools. Each printable includes the main, larger awning shape and a smaller, separate piece that forms one side of the awning. This design allows the entire template to fit perfectly on a standard piece of paper, making it easy to print at home.
For expediency and to get this wonderful Halloween craft to you sooner, we’ve reused some illustrative photos from our Cupid’s Candy Shoppe tutorial. Rest assured, the fundamental methods for printing, cutting, and assembling the awning remain identical across all our candy shop variations.
ELECTRONIC CUTTING MACHINE INSTRUCTIONS
If you are lucky enough to own an electronic cutting machine such as a Silhouette or Cricut, our included SVG file will make this step incredibly fast and precise. The “Print and Cut” feature is a game-changer for projects like this. If you’re new to using your Silhouette machine or need a quick refresher on the print and cut functionality, our detailed Print and Cut tutorial is an invaluable resource.
A couple of crucial notes for electronic cutting machine users:
– Before you send your design to the printer, ensure your registration marks are turned on within your cutting machine’s software. These marks are vital; they act as a guide, telling your machine exactly where the printed design is located on the page, guaranteeing perfectly aligned cuts.
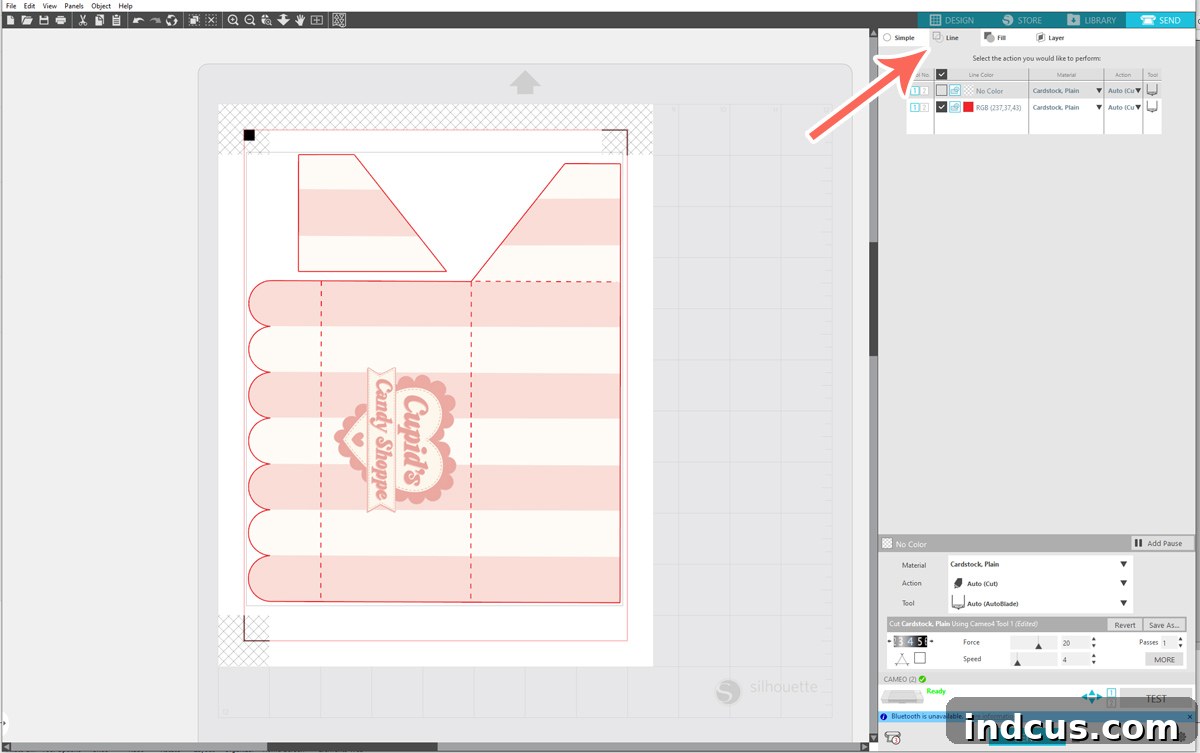
– When you navigate to the “SEND” tab to send your design to the machine, you might initially see numerous cut lines across the entire page. To avoid this, make sure to select the “LINE” sub-tab. This option instructs your machine to cut only around the outer edges of your design, ignoring any internal lines that aren’t meant for cutting. Your screen should resemble the image below when it’s correctly set up and ready for cutting.
CUTTING BY HAND INSTRUCTIONS
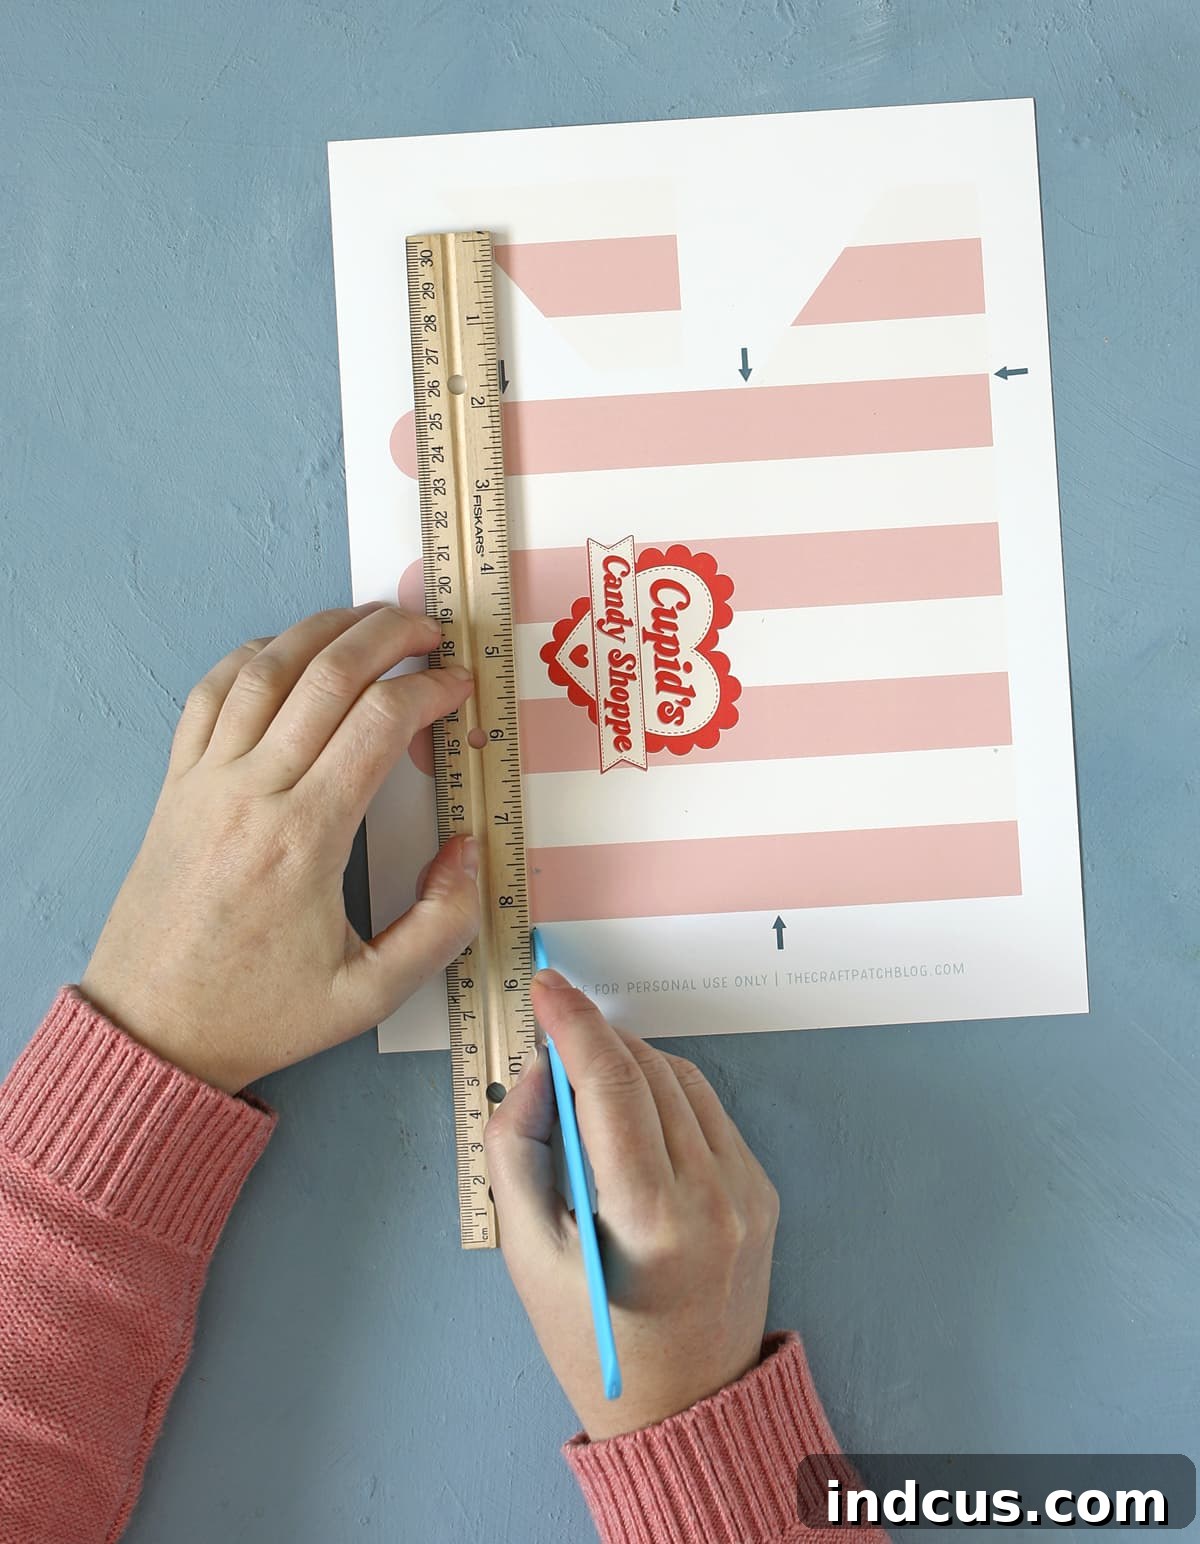
Don’t have an electronic cutting machine? No problem at all! You can absolutely still create this charming Halloween craft with just a pair of scissors and a little precision. Simply download the PDF version of the awning design and print it onto white cardstock. Before you begin cutting, you’ll notice subtle gray arrows on the template. These are your guides for fold lines. Using a scoring tool (or the dull side of a butter knife if you don’t have one) and a ruler, carefully score along these gray arrow lines. Scoring helps create crisp, clean folds without tearing the paper. After scoring, carefully cut out the main awning shape and the separate side piece. We’ve designed the template this way specifically to ensure that no visible lines remain on your beautiful finished project, giving it a clean and professional look.
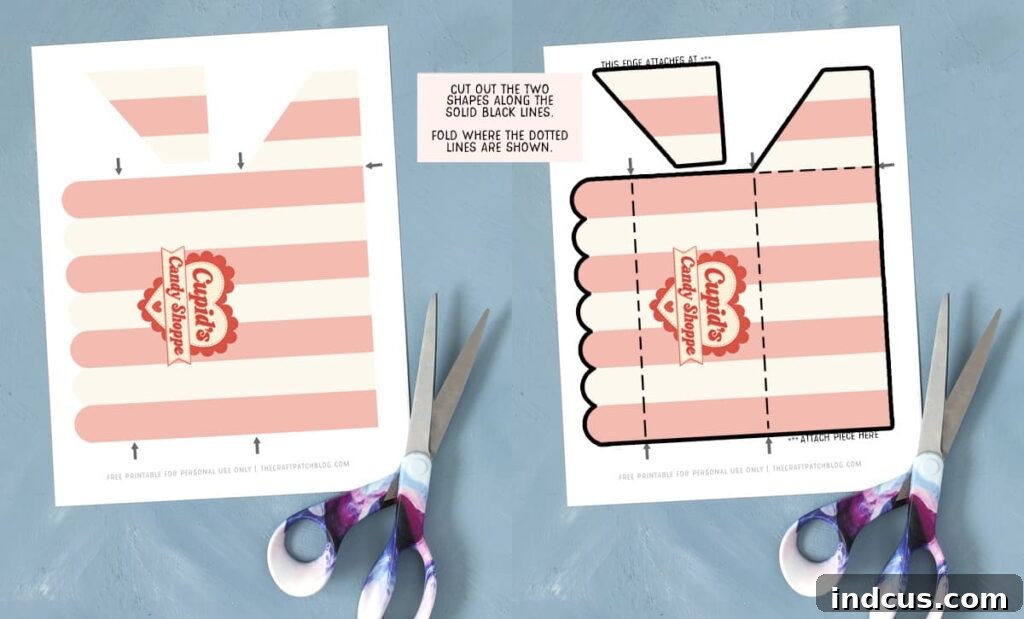
After you’ve successfully cut out both the main awning shape and its smaller side piece, it’s time to prepare them for assembly. The photo below provides a clear outline of where to cut, highlighting the main piece and where the smaller side piece will attach. Pay close attention to these details to ensure your awning comes together perfectly.
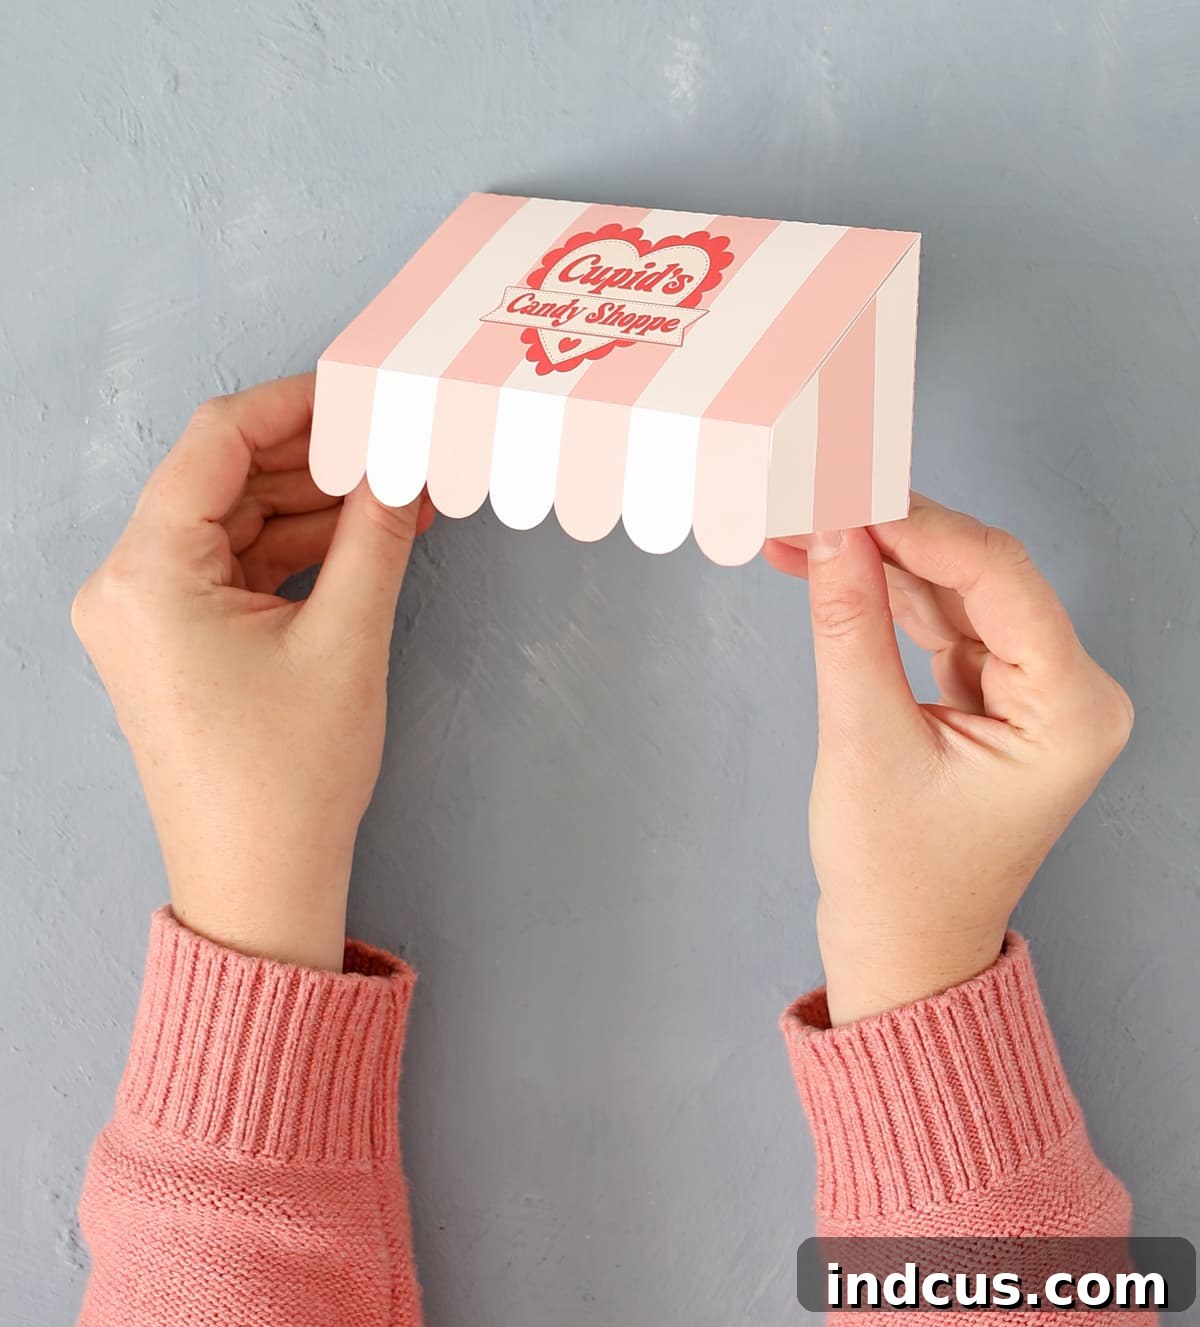
With your pieces cut, the next crucial step is folding. Carefully fold all of the designated fold lines *away* from you. This creates the structure and depth of the awning. Once folded, use clear tape to securely attach the side pieces of the awning to the main center section. If you find yourself unsure about any part of this folding and taping process, please refer to our accompanying video tutorial; it provides a visual guide that will clarify every step. When completed correctly, your paper awning should look exactly like the image below, ready to be installed on your Trick or Treat BOO-tique.
Step 5: Attach the Awning to Your Shop
Now, gently place your beautifully crafted cardstock awning onto the wooden dowels you previously attached. Use a few small pieces of clear tape to secure the awning to the dowels. The key here is to use tape, not permanent glue. This allows for effortless removal, meaning you can easily swap out your Halloween awning for a new, festive design when the next holiday rolls around. This simple trick transforms your mini candy shop into a versatile piece of seasonal decor!
Step 6: Accessorize with Jar Lid Labels
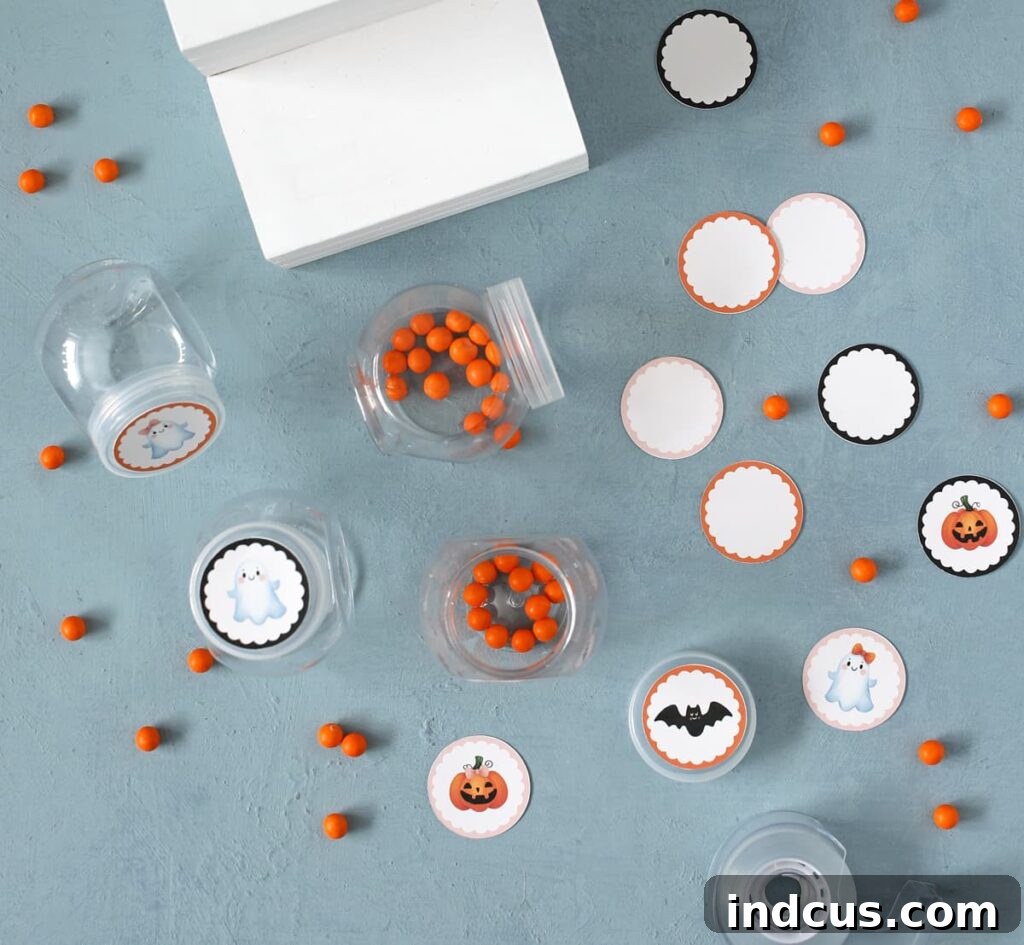
To add an extra layer of charm and customization, we’ve included matching printable designs specifically for your mini candy jar lids! These delightful labels tie the entire theme together and make your Boo-tique truly special. You’ll find these printables in the same download folder as the awning template.
Creating these is incredibly simple: just print them out onto white cardstock, then carefully cut around the circular designs. To attach them to your candy jar lids, form a small loop with a piece of clear tape and place it on the back of the label, then press it firmly onto the center of the lid. This method ensures a secure hold while still allowing for easy removal if you ever wish to change the labels or clean the jars. It’s an “easy peasy” touch that makes a big impact!
Watch the Full Video Tutorial
Seeing is believing! If any step in this crafting process needs further clarification, or if you simply prefer visual guidance, we encourage you to watch our comprehensive video tutorial. It walks you through each stage of assembling your mini candy shop, offering valuable insights and tips that complement these written instructions.
Doesn’t this sound like a truly delightful craft idea for Halloween? We’ve heard from numerous readers who have created these mini candy shops for their grandchildren, turning visits into magical experiences. Imagine the pure joy of a child discovering a charming, personalized candy shop awaiting them at Grandma’s house, filled with seasonal treats! It’s not just a craft; it’s a way to create lasting memories and add a touch of whimsy to everyday moments. This Boo-tique is more than just decor; it’s an invitation to imagination and sweet delights.
Once you’ve experienced the joy of creating this Halloween Boo-tique, you’ll be eager to explore more! Remember, we offer a full collection of printable designs for other holidays and seasons. Imagine a festive candy shop for every celebration throughout the year – it’s a delightful way to keep the crafting spirit alive and your home perpetually decorated with personalized charm. Don’t forget to grab those versions too, and happy crafting!
Explore All Our Seasonal Mini Candy Shop Printables!
Loved creating your Halloween Boo-tique? Dive into our complete collection of mini candy shop printables designed for every major holiday and season! These projects are just as fun and easy to make, allowing you to transform your little stand throughout the year. Click on each image to discover the full tutorial and download the corresponding printables.
-
Cupid’s Candy Shoppe Valentine’s Day Craft
-
Shamrock Sweets Shop St. Patrick’s Day Craft
-
DIY Easter Candy Shop
-
Farmer’s Market Fruit Stand Candy Shop Craft
-
Patriotic Candy Shop Craft
-
Halloween Candy Shop Craft







