Craft Your Own Faux Barn Wood Christmas Tree Collar: An Easy DIY Guide
Embrace the charm of rustic holiday decor without breaking the bank or sacrificing valuable storage space! This comprehensive guide will show you how to create a stunning faux barn wood Christmas tree collar in under an hour, using simple, affordable materials. If you love the cozy, farmhouse aesthetic but dread the thought of expensive, bulky store-bought tree collars, you’ve found your perfect solution. Get ready to transform your Christmas tree base into a stylish focal point that looks incredibly realistic and stores flat once the festive season ends. It’s a true DIY Christmas win!

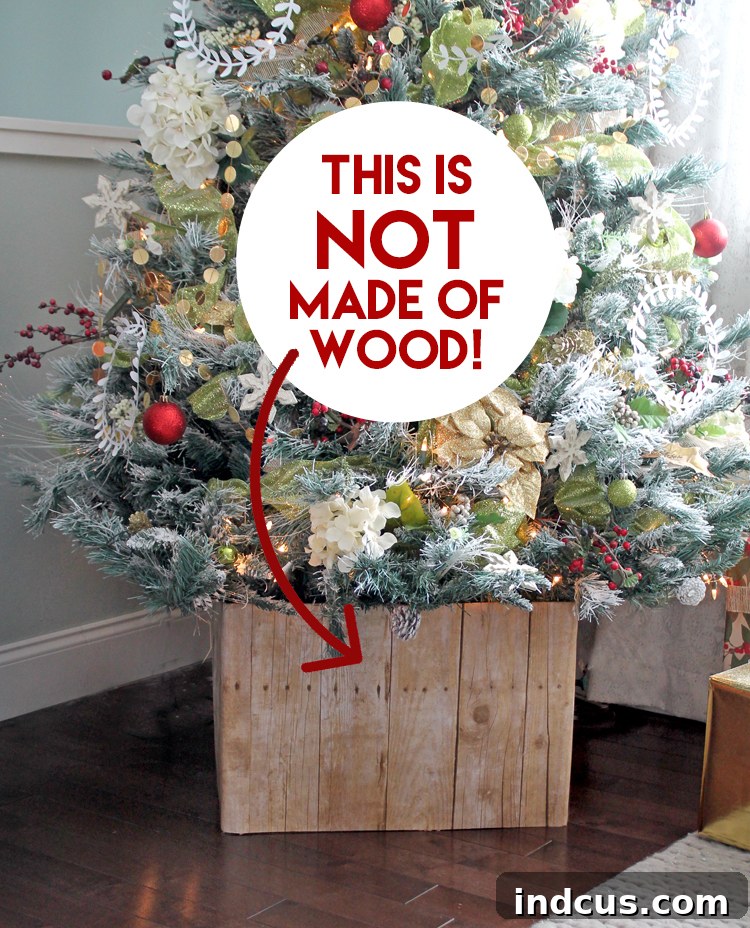
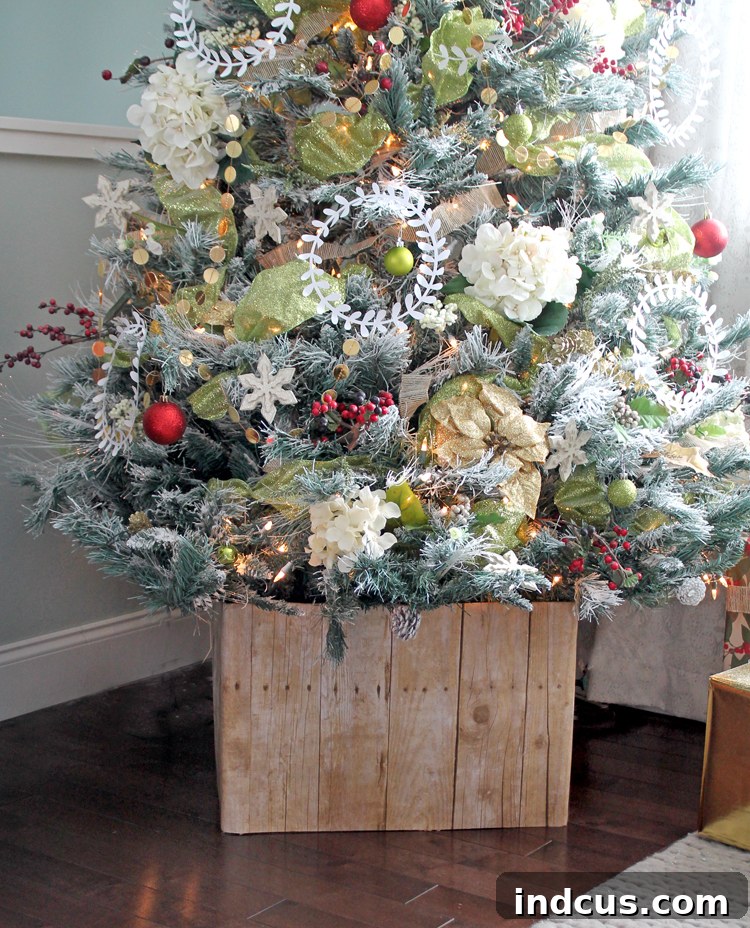
You might be surprised to learn that this beautiful, rustic tree collar isn’t made from real wood. In fact, its secret lies in humble cardboard and decorative paper! This ingenious project takes minimal time – often less than an hour – and requires very few supplies. The most significant purchase will likely be the bulletin board paper, which is still remarkably inexpensive compared to a traditional wooden tree collar. The best part? The finished product is so convincingly realistic, your guests will never guess its true composition. Say goodbye to cumbersome storage solutions and hello to elegant, flat-pack holiday decor!
Ready to add a touch of farmhouse chic to your Christmas tree this year? Let’s dive into creating your very own “wooden” Christmas tree box stand.
Essential Supplies for Your DIY Christmas Tree Collar
Gathering your materials is the first step towards creating this charming tree stand cover. The beauty of this project lies in its simplicity and accessibility; most items can be found at your local craft store, hardware store, or even recycled from around your home.
- Giant Cardboard Box: The larger the better! Think appliance boxes, moving boxes, or even several smaller boxes that can be pieced together. The cardboard provides the essential structure for your tree collar, ensuring it stands tall and offers a sturdy base. Look for corrugated cardboard that isn’t too flimsy, as it will hold its shape better.
- Utility Knife: A sharp utility knife is crucial for clean, precise cuts through the cardboard. Always use caution and a cutting mat or scrap piece of wood underneath to protect your work surface. A ruler or straightedge will also be invaluable for making perfectly straight lines.
- Hot Glue Gun and Glue Sticks: Hot glue provides an instant, strong bond for attaching the paper to the cardboard and securing the structure. Ensure you have plenty of glue sticks on hand, as you’ll be using it generously.
- Big Binder Clip: This clever tool allows you to temporarily or permanently secure the overlapping edge of your collar, making it adjustable and easy to assemble around your tree. Its discreet placement at the back ensures it won’t detract from the aesthetic.
- Bulletin Board Paper: This is where the magic happens! Bulletin board paper comes in a variety of patterns, many of which mimic natural textures like wood, brick, or fabric. Choose a design that complements your existing Christmas decor and personal style. This paper is typically wide and durable, making it ideal for covering large surfaces.
To help you select the perfect bulletin board paper for your faux barn wood Christmas tree collar, here are some excellent options that have proven to be highly effective and realistic. These choices range from classic shiplap to unique textures, allowing for a wide array of personalized styles:
- Hobby LobbyWhite ShiplapBulletin Board Paper: Perfect for a bright, modern farmhouse look, offering a clean and crisp finish that complements minimalist or Scandinavian Christmas themes.
- Hobby LobbyRustic Wood ShiplapBulletin Board Paper: This option delivers that quintessential barn wood aesthetic, with distressed textures and warm tones ideal for a traditional or cozy cabin-inspired Christmas.
- Hobby LobbyBurlapBulletin Board Paper: For a softer, more textural rustic feel, burlap paper offers a charming alternative to wood, adding warmth and an organic touch to your holiday setup.
- Hobby LobbyAged BrickBulletin Board Paper: If you’re looking for something entirely different but equally striking, an aged brick pattern can create an urban loft or cozy hearth ambiance around your tree.
- AmazonBlack Wood ShiplapBulletin Board Paper: A sophisticated choice for contemporary or dramatic holiday decor, black wood shiplap offers a bold and elegant contrast to vibrant ornaments.
- AmazonNavy Wood ShiplapBulletin Board Paper: A unique and stylish option, navy wood shiplap can bring a coastal Christmas vibe or a deep, rich color palette to your festive arrangements.
Most large craft stores and teacher supply outlets stock a diverse range of bulletin board paper designs. It’s always a good idea to check these stores in person so you can see the patterns and textures firsthand before making your selection. Don’t forget to look for coupons or wait for sales to make your project even more budget-friendly!
Step-by-Step Instructions: Crafting Your Faux Wood Tree Collar
Follow these simple steps to construct your beautiful and functional Christmas tree stand cover. This process is designed to be quick, straightforward, and enjoyable for crafters of all skill levels.
Step 1: Prepare Your Cardboard Base for the Collar.
The foundation of your DIY Christmas tree collar is a precisely cut cardboard box. Begin by measuring two key dimensions: the height from your floor to the lowest branches of your Christmas tree, and the approximate width of your tree stand at its widest point. These measurements will ensure your collar fits snugly and conceals the stand perfectly without obstructing the tree’s natural drape.
Using your utility knife and a straightedge, carefully cut the cardboard to create a rectangular strip that will form the sides of your box. The length of this strip should be sufficient to wrap around your tree stand with a generous overlap (approximately 4-6 inches) on one end. This overlap is crucial for securing the collar later. The height of the strip will be your floor-to-lowest-branch measurement. This design intentionally omits a top or bottom, allowing you to easily slide the finished collar around your tree’s base without the hassle of lifting the tree. This thoughtful design makes assembly and disassembly incredibly simple each holiday season.
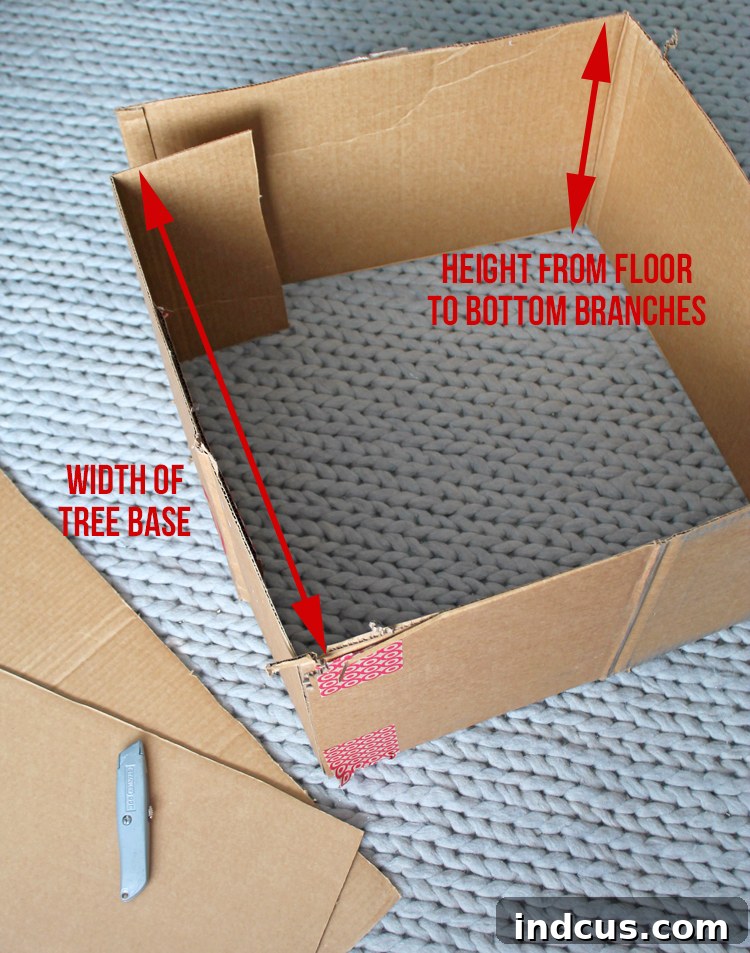
Once cut, gently score (but don’t cut all the way through) the cardboard at three points to create four equal panels. These scores will act as hinges, allowing you to fold the cardboard into a square or rectangular box shape. The overlap on the fourth panel will be used to clamp the box together, ensuring a snug and secure fit around your Christmas tree.
Step 2: Adorn Your Cardboard with Decorative Paper.
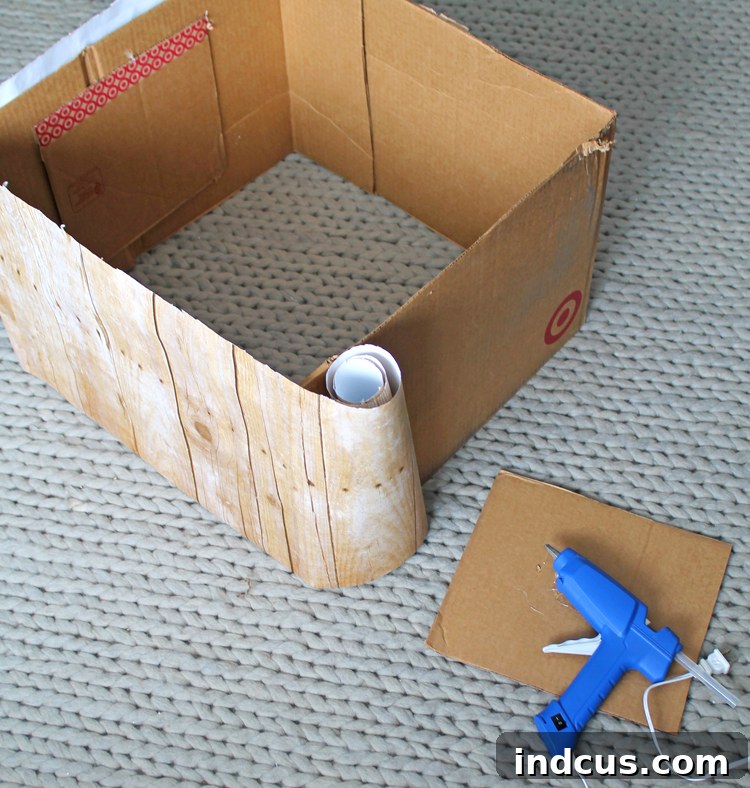
Now comes the exciting part: bringing your faux wood vision to life! If you’re using a roll of bulletin board paper, it’s often easiest to cut through the entire roll at the desired width. This will leave you with a long, manageable strip of paper, perfectly sized to cover your cardboard. Begin by aligning a factory-cut edge of the paper with the bottom edge of your cardboard base. This ensures a clean, straight line at the bottom of your finished tree collar.
Using your hot glue gun, apply a consistent bead of glue along the bottom edge of the cardboard, then carefully press the paper onto it. Work in sections, applying glue and smoothing the paper as you go, to prevent bubbles and wrinkles. Continue this process all the way around the entire length of your cardboard strip, ensuring the paper is tightly adhered and smooth. Take your time with this step, as a smooth application here contributes significantly to the realistic appearance of your faux barn wood Christmas tree collar.
Step 3: Finish the Top Edge for a Polished Look.
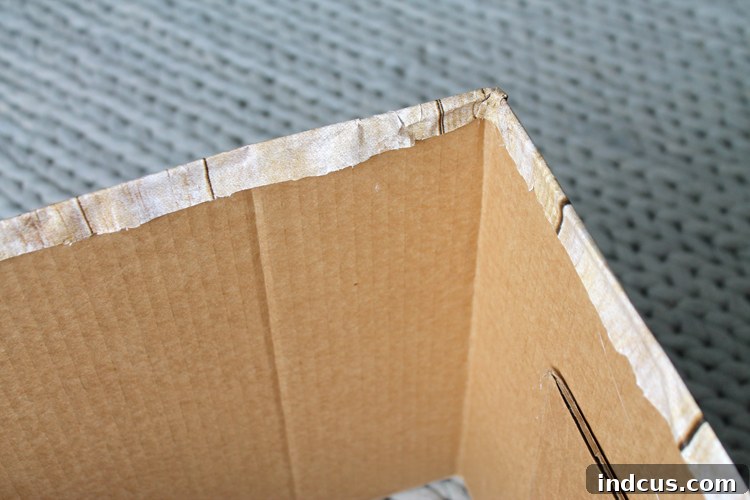
To give your Christmas tree collar a professional and clean finish, you’ll need to secure the top edge of the decorative paper. Once the paper is fully adhered to the cardboard, carefully fold the excess paper from the top edge down towards the inside of the box. Create a crisp fold line. Apply a continuous bead of hot glue along the inside of the cardboard, just below the fold, and press the folded paper firmly into place. This step hides the raw edge of the paper and reinforces the top of the collar, making it more durable and aesthetically pleasing. A neat top edge significantly enhances the overall realism of your faux wood design, preventing any visible cardboard from showing.
Step 4: Assemble Your Christmas Tree Collar Around the Base.
With the paper applied and edges finished, your DIY Christmas tree collar is ready for its grand reveal! Position the collar around the base of your Christmas tree. Gently wrap the cardboard structure so that it encircles the tree stand. Bring the overlapping edge you created in Step 1 around to meet the opposite end of the cardboard. Use your large binder clip to secure these two ends together, creating a seamless and sturdy enclosure. Position the binder clip at the back of the tree, where it will be out of sight, ensuring a clean and uninterrupted view of your beautiful faux barn wood finish.
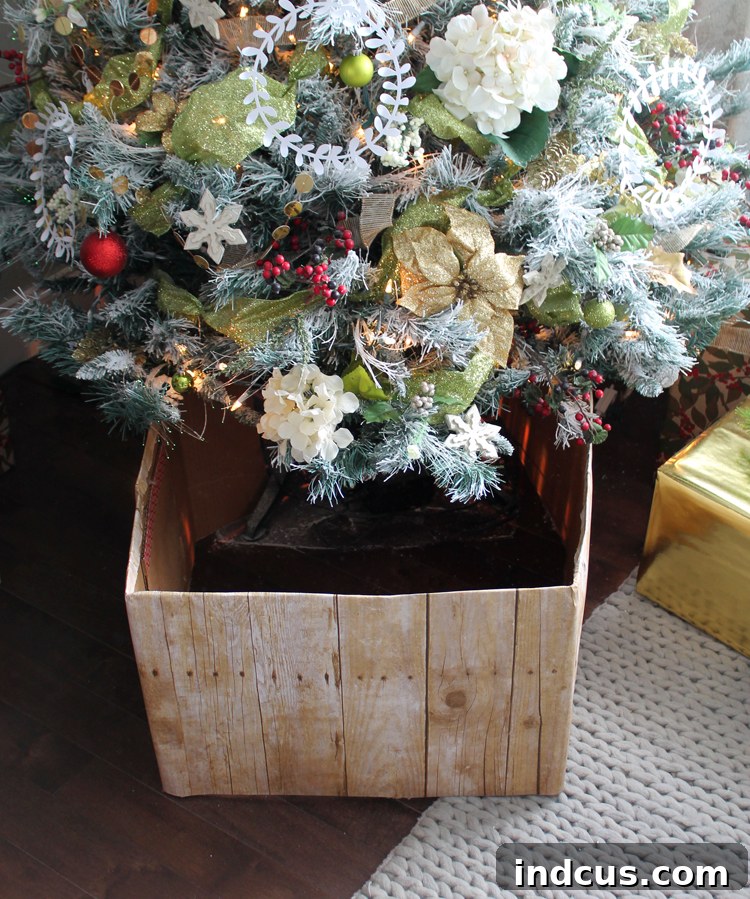
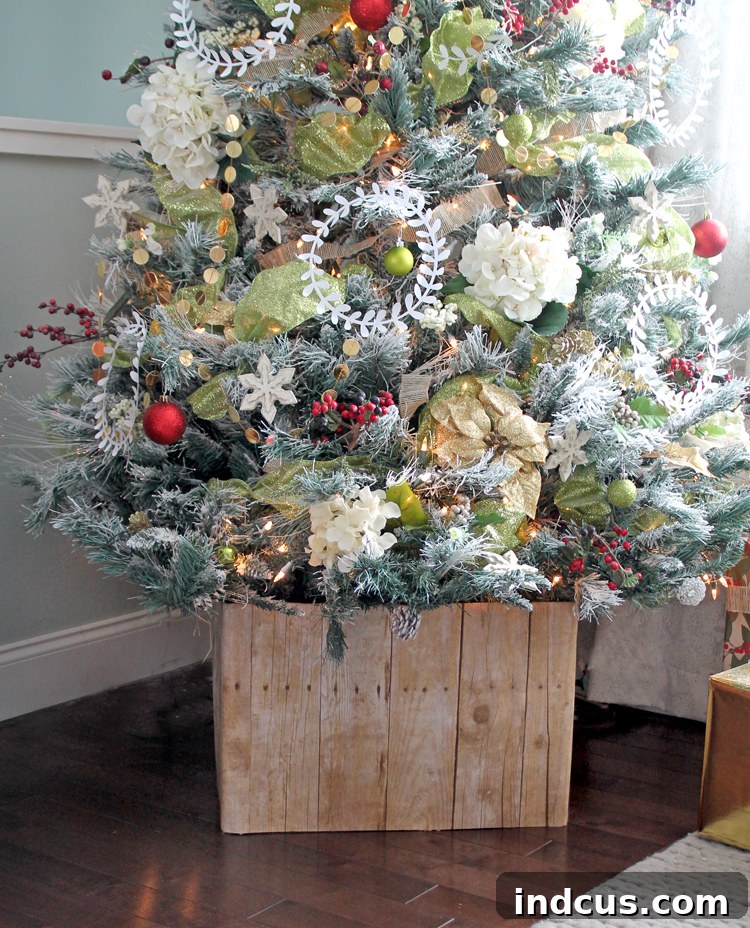
Isn’t the result simply stunning? It’s hard to believe this elegant, rustic Christmas tree collar is crafted from such simple materials. The realistic texture and pattern of the bulletin board paper truly transform humble cardboard into a sophisticated piece of holiday decor. This faux barn wood collar adds an inviting, warm touch to your Christmas tree, enhancing your festive display with its unique character. Best of all, once the holiday season concludes, you can easily remove the binder clip, flatten the cardboard, and store it away compactly until next year. This flat storage capability is a major advantage over bulky traditional tree collars, making it a functional and space-saving solution for every home. HURRAY for smart holiday decorating!
Why This DIY Tree Collar is a Game Changer for Your Christmas Decor
This faux barn wood Christmas tree collar isn’t just another craft project; it’s a revolutionary way to approach your holiday decorating. Here’s why it stands out:
- Unbeatable Affordability: Traditional wooden or metal tree collars can cost upwards of $50-$100 or more. This DIY version typically comes in at under $10, making it an incredibly budget-friendly option for achieving a high-end look.
- Effortless Storage: One of the biggest drawbacks of many tree collars is their bulky nature, making off-season storage a nightmare. This cardboard collar flattens completely, taking up minimal space in a closet or under a bed.
- Quick and Easy Creation: You can complete this entire project in an hour or less, leaving you more time to enjoy the festive season. No complicated tools or advanced crafting skills are required.
- Customizable Aesthetic: With a vast array of bulletin board paper patterns available, you’re not limited to faux barn wood. Explore options like aged brick, burlap, or different wood tones to perfectly match your unique holiday theme.
- Realistic Appearance: Modern bulletin board papers are incredibly detailed, providing a stunningly realistic texture and visual depth that truly mimics real wood or other materials.
- Lightweight and Manageable: Unlike heavy wooden alternatives, this cardboard collar is extremely lightweight, making it easy to move, adjust, and set up around your tree.
I’m officially declaring this project a Christmas DIY win! It perfectly blends practicality, affordability, and beautiful design.
Enhance Your Holiday Decor with More DIY Projects
Beyond this fantastic Christmas tree collar, there are many ways to infuse your home with handmade holiday charm. I’ve also put together a super popular tutorial for how to decorate Christmas garland like a pro. This guide breaks down the process of creating lush, beautiful garland displays into simple, easy-to-follow steps that anyone can master. Hopefully, you’ll find that post equally helpful as you prepare your home for the festive season. Happy Christmas decorating and crafting!
Pin this brilliant DIY idea so you don’t forget it for next Christmas!