
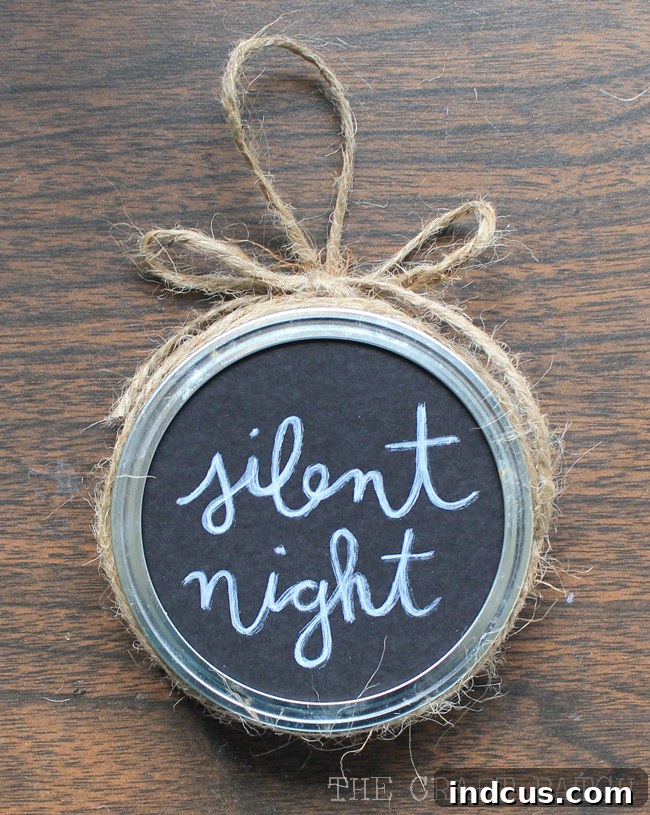
As the festive season approaches, there’s a unique joy in transforming our homes into a cozy winter wonderland. This year, my heart is set on a decor theme that whispers “homey and rustic,” bringing warmth and a touch of nostalgic charm to every corner. I recently shared a glimpse of this inspiration on Instagram, and the response was wonderful! Among the elements that perfectly capture this desired vibe, simple mason jar lid ornaments stand out as a star. They embody everything I love about handmade holiday decorations: character, warmth, and a personal touch that mass-produced items just can’t replicate.
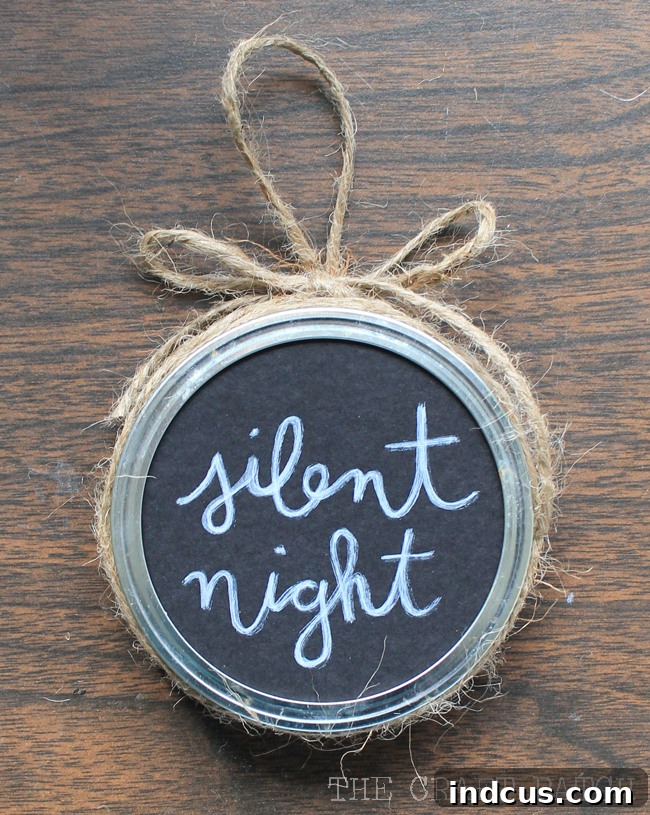
Today, I’m thrilled to share a straightforward yet incredibly charming tutorial for these DIY mason jar lid ornaments. They are not only adorable but also highly customizable, allowing you to infuse your unique style and sentiment into your holiday decor. Imagine creating a collection that tells a story, each ornament a little snippet of joy, a cherished memory, or a beloved carol lyric. The beauty of this project lies in its simplicity and the boundless possibilities for personalization, making it an ideal craft for a cozy afternoon, whether you’re a seasoned DIY enthusiast or just starting your crafting journey.
Embrace the Charm of Handmade: Why DIY Mason Jar Lid Ornaments?
In a world often dominated by commercialism, there’s something incredibly special about handmade decorations. They carry a warmth and authenticity that manufactured items simply can’t replicate. Mason jar lid ornaments, in particular, are a fantastic choice for several compelling reasons:
- Budget-Friendly: Mason jar rings are often readily available, and the other materials are inexpensive, making this an economical way to add a lot of charm to your tree or home.
- Eco-Conscious Crafting: Repurposing mason jar lids is a wonderful way to practice sustainable crafting. It’s an opportunity to give new life to items that might otherwise be discarded.
- Personalized Touch: Unlike store-bought ornaments, these allow for complete personalization. You can choose colors, themes, messages, and embellishments that resonate deeply with you and your family.
- Easy for All Skill Levels: This project is perfect for crafters of all ages and abilities. The steps are simple, and there’s no need for specialized tools or advanced techniques. It’s a fantastic activity to enjoy with children or friends.
- Versatility: While perfect for Christmas trees, these ornaments can also adorn garlands, wreaths, gift packages, or even serve as unique place settings for your holiday dinner.
- Sentimental Value: Each ornament you create will hold a special memory. Whether it’s a lyric from a favorite Christmas song, a family name, or a significant date, these pieces become cherished keepsakes for years to come.
Ready to add a touch of rustic elegance and heartfelt sentiment to your holiday decor? Let’s gather our supplies and begin this delightful crafting adventure!
Materials Needed: Crafting Your Rustic Charms
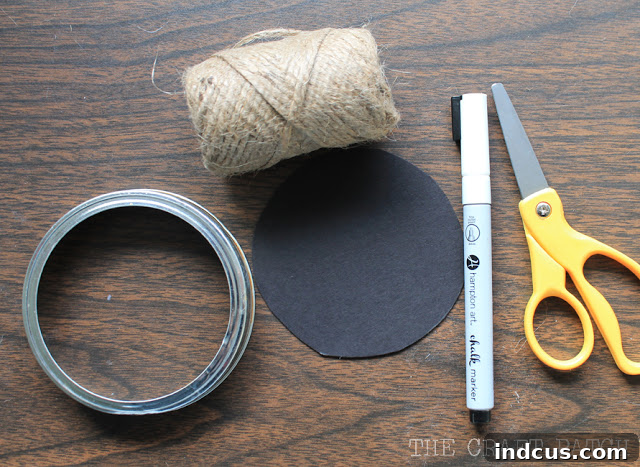
One of the best aspects of this DIY project is the minimal and accessible list of materials. You might even have many of these items around your home already!
- Mason Jar Rings: These are the star of our show. Standard mouth or wide mouth rings both work wonderfully, offering slightly different size options for your ornaments. You can use new rings or clean, repurposed ones from used jars.
- Black Cardstock: This provides the perfect “chalkboard” effect for your messages. Opt for a slightly thicker cardstock (65-80 lb) for durability. If you prefer a different aesthetic, consider kraft paper, colored cardstock, or even patterned scrapbook paper.
- Chalk Pen or White Chalk: For crisp, clean writing, a chalk pen is fantastic as it’s less prone to smudging. However, traditional white chalk offers a truly authentic, soft chalkboard look. Experiment with what you have or prefer!
- Hot Glue Gun + Glue Sticks: Your trusty hot glue gun will be essential for quickly and securely assembling your ornaments. Always exercise caution when using hot glue.
- Twine: Jute twine is perfect for achieving that rustic, natural look. You could also experiment with baker’s twine for a pop of color, thin ribbon, or even strips of plaid fabric for a different texture.
Step-by-Step Instructions: Bringing Your Ornaments to Life
Follow these simple steps to create your beautiful, personalized mason jar lid ornaments. Take your time, enjoy the process, and let your creativity shine!
1. Prepare Your Cardstock Inserts: Begin by cutting circles from your black cardstock to fit snugly inside the mason jar rings. A great tip for achieving the perfect size is to use the flat lid insert (the part that usually goes inside the ring) as a template. Trace around it, then cut slightly inside your traced line to ensure a good fit. Don’t stress too much about achieving perfectly smooth edges; they will be hidden within the ring, so a little imperfection adds to the handmade charm! You’ll want to cut one circle for each ornament you plan to make.
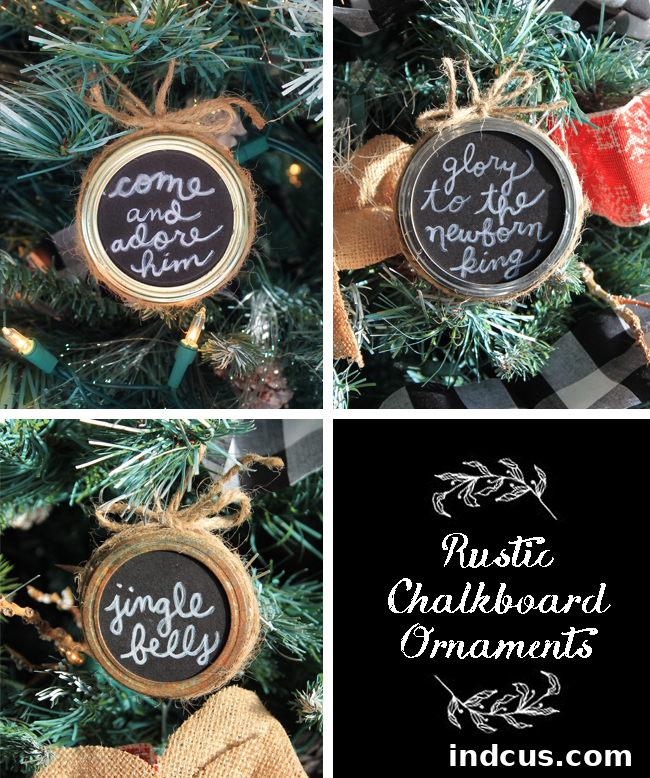
2. Craft Your Message: Now for the fun part – personalizing your ornaments! With your chalk pen or white chalk, write your chosen messages onto the black cardstock circles. I love using lyrics from classic Christmas songs; they evoke such wonderful memories and feelings. Other fantastic ideas include: family names, important dates, short festive greetings like “Joy” or “Peace,” small hand-drawn snowflakes, or even simple geometric patterns. If using chalk, consider a light hand to prevent excessive smudging. Practice on a scrap piece of cardstock first if you’re feeling unsure about your handwriting.
3. Secure the Cardstock: Once your messages are complete and any chalk dust is gently wiped away, it’s time to secure the cardstock inside the mason jar ring. Apply a small bead of hot glue around the inside edge of the mason jar ring. Quickly, but carefully, press your decorated cardstock circle into place, ensuring it’s centered and fully adhered. Hold it firmly for a few seconds until the glue sets. This creates a neat, finished look for your ornament.
4. Add Rustic Embellishment with Twine: To enhance the rustic aesthetic, take a length of twine and wrap it around the outside edge of the mason jar ring. Depending on the thickness of your twine and the look you desire, you might wrap it two or three times. Once you’re satisfied with the wrapping, tie the ends securely with a neat bow at the top or side of the ring. You can add a small dab of hot glue beneath the knot of the bow to keep it from slipping and to secure the ends of the twine in place.
5. Create the Hanger: Finally, let’s make it ready to hang! Cut a piece of twine approximately 3-5 inches long. Form this piece into a loop. Apply a small amount of hot glue to the backside of the bow you just tied on the ornament. Press the ends of your twine loop firmly into the hot glue, holding them in place until the glue completely cools and hardens. Make sure the loop is centered and secure enough to hold the weight of the ornament. This discreetly placed hanger ensures your beautiful ornament is ready to be displayed on your tree or anywhere else you choose!
Beyond the Chalkboard: Endless Customization and Creative Variations
These mason jar lid ornaments look absolutely charming on my tree, and I especially love the subtle, heartfelt reminders that the words provide throughout the season. But the beauty of this craft extends far beyond the chalkboard style. This simple framework offers a canvas for endless creativity!
You can truly take this basic idea and transform it in countless ways to create a diverse collection of ornaments that perfectly match your style or theme. For instance, consider the red ornament on the left in the image below: instead of black cardstock and chalk, it features a festive piece of scrapbook paper, instantly changing the mood. And the metallic bird on the right? That’s cleverly repurposed from an old Christmas card! This shows just how versatile these little rings can be.
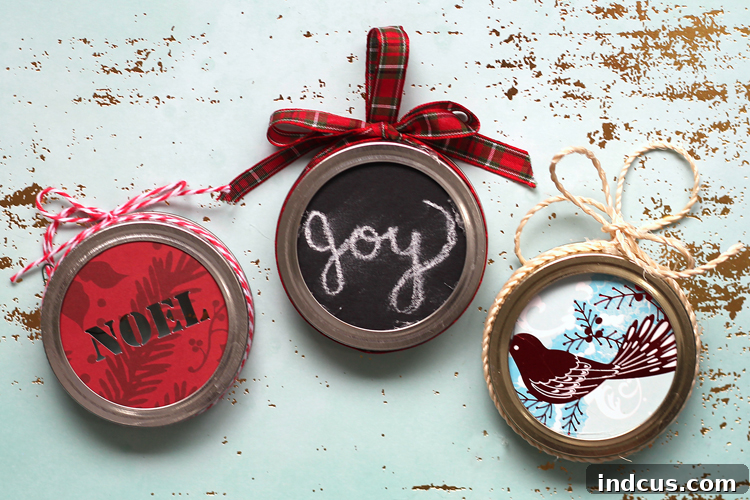
Here are some additional ideas to spark your imagination:
- Scrapbook Paper Magic: Dive into your stash of scrapbook paper! Choose patterns that fit your holiday decor – vintage, whimsical, glittery, or minimalist. You can even layer different patterns or add small cut-out embellishments.
- Repurpose Old Christmas Cards: Before you discard old greeting cards, consider cutting out beautiful images, characters, or even heartfelt messages. These can be glued into your mason jar rings for a wonderfully nostalgic touch.
- Photo Ornaments: Print small, circular photos of family, friends, or beloved pets. These make incredibly personal and cherished keepsakes, perfect for gifting or adorning your own tree.
- Fabric Scraps: Cut circles from festive fabric scraps like plaid flannel, burlap, felt, or even lace. These add a lovely texture and warmth to your ornaments.
- Natural Elements: For an even more rustic feel, glue in pressed leaves, tiny dried flowers, a small sprig of faux pine, or even miniature pinecones. These bring the outdoors in beautifully.
- Glitter and Sparkle: Apply a thin layer of glue to your cardstock circle and sprinkle generously with glitter for a dazzling effect. You can also use glitter pens to add shimmer to your chalk messages.
- Stamps and Ink: Use rubber stamps with festive designs or sentiments on plain cardstock for a clean, elegant look. Embossing powder can add a raised, metallic finish.
- Miniature Scenes: If you’re using wide-mouth rings, you might even be able to glue tiny figures, bottle brush trees, or other miniature props inside to create a small winter wonderland diorama.
These personalized ornaments also make thoughtful and heartfelt gifts for friends, family, teachers, or hosts. Package a set of three or four together with a beautiful ribbon, and you have a unique present that truly comes from the heart. Imagine giving an ornament featuring a cherished photo, a meaningful quote, or a personalized message – it’s a gift sure to be treasured for years to come.
Tips for Crafting Success
- Work in Batches: If you plan to make several ornaments, streamline the process by completing one step for all ornaments before moving to the next (e.g., cut all cardstock circles, then write all messages).
- Involve the Family: This is a fantastic family-friendly craft! Children can help cut cardstock, choose song lyrics, or even decorate with markers or stickers (with adult supervision for hot glue).
- Experiment with Adhesives: While hot glue is fast, white craft glue or a strong tacky glue can also work, just allow more drying time.
- Seal Chalk Art: If you use traditional chalk and want to prevent smudging, a light spray of clear acrylic sealant (available at craft stores) can protect your beautiful lettering.
Conclusion: Crafting Memories, One Ornament at a Time
There’s an undeniable magic that happens when you create something with your own hands, especially during the holiday season. These DIY mason jar lid ornaments are more than just decorations; they are little vessels of creativity, sentiment, and the warmth of a handmade holiday. Whether you choose to fill them with cherished song lyrics, family photos, or festive patterns, each ornament tells a unique story and contributes to a home filled with character and personal flair.
So, gather your materials, put on some festive tunes, and allow yourself to enjoy the simple pleasure of crafting. The result will be a collection of charming, rustic ornaments that not only beautify your space but also create lasting memories. I encourage you to try this project and explore all the creative possibilities. Happy crafting, and happy holidays!







