
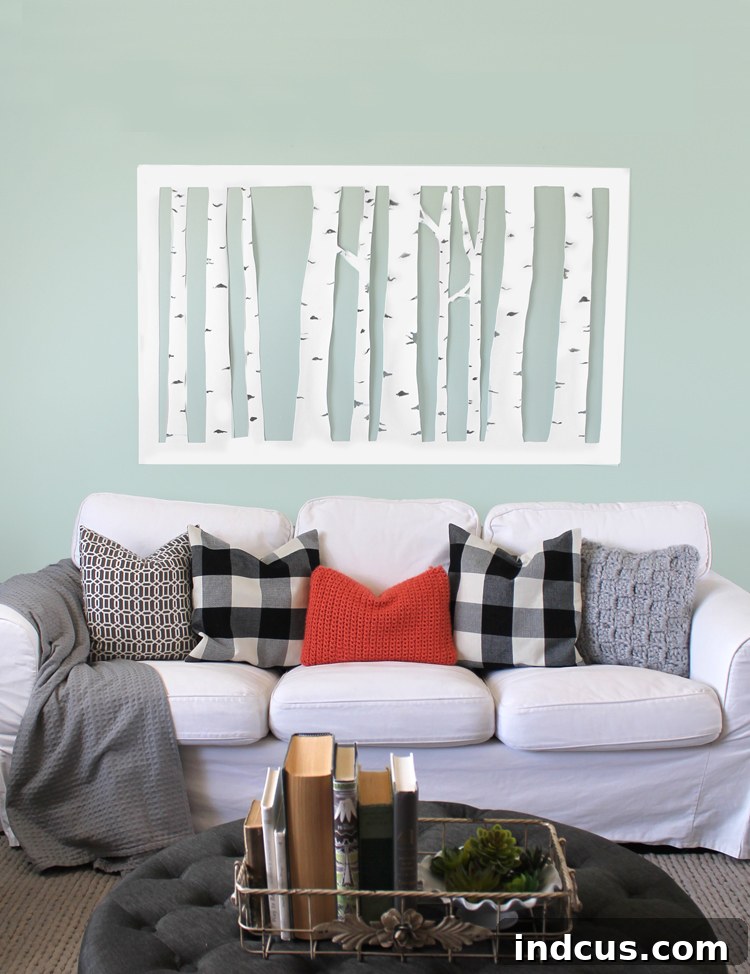
Transform Your Walls: DIY Aspen Tree Wall Art with Craft Foam
Are you looking to infuse your living space with a touch of nature’s tranquility and modern elegance without breaking the bank? Imagine a breathtaking forest scene gracing your walls, an artistic statement that adds depth, texture, and a unique personality to any room. Today, we’re diving into an incredibly fun and surprisingly simple DIY home décor project: creating a large-scale aspen tree wall art piece that looks absolutely stunning. The best part? You’ll be amazed at the humble, inexpensive material that makes this masterpiece possible!
This project is more than just a craft; it’s an opportunity to create a captivating focal point that resonates with minimalist charm and natural beauty. The distinctive white bark of aspen trees, marked with their characteristic dark ‘eyes,’ lends itself perfectly to a graphic, modern interpretation. Whether your home leans towards Scandinavian simplicity, bohemian warmth, or contemporary chic, this DIY wall art effortlessly blends in, elevating your decor game.
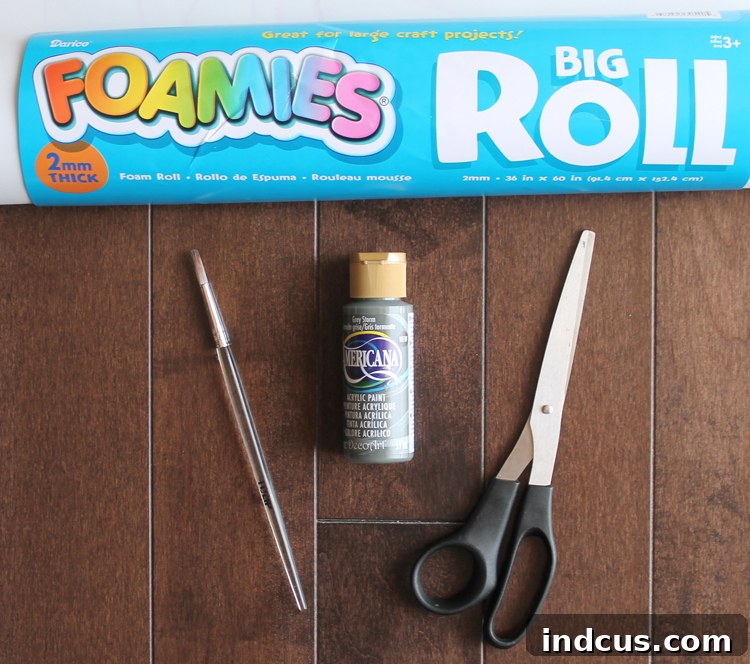
Gather Your Creative Arsenal: Materials Needed
One of the most appealing aspects of this project is its affordability and the accessibility of the materials. You won’t need specialized tools or expensive canvases; just a few basic craft supplies are enough to get started. Here’s what you’ll need to transform a simple roll of foam into an exquisite forest landscape:
- EVA Craft Foam Roll: This is the star of our show! Look for a large roll, often found in craft stores or online. Its flexibility, lightweight nature, and ease of cutting make it the perfect medium for this project. The size of your roll will dictate the maximum size of your art piece.
- Scissors or Craft Knife: A sharp pair of scissors will work for general cutting, but a craft knife (like an X-Acto knife) on a self-healing mat will offer more precision for intricate details and smoother edges. Always exercise caution when using sharp tools.
- Dark Gray Craft Paint: A small bottle of acrylic craft paint in dark gray or charcoal is ideal for mimicking the natural markings on aspen bark. Black also works, but a dark gray often provides a softer, more organic contrast.
- Small Paint Brush: You’ll need a fine-tipped brush for painting the delicate accent marks on your “tree trunks.” Detail brushes work wonderfully for this.
- Pencil: A standard graphite pencil is perfect for sketching your design onto the foam before cutting.
- Yardstick or Long Ruler: Essential for drawing straight lines for your border and ensuring proportional tree trunks.
- Optional but Recommended: A cutting mat (if using a craft knife), masking tape (to secure the foam), and a protective surface for painting.
Crafting Your Forest: Step-by-Step Instructions
Creating this stunning art piece is surprisingly straightforward. The key is in taking your time with each step, allowing your creativity to flow. Follow these instructions to bring your aspen forest vision to life:
Step 1: Unroll and Relax Your Foam
Upon unrolling your EVA craft foam, you’ll likely find that it retains its rolled shape. To ensure a flat, stable surface for drawing and cutting, gently unroll the entire sheet. Secure it to a large, clean, hard work surface such as a tabletop or a hard floor using painter’s tape or masking tape. Press down firmly, especially along the edges, to encourage it to flatten out. Allowing it to relax for a few hours, or even overnight, will make the subsequent steps much easier and yield a cleaner finish.
Step 2: Design and Cut Your Aspen Silhouettes
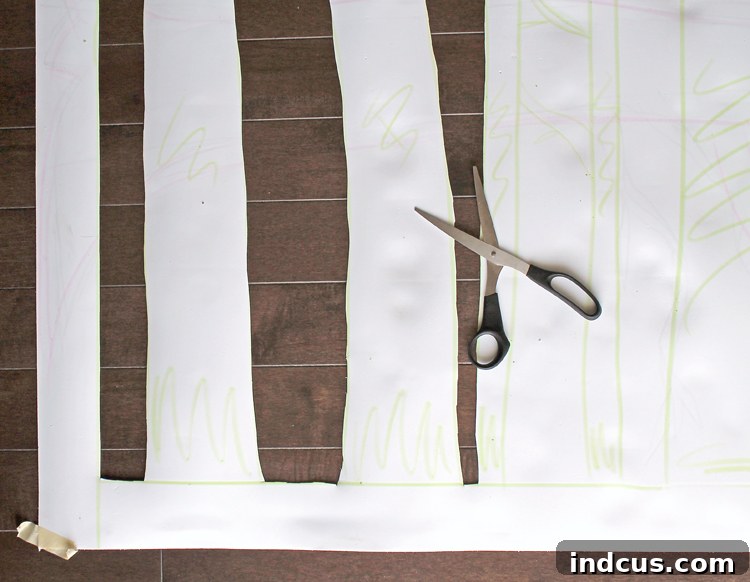
This is where your forest begins to take shape! Flip your flattened foam sheet to its backside. Begin by establishing a sturdy border around the entire perimeter. Using your yardstick and pencil, draw a generous border – I recommend approximately 4 inches thick. This border is crucial as it provides structural stability to your finished project and acts as a natural frame, allowing your chosen wall color to become part of the art itself.
Once your border is established, start sketching the individual tree trunks within this framed area. Think about creating a varied, natural look: some trees taller, some shorter; some thicker, others slender. Allow the trunks to intertwine slightly or overlap for a sense of depth and realism. Don’t strive for perfect uniformity; the organic nature of a forest is what makes it beautiful. Use light pencil strokes initially, then refine your lines. After you’re satisfied with your design, carefully begin cutting out the negative space around the tree trunks. If using a craft knife, place a cutting mat underneath and make several light passes rather than trying to cut through in one go. If using scissors, take small, precise snips to navigate the curves and maintain smooth edges. Remember to keep the exterior border intact!
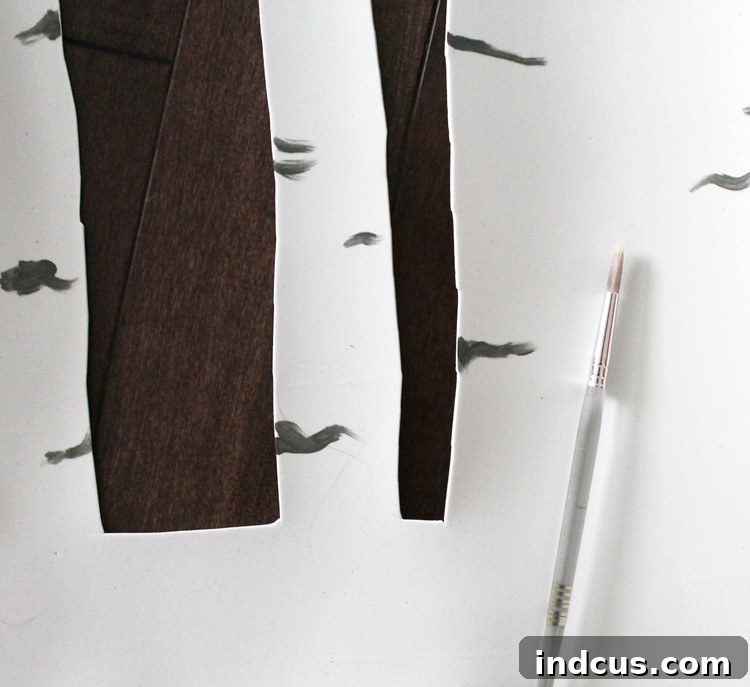
Step 3: Add the Signature Aspen Markings
Once all your trees are cut out and you have a beautiful foam silhouette, flip the project right side up. Now it’s time to bring those trunks to life with their characteristic markings. Dip your small paintbrush into the dark gray craft paint, wiping off any excess so you have only a small amount on the brush. Gently dab and draw small, irregular horizontal lines, “eyes,” and dark patches along the white trunks. Aspen bark isn’t perfectly smooth; it has texture and variation. Embrace this by making your marks somewhat sporadic and uneven, mimicking the natural imperfections found in a real forest. You can practice on a scrap piece of foam first if you’re unsure about the technique. Let the paint dry completely before moving on.
And just like that, your unique aspen tree wall art is complete and ready to adorn your space! The simplicity of the process belies the profound visual impact it creates.
Hanging Your Masterpiece: Damage-Free Solutions
Given the incredibly lightweight nature of EVA craft foam, hanging this large-scale art piece is a breeze and requires minimal effort, often without leaving a trace on your walls. This makes it an ideal solution for renters, dorm rooms, or anyone who wants the flexibility to change their decor frequently without commitment.
- Command Strips: My personal go-to for hanging lightweight art. These velcro-type adhesive strips are designed for damage-free hanging and removal. Apply several strips strategically along the back of your foam border, ensuring even distribution of weight. Follow the package instructions carefully for proper application and removal to guarantee your walls remain pristine.
- Push Pins: For a quick and easy solution, a few strategically placed clear push pins can hold the foam art securely. They leave minimal holes, which are often barely noticeable.
- Painter’s Tape: For a truly temporary display, loops of painter’s tape can be used. Apply several strong loops to the back of the foam. While effective for lightweight items, ensure you use enough tape to prevent sagging over time.
- Small Nails: If you’re less concerned about small nail holes, a few thin finishing nails can provide a very secure hold. This is generally reserved for more permanent installations.
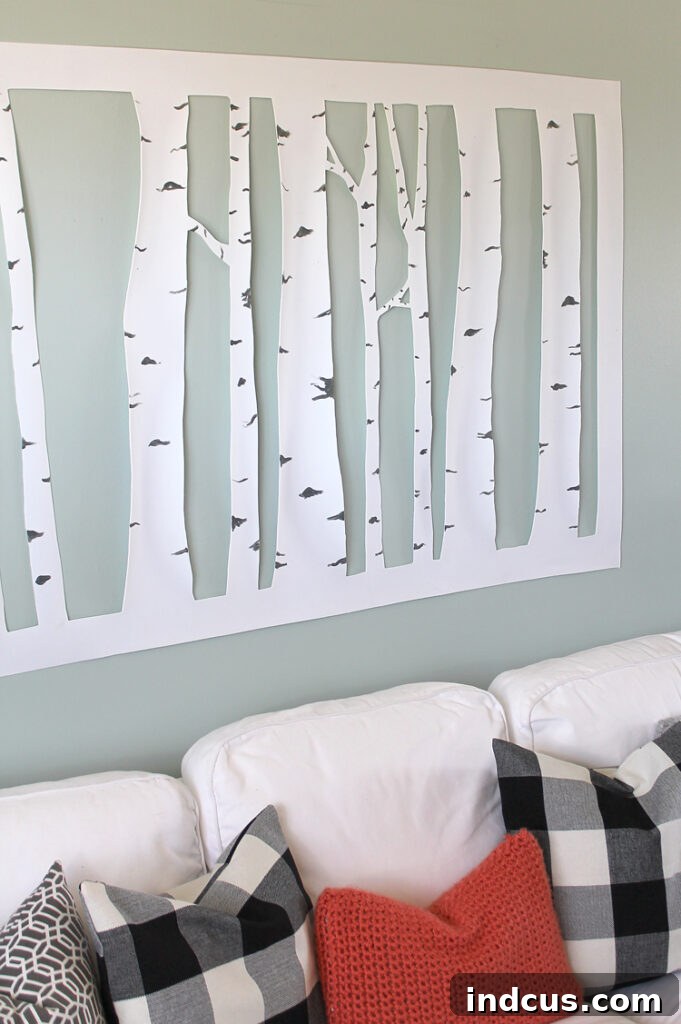
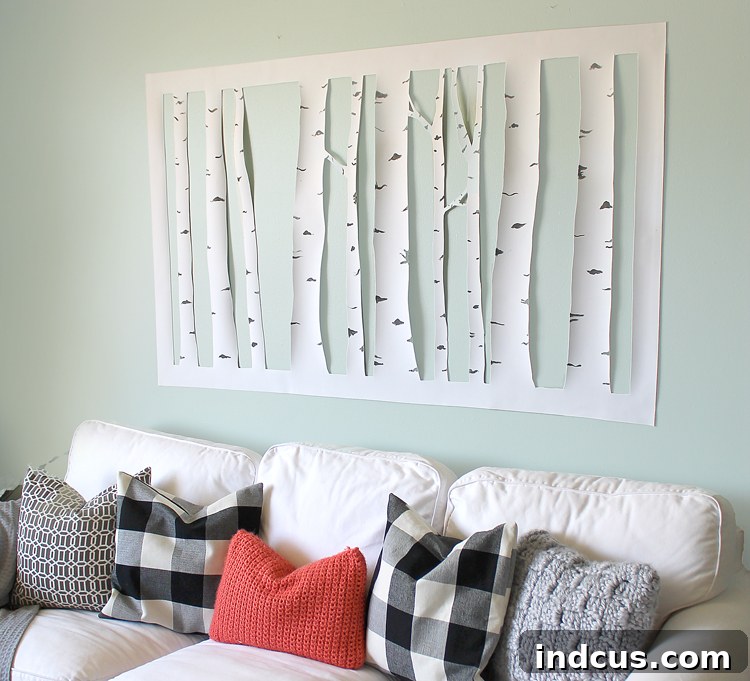
The beauty of this lightweight material is that it subtly lifts off the wall, creating a beautiful three-dimensional effect. The slight shadow cast behind the foam adds to its depth and visual interest, making your wall art truly pop.
Why This DIY Aspen Tree Wall Art is a Decor Game-Changer
Beyond its aesthetic appeal, this craft foam art project offers a myriad of benefits that make it a standout choice for anyone looking to refresh their home decor:
- Unbelievably Lightweight: This is a huge advantage, especially for renters or anyone hesitant to put heavy holes in their walls. It allows for effortless hanging and repositioning.
- Budget-Friendly Decor: Compared to store-bought large-scale art, the cost of an EVA foam roll and a small bottle of paint is incredibly low, making high-impact decor accessible to everyone.
- Fully Customizable: You have complete control over the design. Make your trees sparse or dense, tall or short, thick or thin. You can even experiment with different wall colors showing through, or use colored foam for a unique base.
- Unique Dimensionality: Unlike a flat canvas print, the slight thickness of the foam and the way it stands off the wall creates a beautiful shadow and a sense of tangible depth, giving the art a sculptural quality.
- Rental and Dorm Friendly: The damage-free hanging options make it perfect for temporary living situations, allowing you to personalize your space without losing your security deposit.
- Modern and Versatile Aesthetic: The clean lines and natural theme of aspen trees fit seamlessly into various interior design styles, from modern minimalist to rustic contemporary. It’s a timeless design that doesn’t overwhelm.
- Satisfying DIY Project: There’s immense satisfaction in creating something beautiful with your own hands. This project is simple enough for beginners but yields professional-looking results.
I truly believe this project offers exceptional value and aesthetic appeal. The way your wall color interacts with the cut-out foam, showing through as part of the “sky” or “background,” adds an integrated feel that customizes the art to your specific room. The subtle protrusion of the foam from the wall truly brings the piece to life, creating dynamic shadows that shift with the lighting throughout the day.
Tips for Enhanced Success and Creative Variations
- Vary Tree Sizes and Shapes: For a more natural and dynamic forest look, draw trees of varying heights, widths, and slightly different trunk curvatures. Some can be slender and tall, others thicker and shorter.
- Consider Branch Details: If you’re feeling adventurous, you could lightly sketch and cut out very thin, subtle branch lines extending from the trunks. However, the beauty of this project often lies in its minimalist silhouette.
- Experiment with Foam Colors: While white foam mimics classic aspen, black foam against a light wall could create a dramatic, silhouetted forest. You could even use subtle cream or very light gray foam for a softer look.
- Add a “Forest Floor” Element: Instead of cutting the bottom of the border straight, you could create a wavy or gently sloping “ground” line to add another layer of realism.
- Layering for Depth: For an even more profound 3D effect, consider cutting out two separate foam pieces with slightly different tree arrangements and layering them with small spacers in between.
- Backlighting Potential: Imagine placing LED strip lights behind the foam art! The light would cast beautiful, ethereal shadows, transforming your forest into an illuminated spectacle, especially at night.
Conclusion: Embrace the Beauty of DIY
This DIY large-scale aspen tree wall art project is a testament to how simple materials and a little creativity can yield extraordinary results. It’s an accessible, affordable, and incredibly impactful way to personalize your home, bringing the serene beauty of a forest indoors. Whether you’re a seasoned crafter or a complete beginner, the steps are easy to follow, and the outcome is a piece of art that looks professionally designed but carries the unique touch of your own hands.
So, gather your supplies, find a comfortable spot to work, and get ready to create a statement piece that will transform your walls and spark conversations. Don’t be afraid to experiment and make it truly your own. Happy crafting, and enjoy the beautiful, tranquil forest you’ve brought into your home!







