
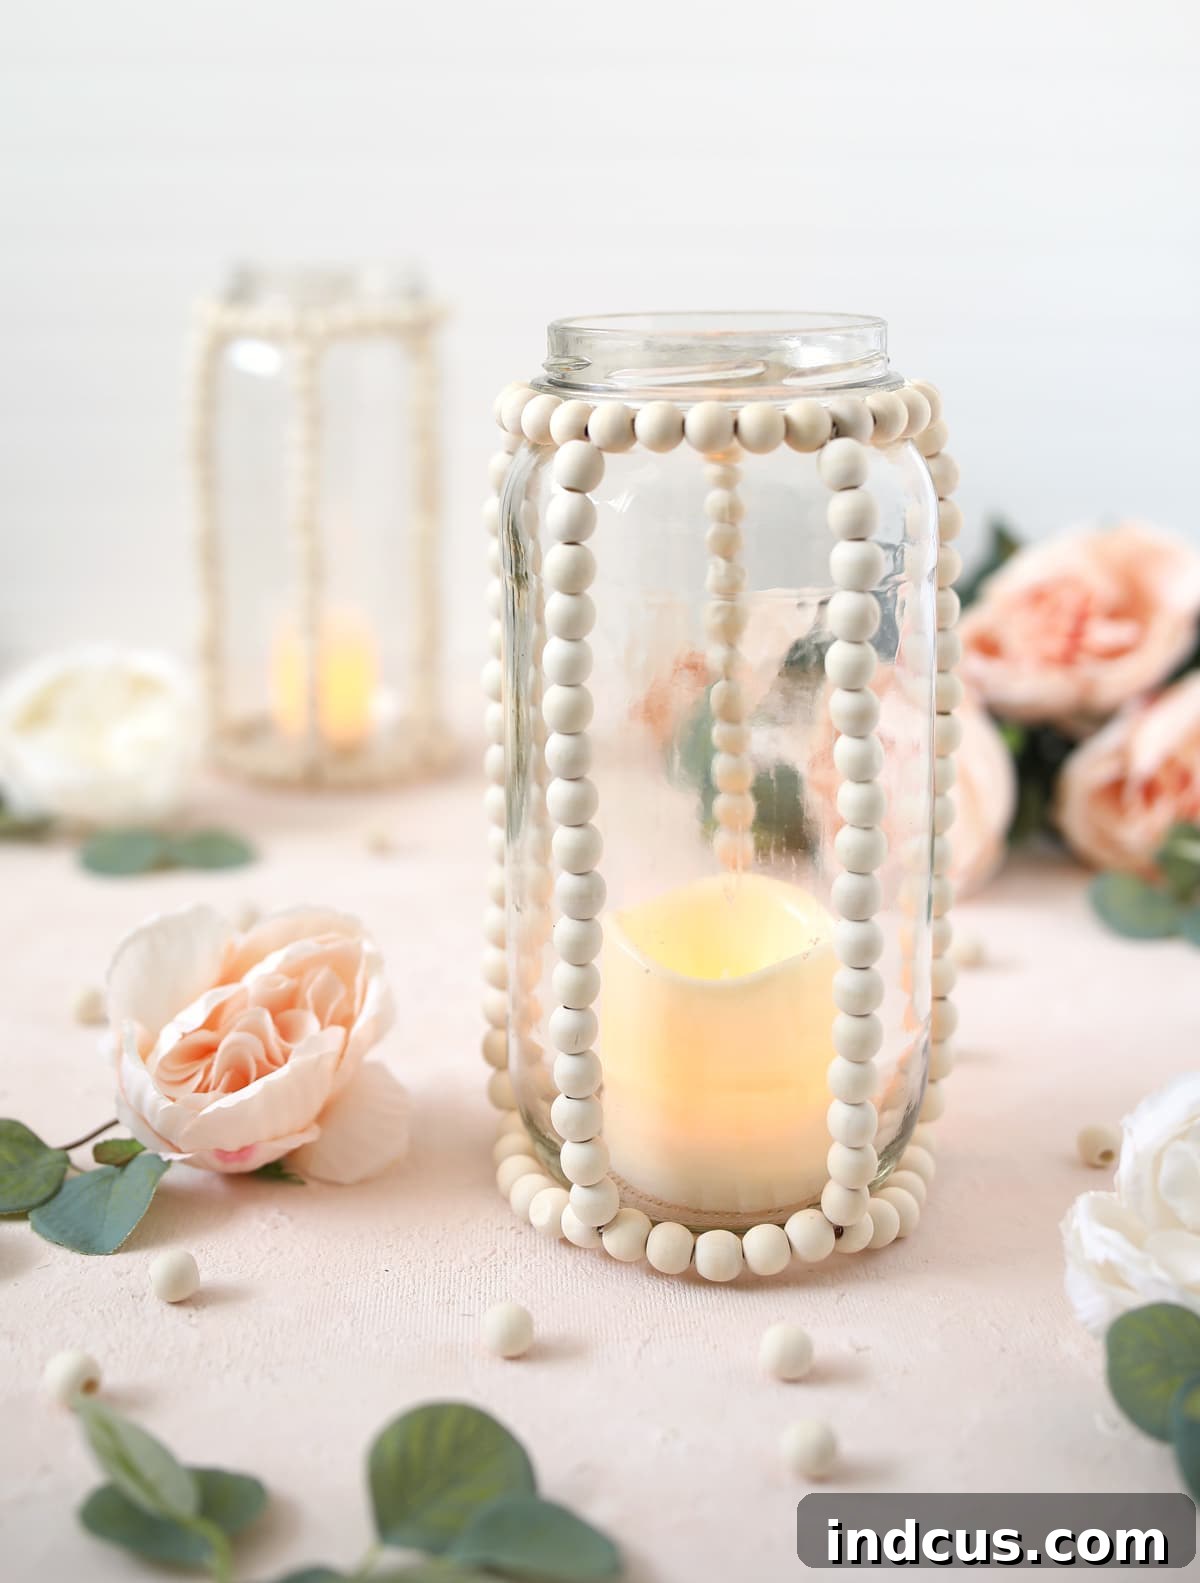
Transforming Ordinary Jars into Enchanting Wood Bead Lanterns: A DIY Guide for Stunning Decor
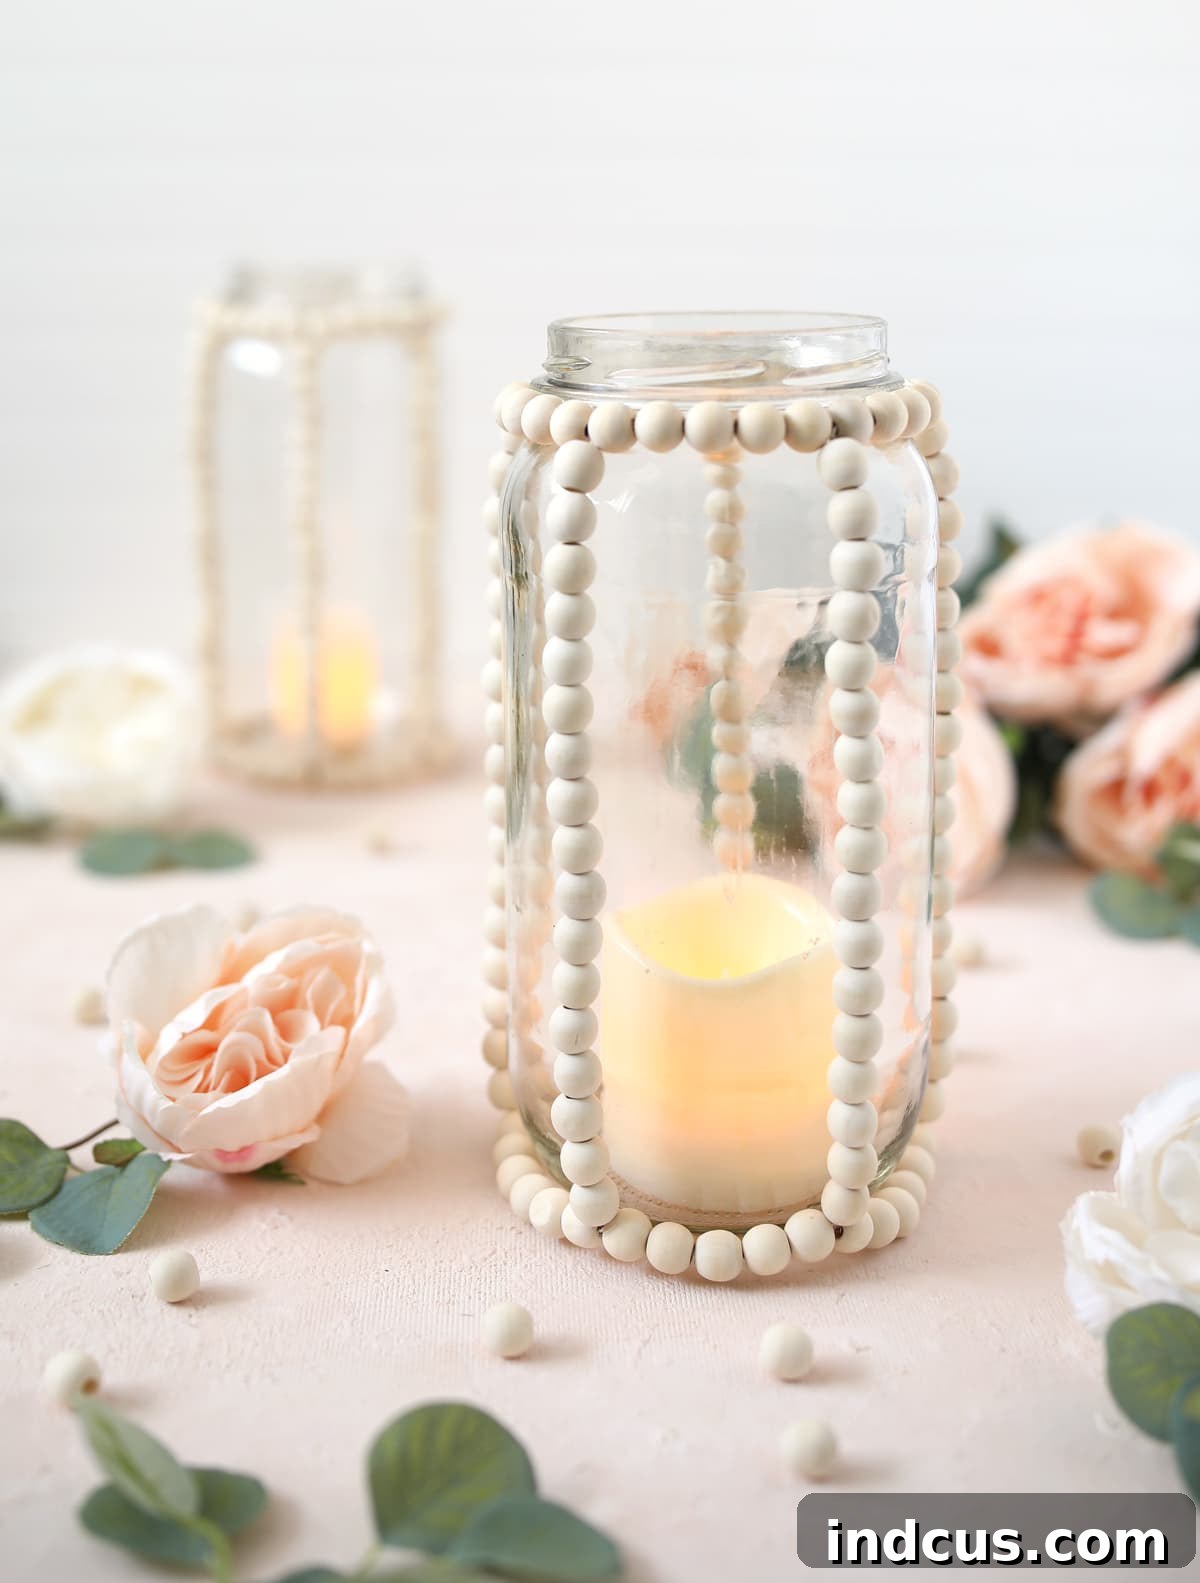
Are you searching for a unique and budget-friendly way to add a touch of rustic elegance to your home, wedding, or next big celebration? Look no further than this delightful DIY wood bead lantern project! Today, we’re diving into an incredibly simple yet impactful craft that transforms an everyday item – a large glass jar – into a captivating decorative piece. Imagine the warm, inviting glow these lanterns will cast, whether illuminating a cozy corner in your living room or gracing tables as enchanting centerpieces for your special events. This guide will show you exactly how to repurpose a glass jar, like a humble pickle jar, into a beautiful wood bead lantern that embodies charm and handmade sophistication.
My journey to creating these gorgeous lanterns began unexpectedly. A few months ago, while grocery shopping, I stumbled upon some exceptionally large jars of pickles. My immediate thought wasn’t about the pickles themselves, but rather the immense creative potential held within those oversized glass containers. I knew they were destined for something special, and it wasn’t long before inspiration struck: elegant wood bead lanterns! The result was even more beautiful than I envisioned, and the process was surprisingly straightforward, making this an accessible project for crafters of all skill levels. This project offers a fantastic opportunity to embrace upcycling, transforming what might be considered waste into a treasured item that reflects your personal style.
This post is sponsored by Hobby Lobby. #ad #sponsored #hobbylobbyfinds
Whether you’re planning a rustic wedding, a garden party, or simply want to infuse your home with a warm, inviting ambiance, these DIY wood bead lanterns are an ideal choice. Their versatility allows them to blend seamlessly with various decor styles, from farmhouse chic to bohemian elegance. Below, you’ll find a comprehensive breakdown of the materials required and a detailed, step-by-step guide to help you create your very own stunning lanterns.
Why Craft Your Own Wood Bead Lanterns?
There are numerous compelling reasons to embark on this DIY project. Firstly, it champions the principle of repurposing. Instead of discarding glass jars, you give them a new life, contributing to sustainable living. Secondly, the creative satisfaction of making something beautiful with your own hands is unparalleled. Each lantern will carry a unique story and personal touch that mass-produced decorations simply cannot replicate. Thirdly, these lanterns are incredibly versatile. They can serve as:
- Wedding Centerpieces: Imagine rows of these glowing lanterns adorning reception tables, adding a romantic and intimate atmosphere.
- Party Decorations: Perfect for outdoor gatherings, birthdays, or anniversaries, they create a festive yet sophisticated mood.
- Home Decor Accents: Place them on shelves, mantels, side tables, or even hang them to add a cozy, bohemian vibe to any room.
- Thoughtful Gifts: A handmade wood bead lantern makes a heartfelt present for friends and family, showcasing your creativity and care.
Beyond their aesthetic appeal, the process itself is a relaxing and rewarding craft experience. It’s a chance to unwind, tap into your creative spirit, and produce something truly special.
Essential Materials for Your DIY Wood Bead Lanterns
Gathering your materials is the first exciting step in any DIY project. For this charming lantern, you’ll find most items readily available at your local craft store like Hobby Lobby, or you might even have some of them lying around your home. The beauty of this project lies in its flexibility, allowing you to adapt materials to suit your preferences and what you have on hand.
- Large Glass Jar: A spacious glass pickle jar works wonderfully, offering a sturdy base and a generous size for your lantern. If pickles aren’t your preference, a similar large glass canister or an 89 oz glass jar from Hobby Lobby would be an excellent substitute. The key is to find a jar with some form of a lip or ridge near the opening to help secure the top circle of beads.
- Beaded Wood Garland: This is the star of our project! Look for garlands with beads of a suitable size – neither too small to be fiddly nor too large to overpower the jar. The pre-strung garland makes it easy to acquire a good quantity of uniform beads. Consider natural wood tones for a rustic look, or painted beads for a pop of color.
- Twine or Strong String: Choose a durable twine or string that complements the color of your wood beads. Jute twine is an excellent choice for its natural look and strength. Ensure it’s thin enough to thread through the bead holes easily but strong enough to hold the beads securely.
- LED Candles: For safety and convenience, flameless LED candles are highly recommended. They provide a beautiful, flickering glow without the fire hazard, making these lanterns safe for any setting, including homes with children or pets, and events where open flames are restricted. Of course, since the jar is glass, real flame candles can also be used safely if preferred, but always exercise caution.
- Scissors: A sharp pair of scissors will be essential for cutting the garland and twine cleanly.
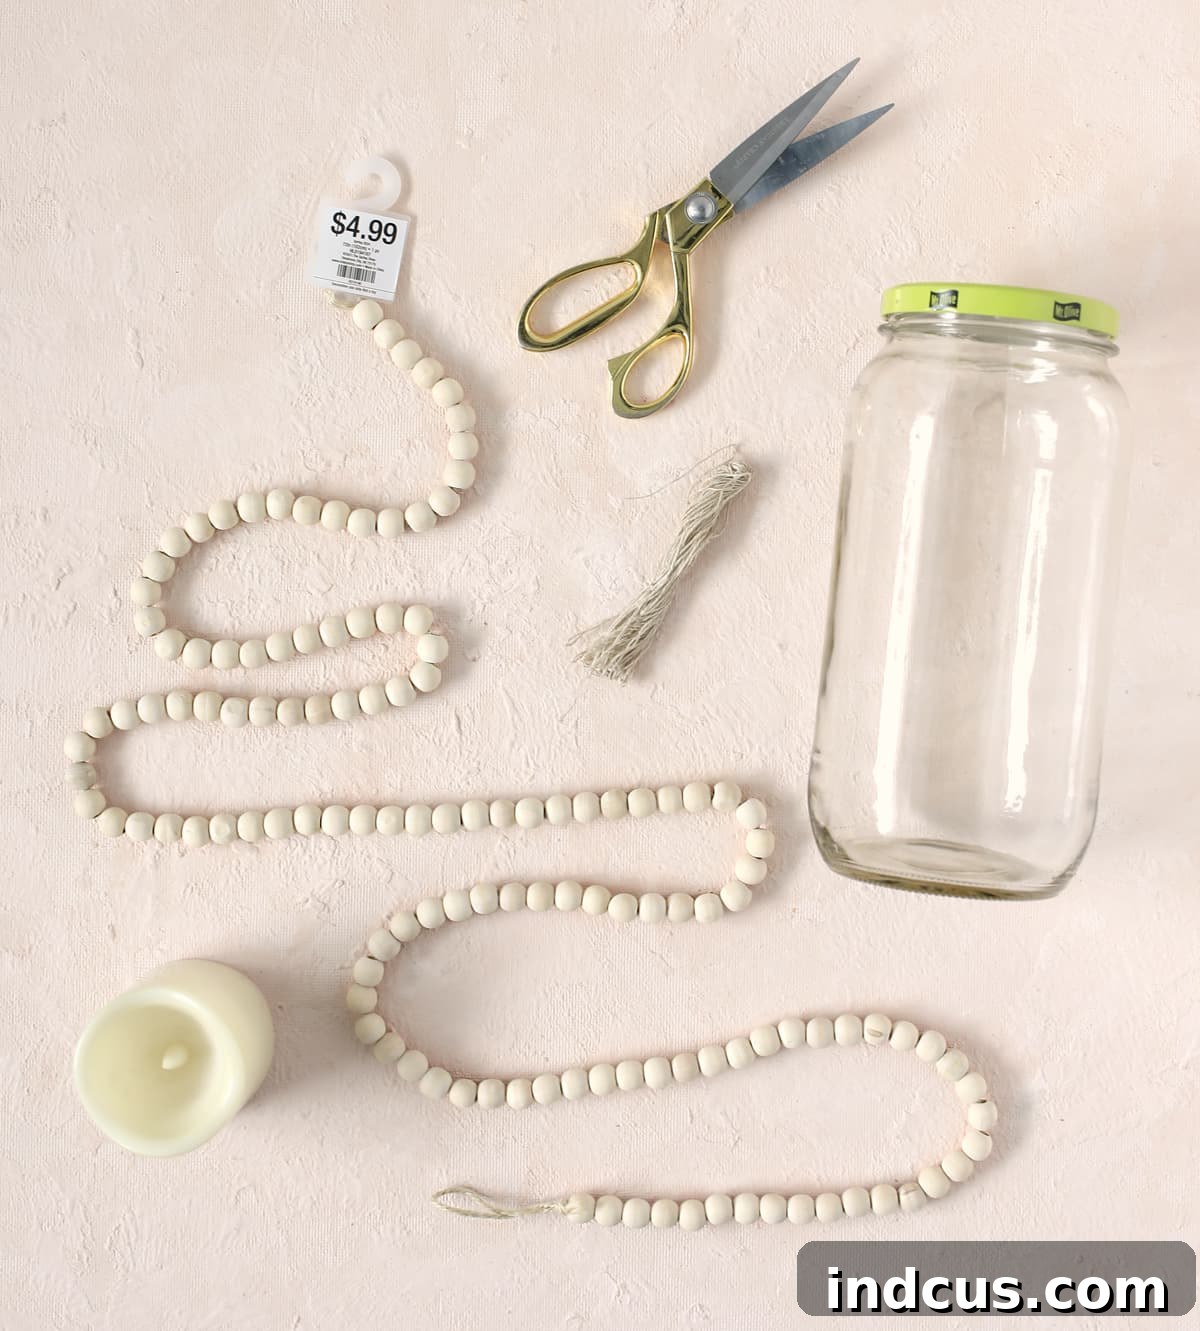
A helpful note on material selection: While I used a specific garland and jar, this project is highly adaptable. You can absolutely experiment with various sizes of wood beads and different types of glass jars. As long as your chosen jar has some kind of rim or lip near the top, it will work to anchor the top circle of beads. Mason jars, particularly the larger sizes, are another fantastic option for this project. If you’re exploring options, Hobby Lobby boasts an entire section dedicated to glass jars, offering a wide array of shapes and sizes to spark your creativity. Remember, the goal is to make a piece that you love, so feel free to personalize your material choices.
And for those with a keen eye for detail, the stunning floral accents featured in the project photos are cabbage rose and silver dollar eucalyptus bushes in lovely white and peach tones – a truly gorgeous touch if you’re looking to complete the visual aesthetic!
Step-by-Step Instructions: Crafting Your Wood Bead Lantern
Now, let’s get to the heart of the project! Follow these detailed steps to assemble your elegant wood bead lantern. Precision and patience are your best tools here, ensuring a beautifully finished product.
Step 1: Preparing Your Glass Jar
The first step is crucial for a clean, professional finish. Carefully remove all labels from your glass jar. For stubborn labels, a razor blade scraper works wonders, gently lifting them without scratching the glass. After removing the labels, give the jar a thorough wash, either by hand or by running it through the dishwasher. This ensures it’s sparkling clean and free of any residue. If your jar has any ink-printed dates or codes directly on the glass, a cotton swab dipped in acetone (nail polish remover works) can effectively wipe away the ink, leaving your jar perfectly clear.
Step 2: Creating the Top Bead Circle
Take your beaded wood garland and carefully cut it apart, collecting all the individual wood beads. Next, cut a generous length of your chosen twine. It’s always better to have too much string than too little, as it allows for easier knot tying and adjustments. Thread enough beads onto the twine to form a snug circle around the very top of your glass jar, just beneath the lip or rim. The beads should touch each other and fit tightly against the glass. Once you have the correct number of beads, bring the ends of the twine together and tie them securely with a double knot. This top circle will provide the main anchor for your lantern’s structure.
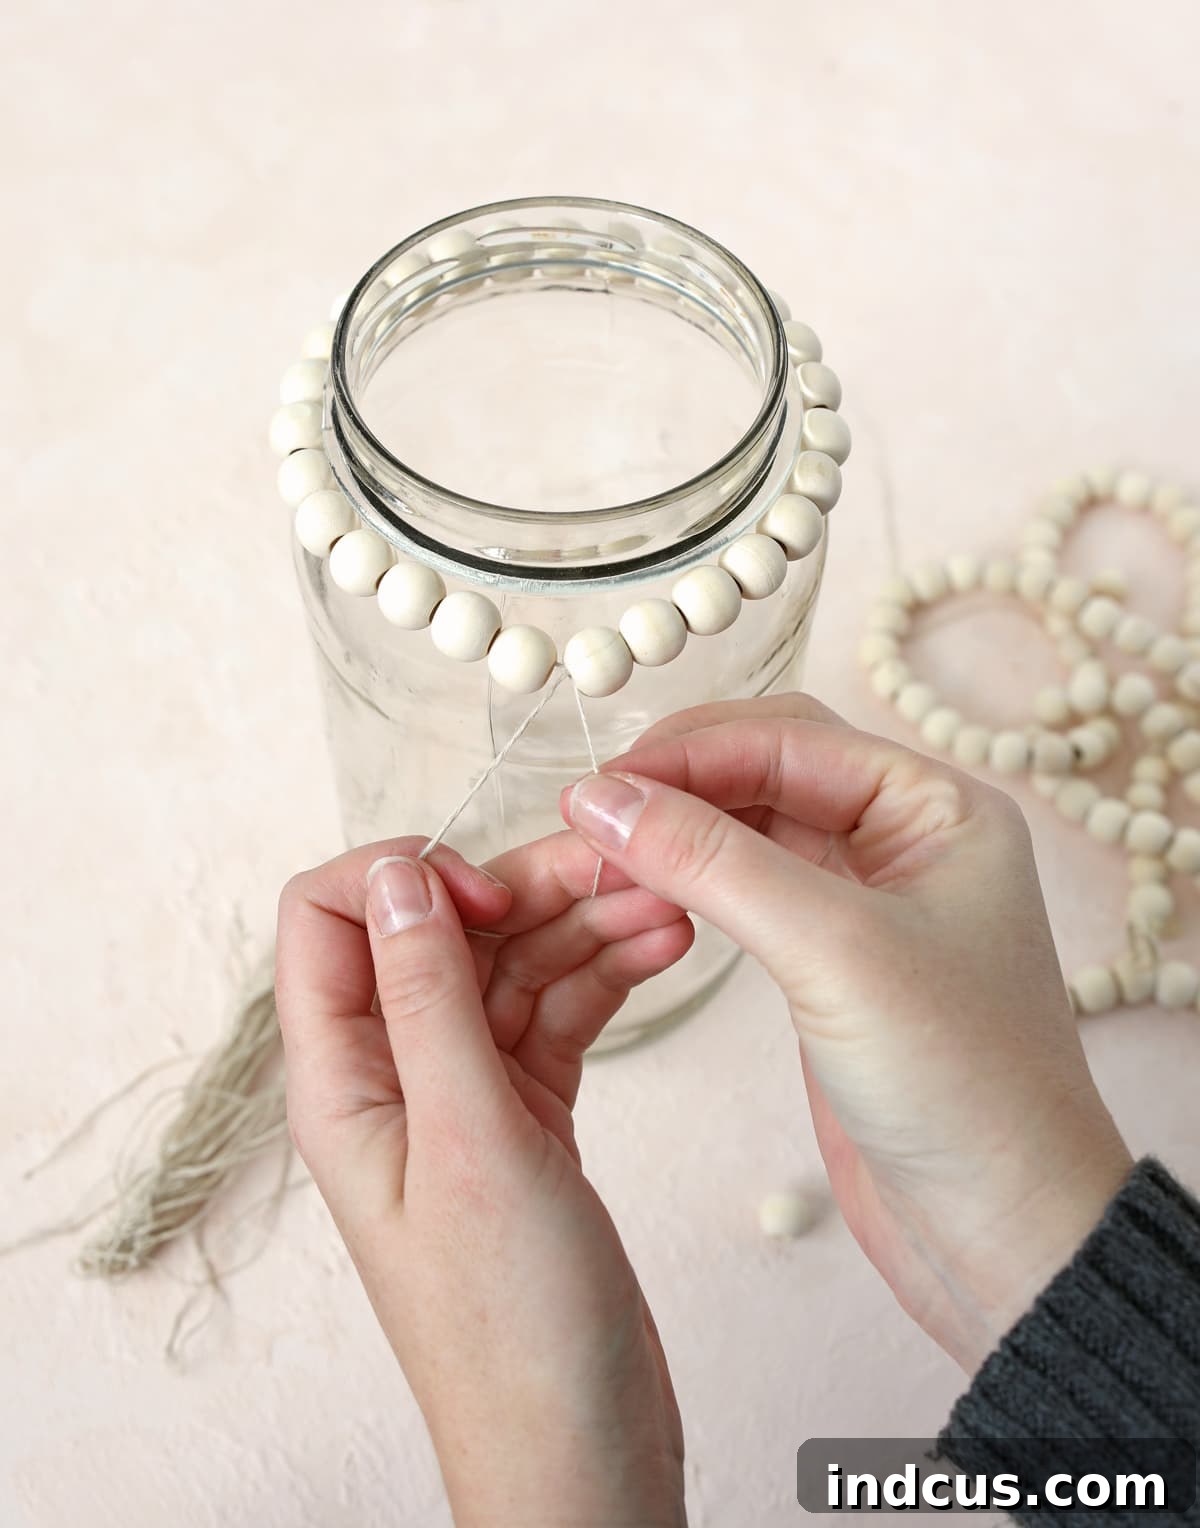
Step 3: Assembling the Bottom Bead Circle
Repeat the process from Step 2 to create a second circle of beads, this time designed to fit snugly around the bottom circumference of your jar. Unlike the top circle, this bottom circle will not stay in place on its own initially; your jar will simply rest inside it. Don’t worry about it being loose at this stage. The purpose of this circle is to provide a base for the vertical bead strands, and we will connect it to the top circle in the next step to ensure stability and a cohesive look. Tie the twine ends together tightly as you did for the top circle.
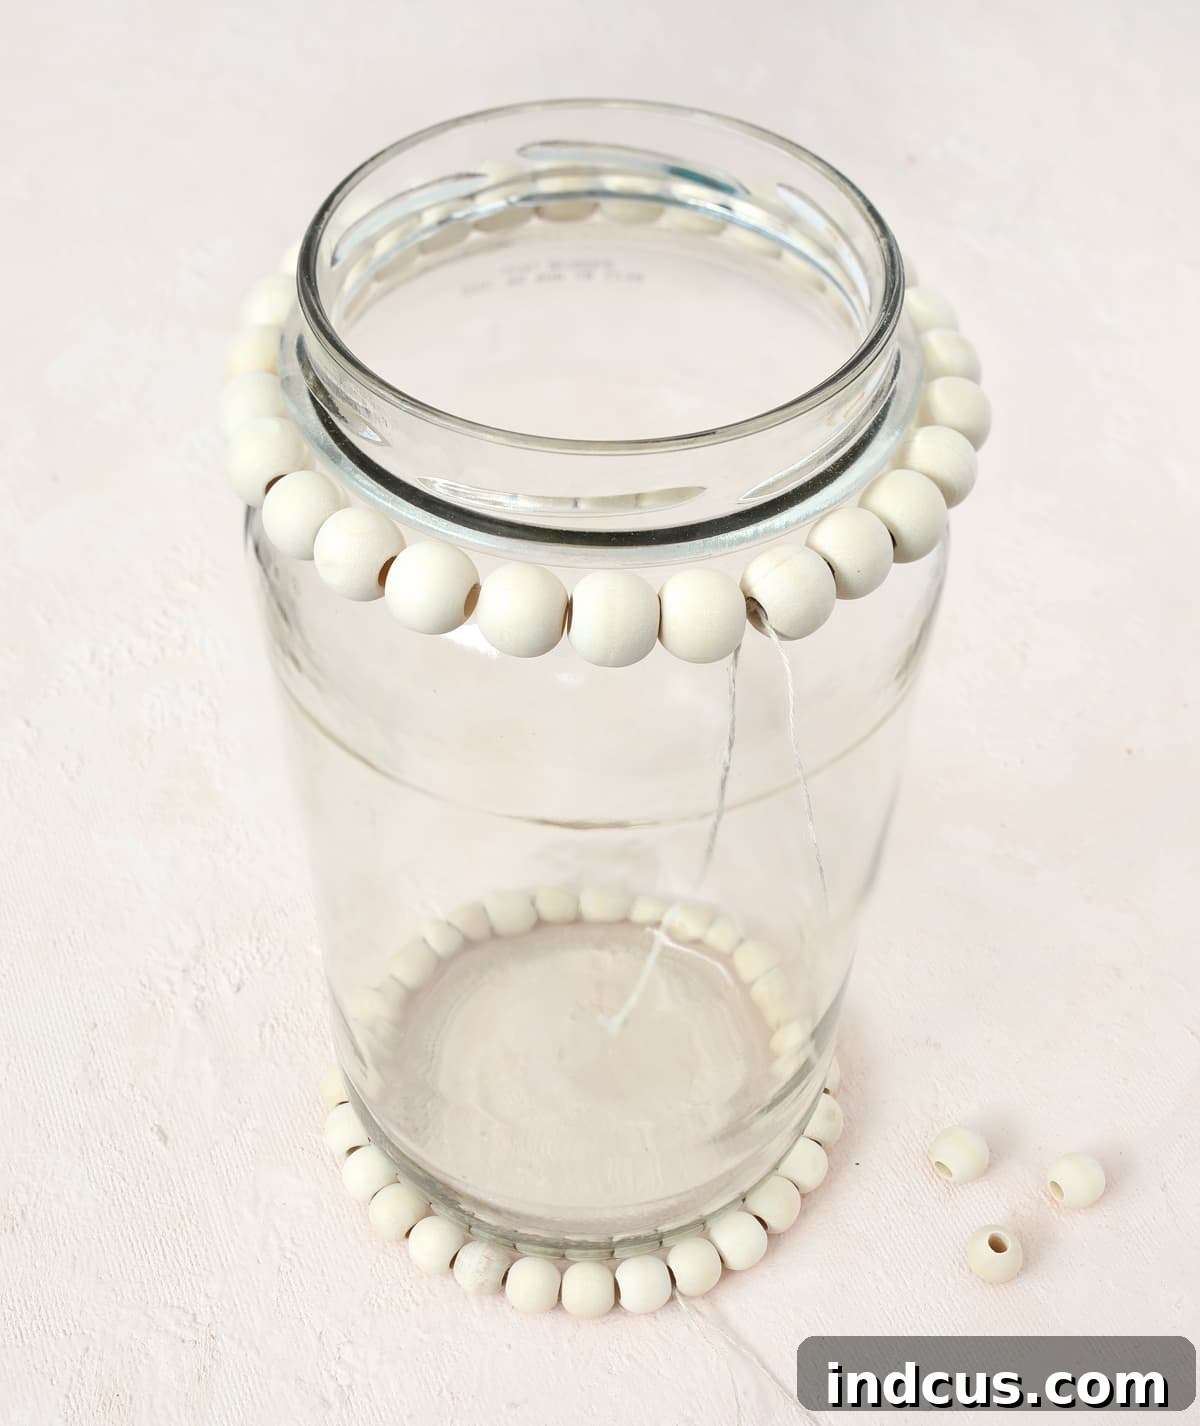
Step 4: Connecting with Vertical Bead Strands
Now, it’s time to create the beautiful vertical strands that connect your top and bottom bead circles. Cut another generous piece of string – again, ample length prevents frustration! Tie one end of this string securely to the top bead circle. Then, begin threading wood beads onto this string until it reaches the bottom bead circle. The number of beads will depend on the height of your jar; for my project, I found 16 beads worked perfectly. Once you have the correct number of beads that allow the strand to sit flush against the jar, tie the string tightly to the bottom bead circle. The goal is for the string to disappear completely within the beads, creating a seamless column. Ensure the beads sit flush against both the jar and the two circular bead rings.
Repeat this process all the way around the jar, creating multiple vertical bead strands. It’s important to space them evenly around the circumference of the jar and to use the exact same number of beads on each vertical piece. This consistency will ensure your lantern looks balanced and professionally finished, creating a charming, cage-like effect with the wooden beads.
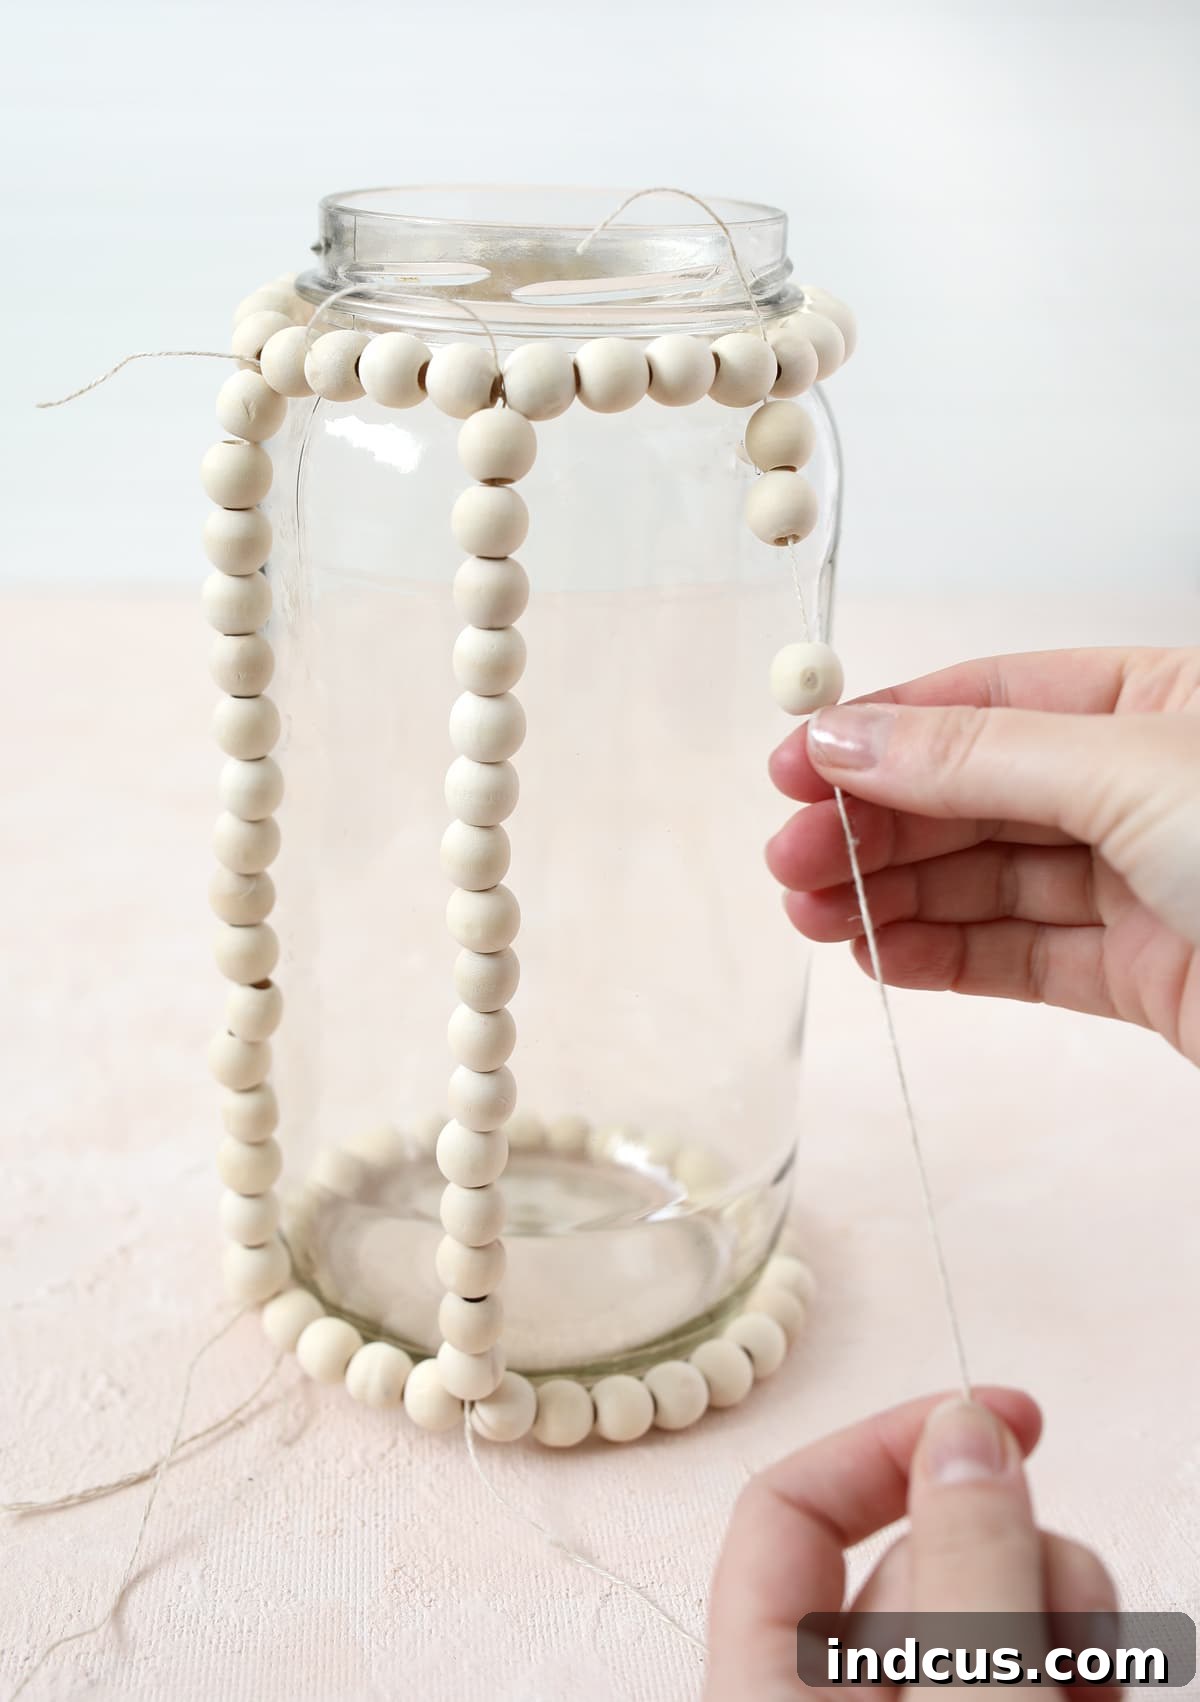
Step 5: Finishing and Hiding Twine Ends
With all your vertical bead strands in place, you’ll have several loose ends of twine from where you tied your knots. To achieve a clean, polished look, carefully tuck these string ends through the centers of nearby beads. Use a needle if necessary to help guide the twine through the bead holes. Once the ends are hidden discreetly within the beadwork, trim off any remaining visible string ends with your scissors. This step ensures that no unsightly strings detract from the natural beauty of your wood bead lantern.
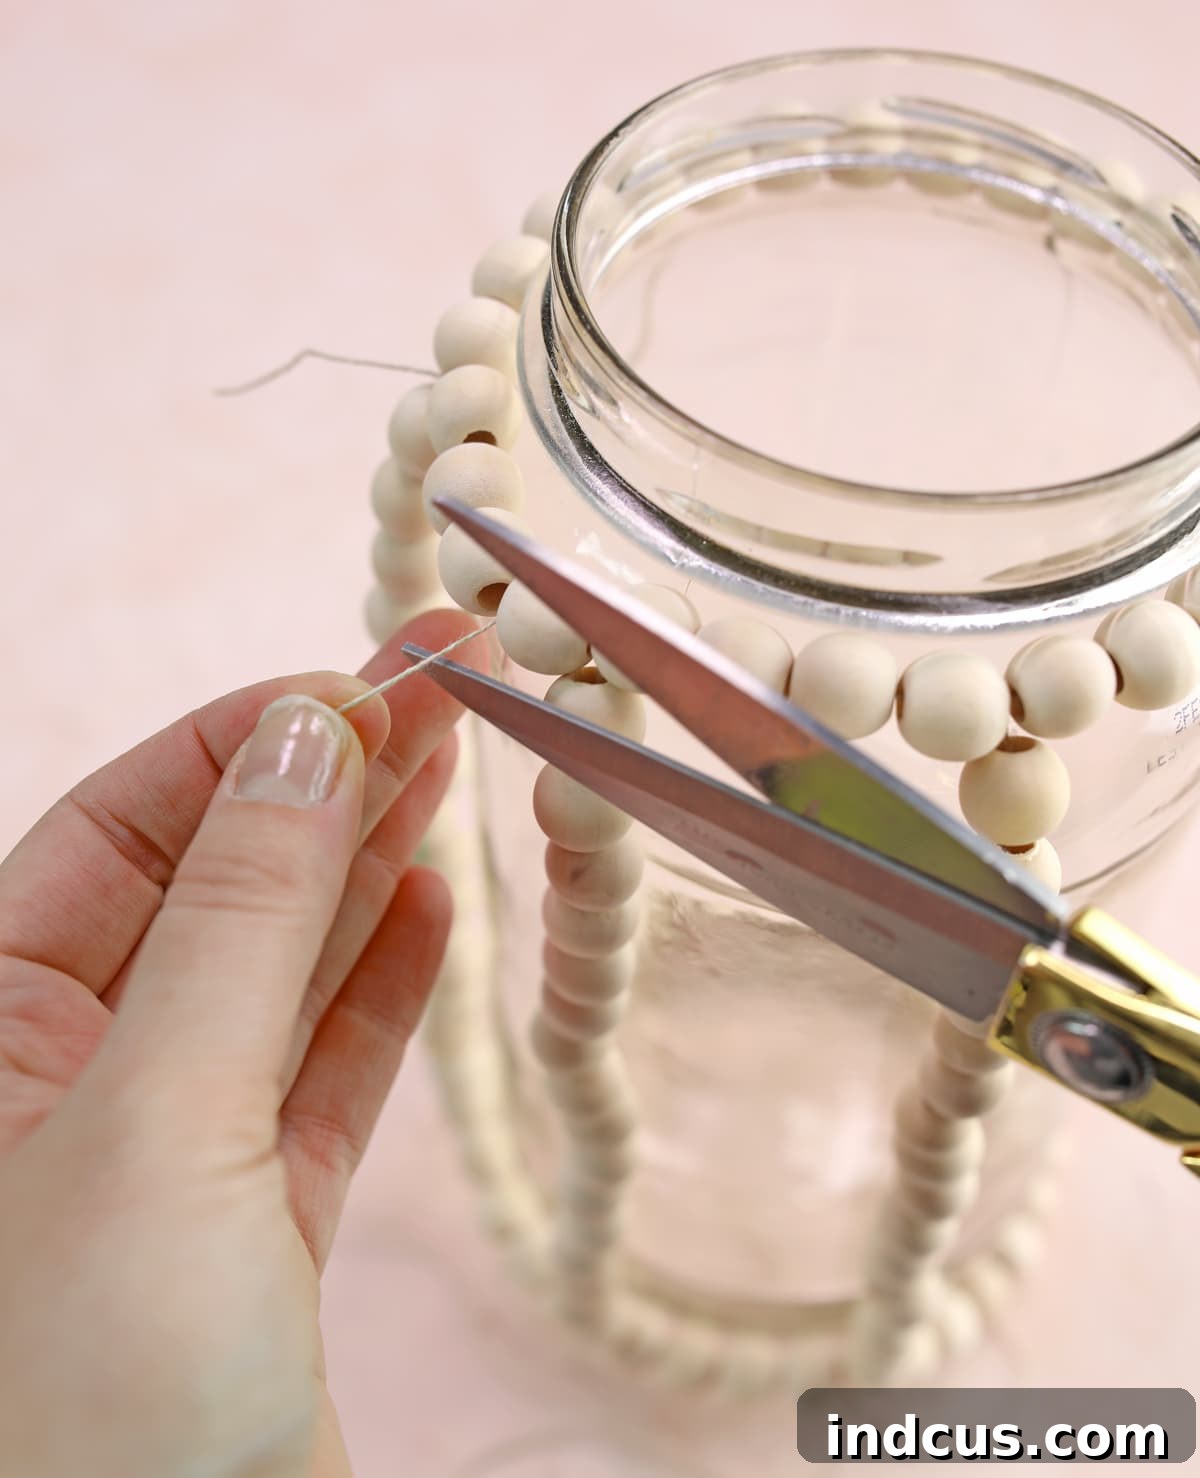
Step 6: Adding the Light Source
The final and most rewarding step is to place your chosen light source inside the finished lantern. Carefully set an LED candle (or a real flame candle, if preferred and safely situated) into the bottom of the glass jar. Turn it on, and watch as your repurposed jar transforms into a captivating wood bead lantern, casting a warm and inviting glow. Congratulations, your beautiful DIY decoration is complete!
This entire process is a testament to how simple materials and a bit of creativity can lead to truly stunning results. From a simple pickle jar to an elegant lantern, the transformation is incredibly satisfying.
Visual Guidance: Wood Bead Lantern DIY Tutorial
For those who prefer a visual demonstration or have further questions, a comprehensive video tutorial showcasing the entire process from start to finish is available on our website. It offers a detailed look at each step, helping visual learners navigate the craft with ease and confidence.
I am absolutely delighted with how this simple yet elegant craft project turned out. The ability to transform something as ordinary as a pickle jar into a chic, decorative lantern is incredibly satisfying. It’s always wonderful when a creative vision comes together so beautifully, especially when it involves both enjoying a tasty treat (the pickles!) and producing a gorgeous piece of DIY home decor. This project truly embodies the joy of repurposing and handmade artistry.
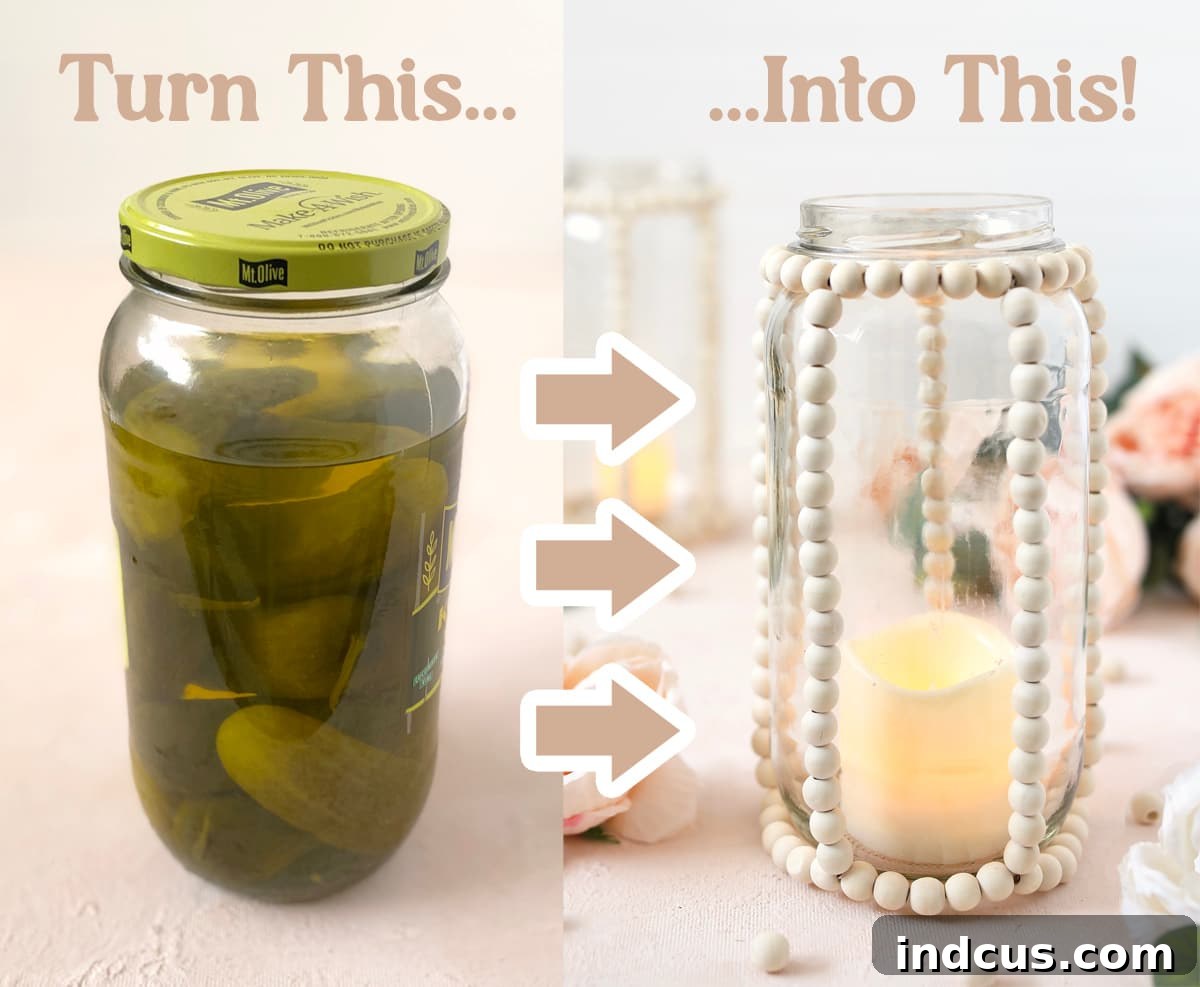
Do you have a special occasion coming up, perhaps a wedding, a backyard BBQ, or just a desire to refresh your living space with some charming, unique decor? These elegant wood bead lanterns are the perfect solution. Now that you know precisely how to make them, you have the power to create beautiful, personalized accents that will surely impress and enchant. Embrace the joy of DIY and illuminate your world with these enchanting lanterns!







