Spooktacular DIY Halloween Luminaries: A Fun & Easy Craft for Festive Porch Decor
Halloween is a time for creativity, spooky fun, and transforming our homes into enchanting havens of holiday spirit. What better way to welcome trick-or-treaters and delight passersby than with glowing, handmade decorations? We’re thrilled to share a super cute and incredibly simple DIY project today: dazzling Halloween luminaries! These charming crafts are perfect for adding a touch of whimsical spookiness to your porch, pathway, or even indoors. Requiring just a few basic supplies and minimal crafting experience, these luminaries look absolutely fantastic both day and night, casting a warm, inviting glow that’s perfect for the season.
Forget generic store-bought decor; these handmade monster and ghost luminaries bring a personalized touch that mass-produced items simply can’t match. They are not only a joy to create but also offer a wonderful opportunity for family crafting time. Imagine the smiles as your little ones help bring these friendly (or spooky!) creatures to life. Ready to illuminate your Halloween night with a project that’s as easy as it is exciting? Let’s dive into making these captivating DIY luminaries step-by-step!
Why Choose DIY Halloween Luminaries?
Handmade decorations hold a special place in holiday traditions, and these DIY Halloween luminaries are no exception. Beyond the satisfaction of creating something beautiful with your own hands, there are numerous advantages to choosing this craft for your seasonal decor. Firstly, they are incredibly cost-effective, utilizing readily available and inexpensive materials that you might even have lying around your craft stash. Secondly, their customizable nature means you can tailor them to perfectly match your existing Halloween theme or create an entirely new one. Whether you prefer cute monsters, classic ghosts, or something entirely unique, the design possibilities are endless.
Furthermore, these luminaries offer a safe alternative to traditional candles, thanks to the use of LED tea lights. This makes them ideal for homes with children and pets, allowing you to enjoy the enchanting glow without any fire hazards. The simple construction also means this is a fantastic project for crafters of all ages, fostering creativity and providing a rewarding hands-on experience. They provide a unique blend of festive ambiance and personal expression, making your Halloween display truly stand out.
Gather Your Spooky Supplies
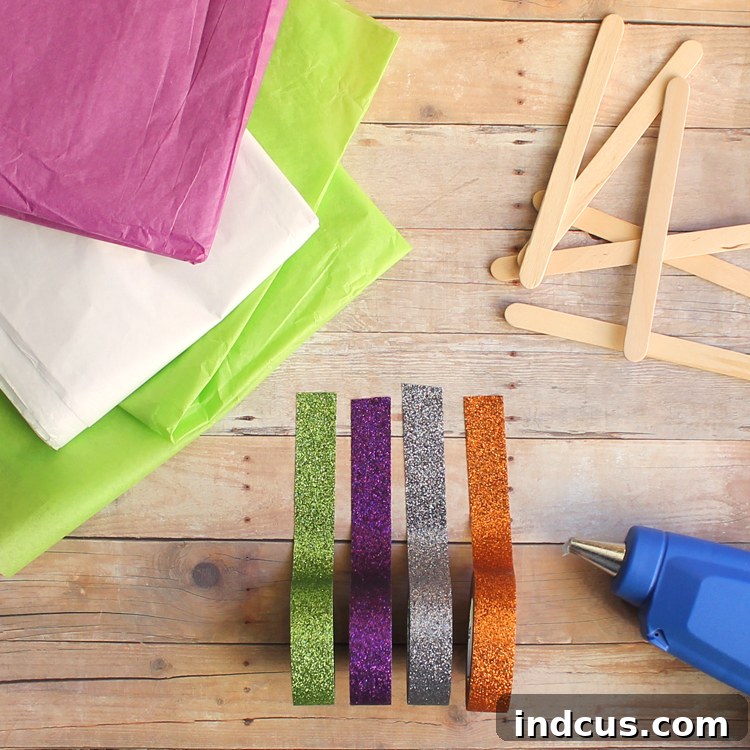
Before we embark on this exciting crafting journey, let’s ensure we have all our magical ingredients ready. The beauty of this project lies in its simplicity, requiring only a handful of common craft items. Gather these essentials, and you’ll be well on your way to creating your own captivating Halloween luminaries:
- Glitter Washi Tape: This adds a fantastic sparkle and helps conceal seams, giving your luminaries a polished look. Choose Halloween-themed colors like black, orange, purple, or green for extra flair.
- Wooden Craft Sticks: Also known as popsicle sticks, these form the sturdy skeleton of your luminary cubes. They’re affordable and easy to work with.
- Tissue Paper: This translucent material allows the light to shine through beautifully. White is perfect for ghosts, while various colors can create different monster effects.
- Sharpie Marker (Black): Essential for drawing those iconic spooky faces that bring your luminaries to life.
- Hot Glue Gun & Glue Sticks: For quick and secure adhesion. We recommend this for impatient crafters! (See safety note below for younger crafters).
- LED Tea Lights: The safe and flickering heart of your luminaries, providing a warm, inviting glow without any fire risk.
Step-by-Step Guide to Crafting Your Enchanting Luminaries
Let’s get crafting! Follow these simple steps to construct your stunning Halloween luminaries. We’ll walk you through each stage, ensuring a smooth and enjoyable crafting experience.
1. Prepare Your Tissue Paper Panels
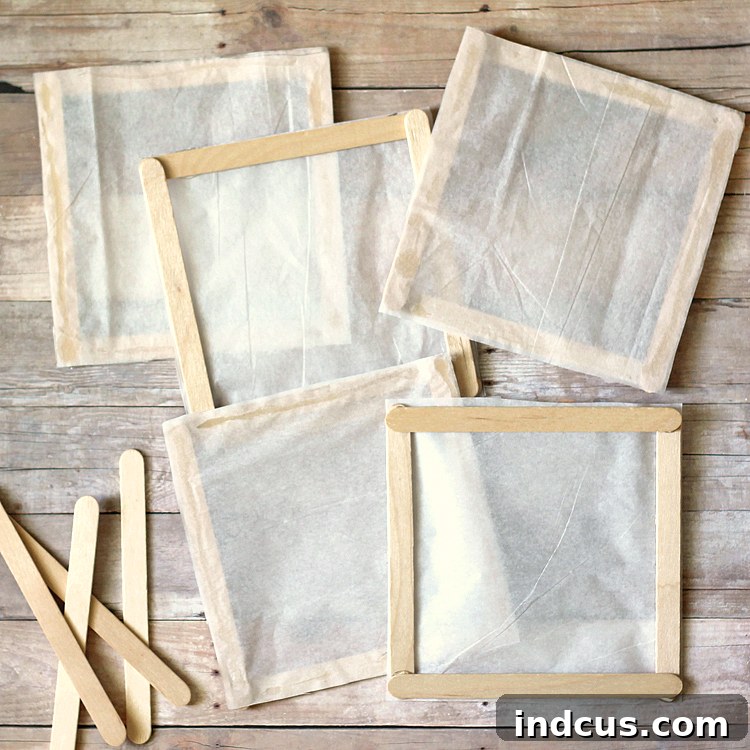
The foundation of your luminary cube consists of five tissue paper panels. Start by cutting five identical squares of tissue paper, each measuring approximately 4 1/2 inches by 4 1/2 inches. Precision here helps ensure your final cube is neat and well-formed. Once your squares are cut, it’s time to add the structural support. Carefully glue a wooden craft stick along each of the four edges of four of your tissue paper squares. For the fifth square, glue sticks along all four edges as well. I personally opt for a hot glue gun because of its rapid drying time, which is perfect for impatient crafters like myself! However, if you’re crafting with children, prioritize safety by using school glue. While it takes longer to dry, it completely eliminates the risk of burns to little fingers, making the activity safer and more enjoyable for everyone. You’ll end up with individual squares framed by craft sticks.
2. Assemble the Cube Structure
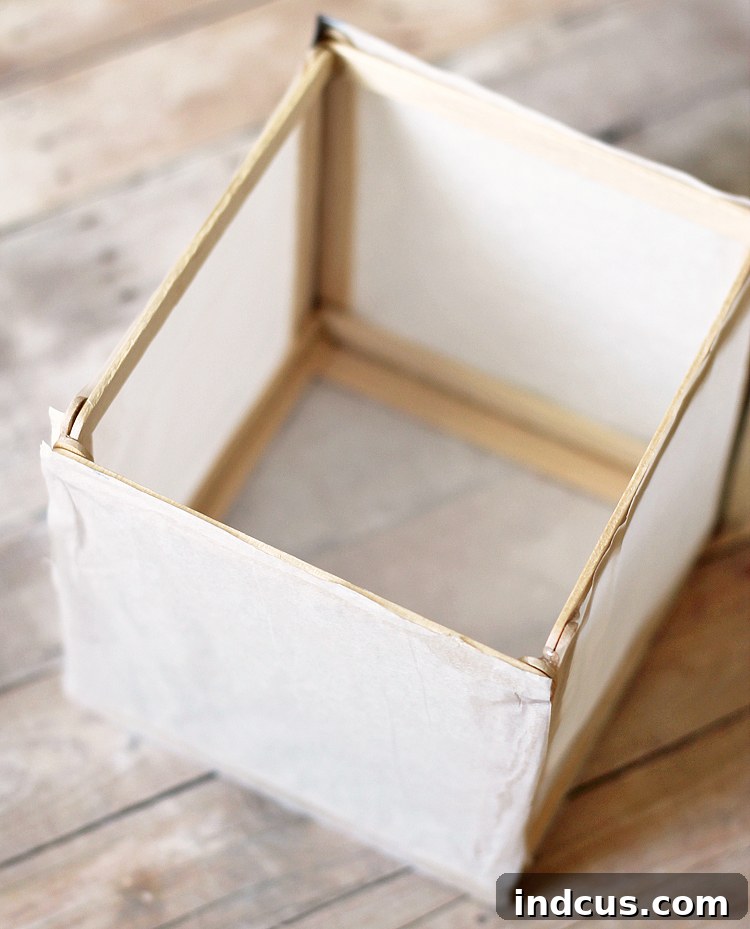
Now that you have your individual panels, it’s time to bring them together to form the three-dimensional shape of your luminary. Take four of the prepared squares and begin to glue them together along their craft stick edges, forming a cube with one side still open. The craft sticks provide excellent gluing surfaces, making this step straightforward. Apply a bead of hot glue along the side of one craft stick and press it firmly against the craft stick edge of another square. Hold for a few seconds until secure. Continue this process, building up the sides of your cube. The open side will serve as the top or bottom opening, allowing you to insert the LED tea light and, if desired, add a handle later. Take your time to ensure the corners are as square as possible for a sturdy and aesthetically pleasing final product.
3. Add Spooky Bling with Washi Tape
This is where your luminaries start to get their charming, finished look! Take your glitter washi tape and begin to line the vertical edges around the cube. The tape serves a dual purpose: it neatly hides any visible seams where the craft sticks meet, and it adds a fantastic touch of sparkle and “bling” to your creation. After you’ve covered the vertical edges, repeat the process along the top and bottom edges of the cube. Don’t be shy with the glitter – because when it comes to Halloween decorations, can you really have too much sparkle? While washi tape is wonderfully decorative, it isn’t always the strongest adhesive. To ensure your beautiful embellishments stay perfectly in place throughout all your Halloween festivities, I recommend securing the beginning and end of each piece of washi tape with a tiny dot of hot glue. This small extra step prevents any pesky peeling and keeps your luminaries looking pristine.
4. Bring Your Monsters to Life with Faces
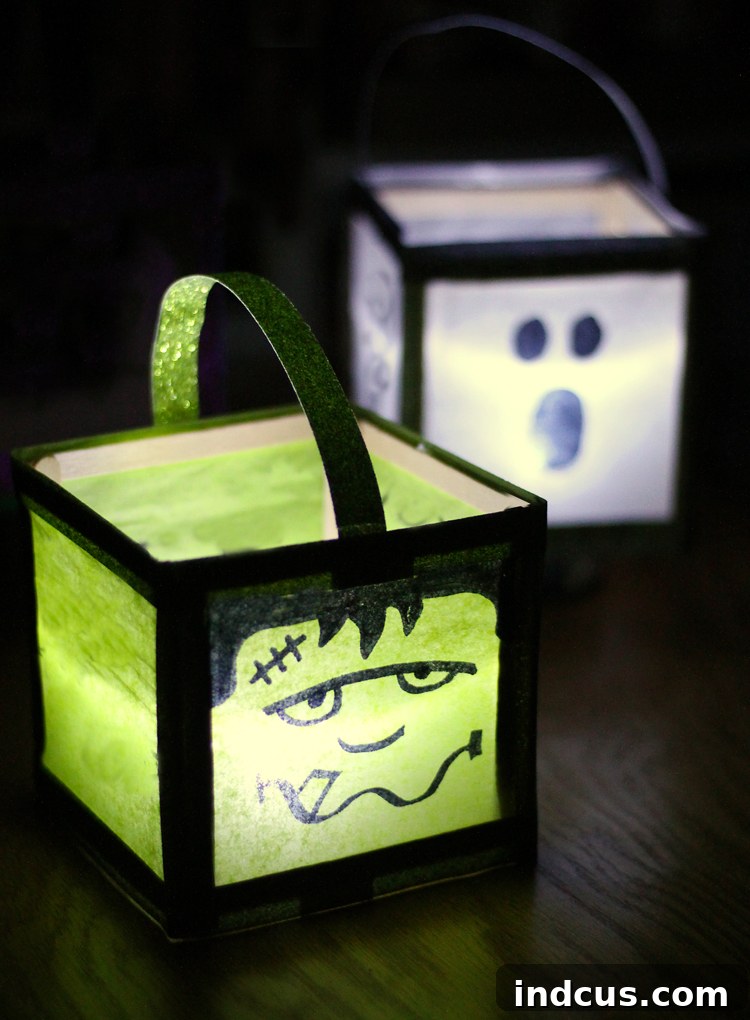
Now for the most fun part – giving your luminaries their unique personalities! Grab your black Sharpie marker and unleash your creativity. On each of the four tissue paper sides of your luminary cube, draw a distinct Halloween face. Think classic ghosts with simple ovals for eyes and a wavy mouth, or get playful with monster faces featuring jagged teeth, mismatched eyes, or even Frankenstein’s iconic stitch marks. You can draw spooky eyes, goofy grins, or even spiderwebs. This step allows for immense personalization, making each luminary truly one-of-a-kind. If your luminaries are intended to sit on a flat surface, such as a porch step or a table, you’re essentially done with the decorative elements!
5. Optional: Create a Hanging Handle
If you envision your enchanting luminaries hanging from a porch railing, tree branch, or shepherd’s hook, you’ll need to add a sturdy handle. This is easily done using more of your glitter washi tape. Cut one piece of washi tape approximately 11 inches long and another piece about 9 inches long. Carefully stick these two pieces together, adhesive sides facing each other. This creates a double-sided, extra-strong strip of tape that forms your handle, ensuring it’s durable enough to support the luminary without tearing. The glitter on both sides also adds extra sparkle!
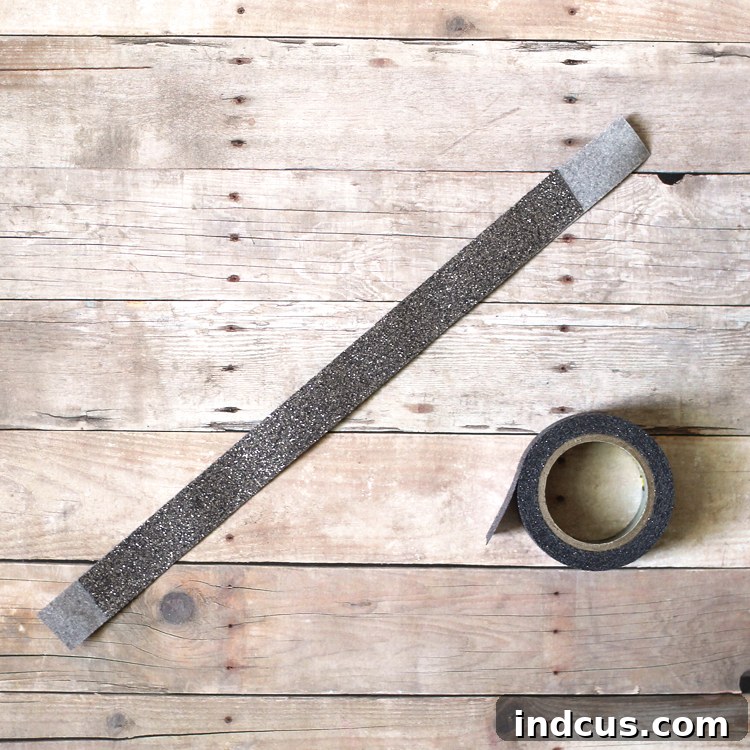
Once your handle is ready, securely attach it across the open side of your cube. Use a generous amount of hot glue at each end to bond the handle firmly to the craft stick frame. Allow the glue to cool and set completely before hanging to ensure maximum stability. This ensures your luminaries will sway gently in the breeze without fear of falling.
6. Light Up Your Creation!
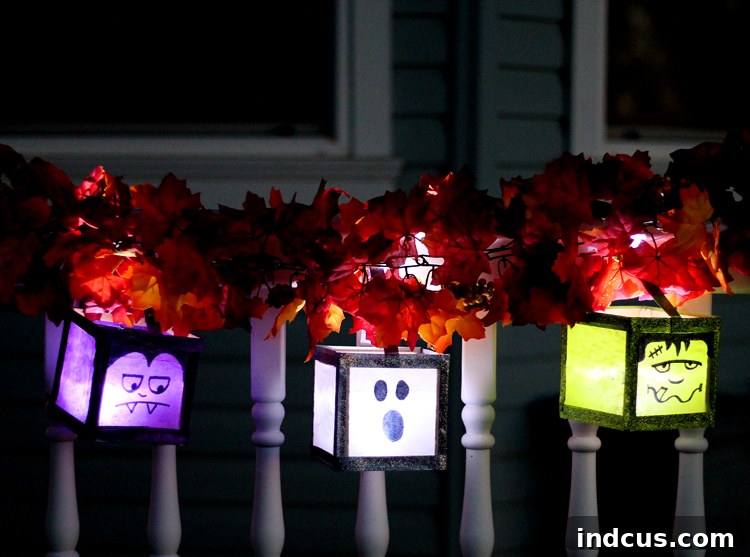
The moment of truth! Gently place an LED tea light inside each of your newly crafted luminaries through the open side. Flip the switch on the tea light, turn down the ambient lights, and watch as your cute, spooky creations come to life with a warm, flickering glow. It’s truly magical to see the monster faces illuminate and cast dancing shadows, instantly transforming any space into a festive Halloween wonderland. The soft light filtering through the tissue paper creates an ethereal effect, making your handmade decor truly shine!
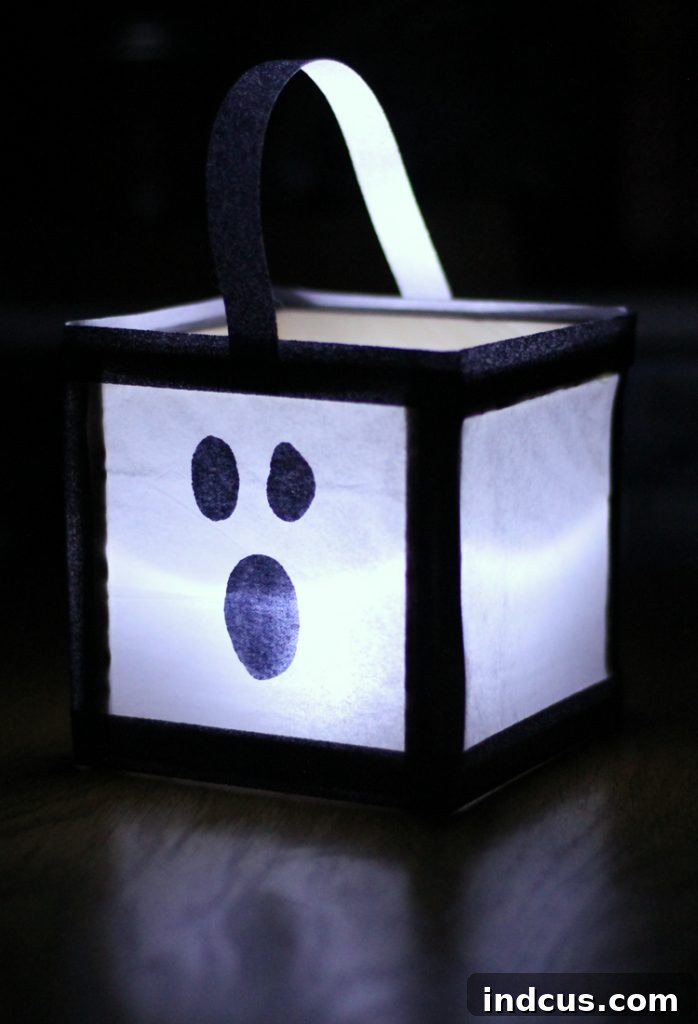
Isn’t the transformation incredible? Each luminary, with its unique face and shimmering details, radiates a delightful charm. The Frankenstein face, in particular, always captures my heart with its quirky and endearing appeal. Look at how adorably he glows!
Creative Variations & Customization Ideas
While the monster and ghost themes are absolutely charming, the beauty of DIY projects lies in their adaptability! Here are some ideas to inspire even more unique Halloween luminaries:
- Theme It Up: Instead of traditional monsters, try drawing pumpkin faces, friendly vampires, spooky spiders, or even black cats. You could also create themed sets, like a collection of different classic monsters.
- Color Play: Experiment with various colors of tissue paper! Orange for pumpkins, green for classic monsters, purple for witches, or even vibrant multi-colored panels for a truly whimsical look.
- Alternative Decorations: Not a fan of washi tape? Use glitter glue, acrylic paints, or even marker pens to draw intricate patterns or borders on the craft sticks. You could also glue on small embellishments like googly eyes, sequins, or tiny plastic spiders before assembly.
- Size Matters: Adjust the size of your tissue paper squares and craft sticks to create larger or smaller luminaries. A collection of varying sizes adds visual interest to your display.
- Indoor Charm: While perfect for porches, these luminaries also make fantastic indoor decorations for Halloween parties. Arrange them on a mantelpiece, along a bookshelf, or as a centerpiece for a festive glow.
- Personalized Touches: Write spooky messages or names on the luminaries for a personalized touch, using metallic markers for extra flair.
Safety First: Important Tips for Crafting
While this is a fun and generally safe craft, a few precautions can ensure everyone has a great time:
- Hot Glue Gun Safety: If using a hot glue gun, especially with children, always supervise closely. Teach them how to handle the gun safely, and consider using low-temperature glue guns or school glue for younger crafters to prevent burns.
- LED Tea Lights Only: Always use battery-operated LED tea lights instead of real candles. This completely eliminates any fire risk, making your luminaries safe for both indoor and outdoor use, particularly around flammable materials like tissue paper.
- Ventilation: If you’re using spray adhesives or paints, ensure you’re in a well-ventilated area.
Displaying Your Enchanting Luminaries
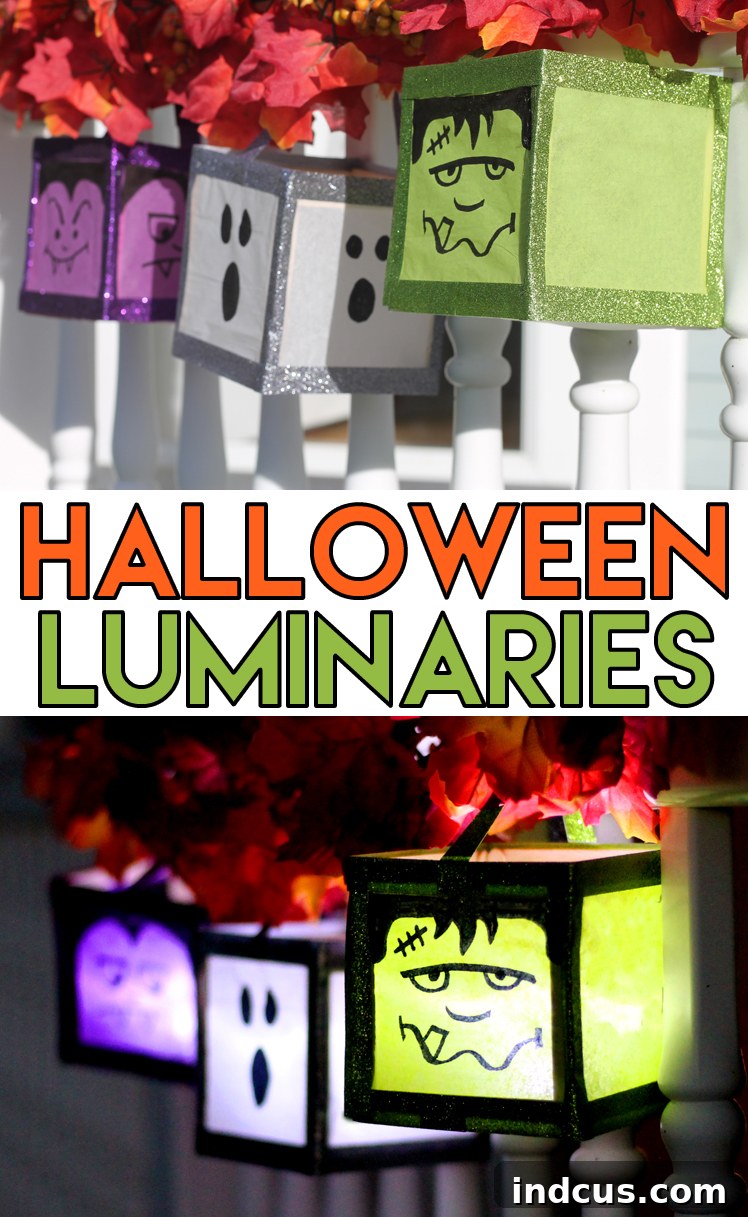
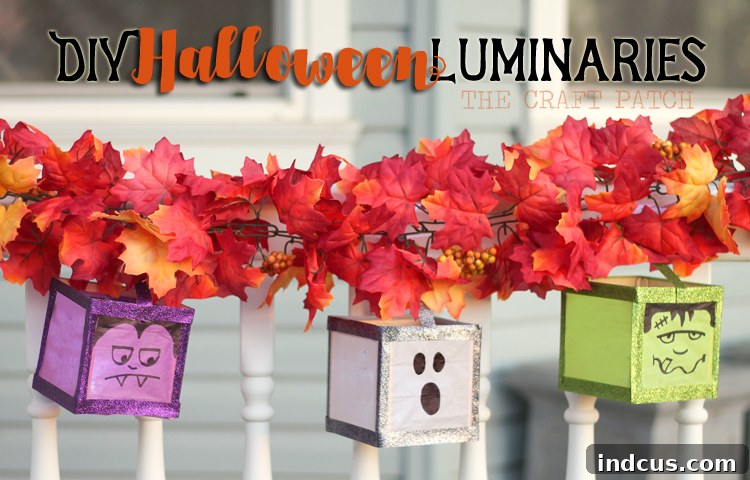
Once your charming luminaries are complete, it’s time to find the perfect spot for them to shine! They are incredibly versatile and can enhance almost any area of your home or garden. For a truly captivating outdoor display, I used a piece of string to hang my luminaries from the porch railing, weaving them amongst a garland of colorful Fall leaves. The effect is simply magical – during the day, they sparkle with glitter and add a cute, festive touch, and as dusk falls, they transform into glowing beacons of Halloween fun. The vibrant colors of the tissue paper and the subtle glitter truly pop when illuminated, creating an eye-catching focal point.
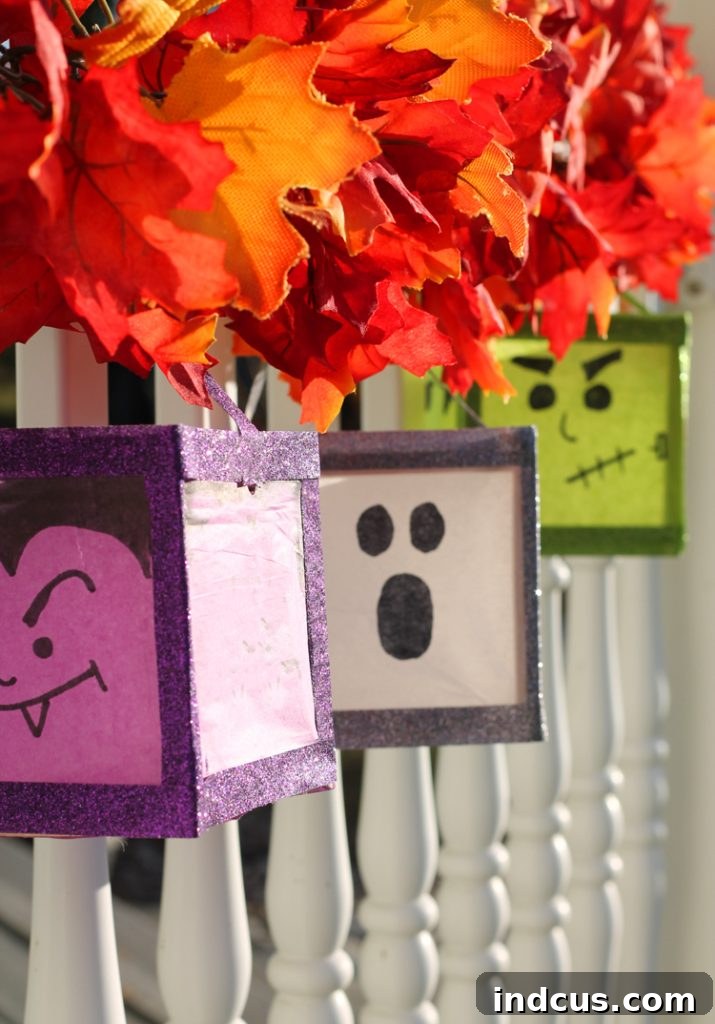
Consider placing them along your garden path to guide trick-or-treaters, on porch steps to add an inviting glow, or even nestled among pumpkins and hay bales for a classic autumnal look. Indoors, they make fantastic centerpieces for a Halloween feast, delightful accents on windowsills, or playful nightlights in children’s rooms for the spooky season. The possibilities are endless, and wherever you choose to display them, these DIY luminaries are sure to evoke smiles and amplify the festive spirit of Halloween.
Watch the Magic Unfold: Video Tutorial
Prefer to see the crafting process in action? We’ve put together a handy video tutorial that walks you through each step of creating these delightful Halloween luminaries. Watch along to visualize the assembly process and pick up any extra tips and tricks to make your crafting experience even smoother.
Conclusion: Illuminate Your Halloween Spirit
Creating these DIY Halloween luminaries is more than just a craft; it’s an invitation to infuse your home with personal charm and festive cheer. With minimal effort and supplies, you can transform simple materials into captivating decorations that will bring smiles to faces and light up your Halloween nights. Whether you’re a seasoned crafter or just looking for an easy, fun project to do with the family, these glowing monsters and ghosts are the perfect addition to your spooky season traditions. So gather your supplies, let your imagination run wild, and get ready to illuminate your porch and spread some handcrafted Halloween magic!
Loved this craft? Pin it now so you can easily find it for next Halloween or share it with fellow craft enthusiasts!