
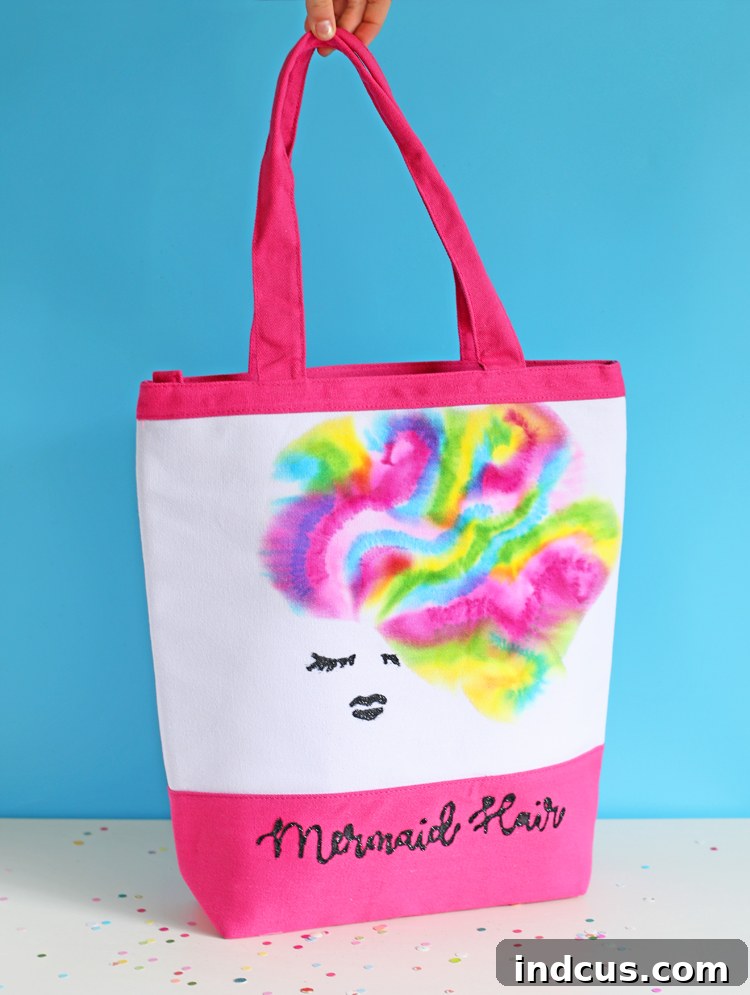
As the days grow longer and the scent of blossoms fills the air, there’s an undeniable energy that comes with spring, signaling the joyful arrival of summer. This is the perfect time to infuse a little handmade magic into your wardrobe and accessories. Embracing this vibrant season, I recently embarked on a creative journey, experimenting with various craft supplies to bring a truly unique and playful vision to life: a stunning, personalized tote bag that’s sure to be my go-to accessory all summer long!
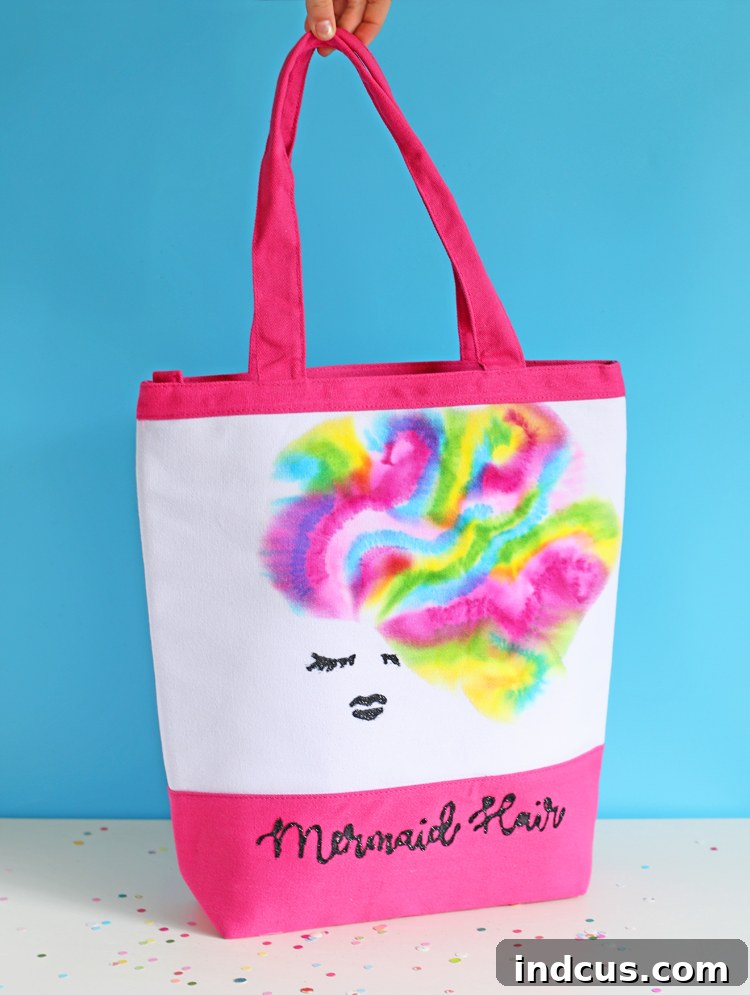
My latest creation is a whimsical, mermaid-themed tote bag, bursting with color and personality. What truly makes this bag special, you ask? It’s the mermaid’s hair – a dazzling cascade of colors achieved through an innovative Sharpie tie-dye technique that’s both mesmerising and incredibly easy to master. This project isn’t just about crafting; it’s about bringing a piece of oceanic fantasy into your everyday life, perfect for beach trips, farmers’ market runs, or simply adding a splash of joy to your outfit. The best part? You can gather all the necessary supplies, including the essential blank canvas bag, from your local craft store like Michaels.
Ready to dive into the enchanting world of DIY fashion? Let’s transform a simple canvas bag into a magnificent mermaid masterpiece that will turn heads and spark conversations wherever you go. Follow these simple steps to craft your very own bespoke mermaid tote bag.
Craft Your Own Enchanting Mermaid Tote Bag: A Sharpie Tie-Dye Adventure
Personalizing your accessories allows you to express your unique style and creativity. This DIY mermaid tote bag project offers a fantastic opportunity to do just that, blending artistic flair with practical utility. It’s an accessible craft for all skill levels, promising a delightful outcome that you’ll be proud to carry.
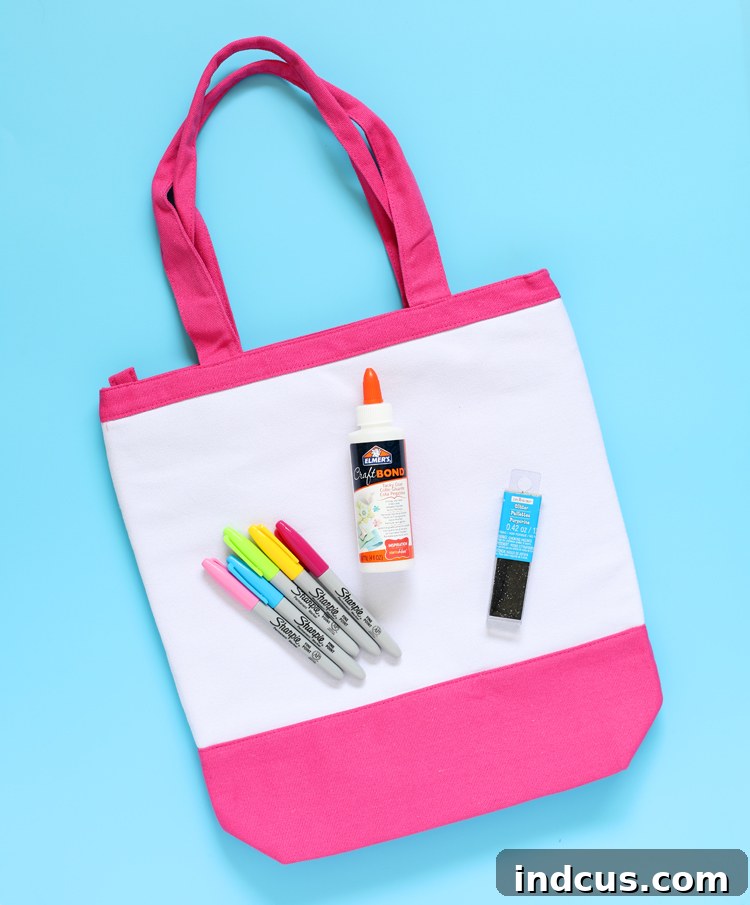
Essential Supplies for Your Mermaid Tote Bag Project:
- Blank Canvas Tote Bag: Choose a sturdy, light-colored canvas bag. The lighter the fabric, the more vibrant your Sharpie colors will appear. Make sure it’s pre-washed and completely dry to ensure optimal ink absorption.
- Assorted Sharpie Markers: A variety of bright, permanent markers are key. The more colors you have, the more dynamic and beautiful your mermaid hair will be. Fine-tip Sharpies are excellent for details, while chisel-tip markers can cover larger areas.
- Elmer’s CraftBond Tacky Glue: This strong, fast-drying adhesive is perfect for securing glitter and creating dimensional designs that hold up well. Its tackiness ensures glitter adheres beautifully without excessive shedding.
- Fine Glitter: Select an array of glitter colors that complement your mermaid theme – iridescent, silver, gold, and vibrant blues or greens work wonderfully for scales and facial features.
- 91% Strength Rubbing Alcohol (Isopropyl Alcohol): This high-strength alcohol is crucial for achieving the stunning tie-dye effect with your Sharpie ink. Lower concentrations may not yield the same vibrant bleed.
- Medicine Dropper or Pipette: Essential for precise application of the rubbing alcohol. This tool allows you to control the amount and placement of alcohol, preventing over-saturation and ensuring a controlled tie-dye spread.
- Protective Surface Cover: Old newspapers, cardboard, or a plastic tablecloth to protect your workspace from ink and alcohol spills.
- Pencil (Optional): For sketching out facial features or text before applying glue and glitter.
Step-by-Step Guide to Your Sharpie Tie-Dye Mermaid Masterpiece:
Before you begin, lay your blank canvas tote bag flat on a protected surface. Place a piece of cardboard or several layers of newspaper inside the bag to prevent the Sharpie ink and alcohol from bleeding through to the other side.
1. Design Your Mermaid Hair with Sharpies:
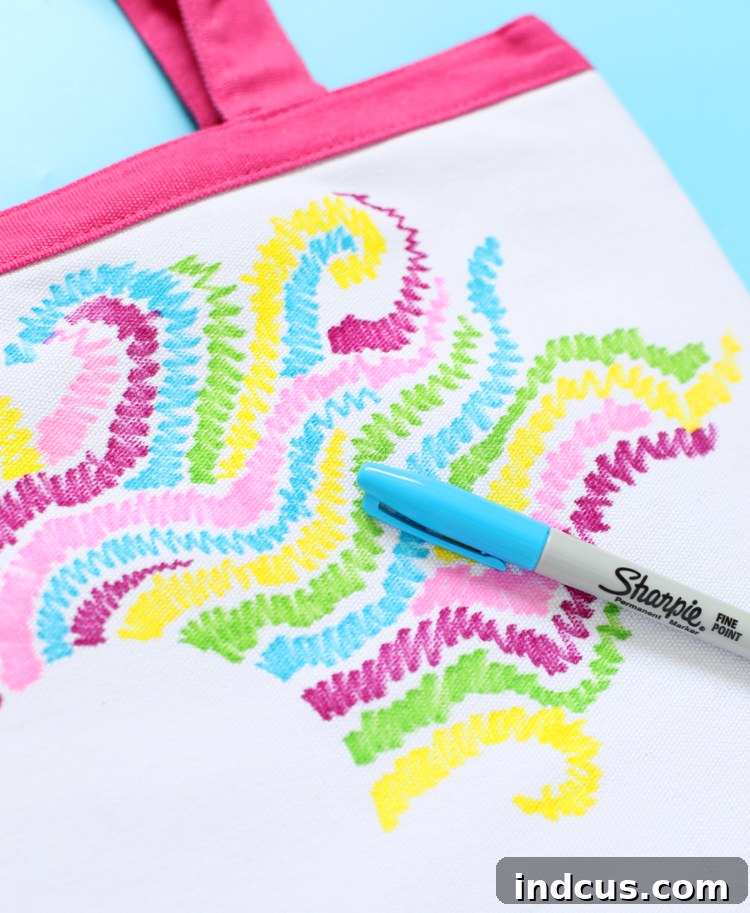
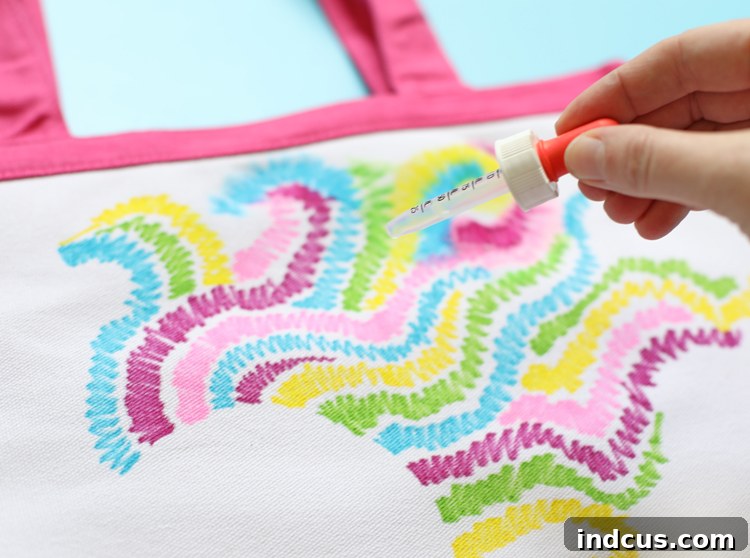
Begin the magical transformation by coloring your chosen design onto the tote bag using your collection of Sharpie markers. For a captivating mermaid theme, I opted to draw flowing, curly wisps of hair, interweaving strands in a spectrum of enchanting colors. Don’t be afraid to mix and match; think vibrant blues, purples, greens, and pinks to truly evoke the spirit of the ocean. Sketch lightly with a pencil first if you prefer, then go over your lines with the markers. The key here is to lay down a good amount of ink; the more intense the color, the more dramatic the tie-dye effect will be. Let your imagination guide you – whether it’s long, wavy locks, intricate braids, or a wild, free-flowing mane, make it uniquely yours.
2. Unleash the Tie-Dye Magic with Rubbing Alcohol:
Once you’re completely satisfied with your Sharpie design and the colors are boldly laid out, it’s time for the most exciting part: creating the stunning watercolor tie-dye effect. Fill your medicine dropper with 91% strength rubbing alcohol. Carefully and slowly drip small amounts of alcohol directly onto your Sharpie marker design. Observe as the alcohol interacts with the permanent ink, causing it to bleed, spread, and beautifully blend together, transforming your distinct lines into a soft, watercolor-like tie-dye masterpiece. This process is truly mesmerizing! Remember, it’s always better to start with small drops and proceed gradually. You can always add more alcohol to encourage further bleeding, but you can’t remove it once applied. Experiment with placing drops on different color junctions to see how they meld. Allow ample time for the alcohol to evaporate and the colors to fully set before moving to the next step.
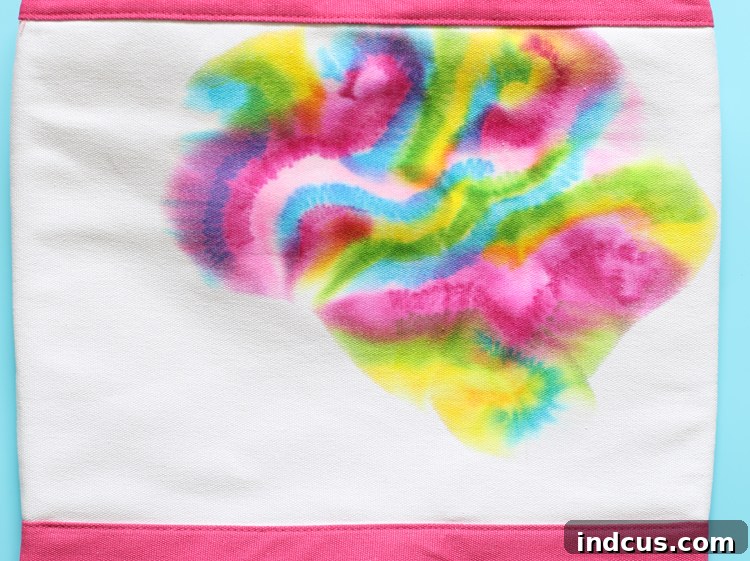
After the rubbing alcohol has done its work and evaporated, the transformation is truly remarkable. What began as bold, distinct lines now appears as a beautifully softened, organically blended tie-dye pattern. This technique offers the visual appeal of traditional tie-dye but with significantly more control over the final outcome, allowing for intricate designs without the mess and complexity. The colors fuse and flow, creating an almost ethereal quality, perfectly befitting a mermaid’s mystical allure. Isn’t it absolutely stunning how the edges soften and the hues melt into one another?
3. Bringing Your Mermaid to Life with Glitter Accents:
This next phase is where your mermaid truly comes to life, adding dazzling sparkle and personality that makes the entire project pop! Ensure your Sharpie and alcohol design is completely dry before proceeding.
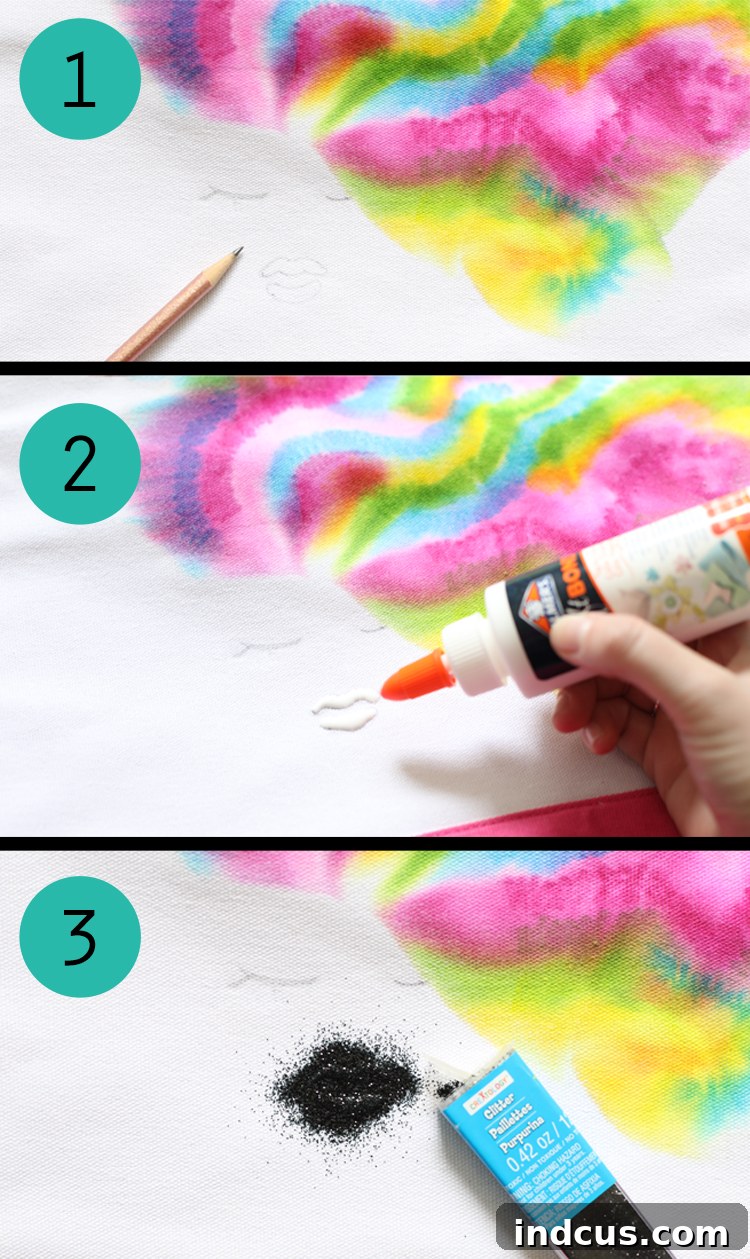
- Sketch Your Features: Using a pencil, lightly sketch out the mermaid’s eyes and mouth. This step is crucial for achieving the desired expression and ensuring symmetry before applying permanent elements.
- Apply Tacky Glue: Carefully trace over your pencil sketch with Elmer’s CraftBond Tacky Glue. Be precise and apply the glue in a consistent line – this will form the foundation for your glitter design.
- Glitter Application: Immediately and generously sprinkle your chosen glitter over the wet glue design. Ensure the glue is fully covered. Gently tap the bag to remove any excess glitter, revealing a beautifully defined, sparkling face. The tackiness of the glue will hold the glitter securely, creating a wonderful, raised texture.
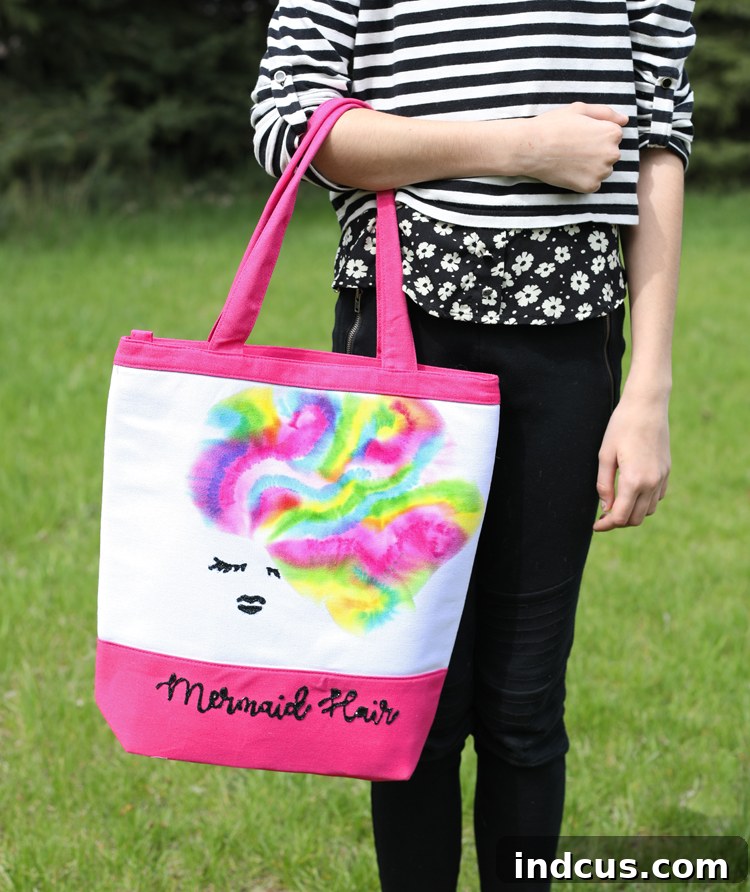
Beyond facial features, I also decided to add a playful touch by emblazoning the words “Mermaid Hair” onto the bottom pink section of the bag. I employed the exact same glue and glitter method, which yielded stunning results. This technique is simply brilliant because the glittered elements acquire an incredible three-dimensional quality, thanks to the thickness and hold of the tacky glue. The raised, sparkling text and features add depth and visual interest, making the design truly pop and giving the bag a luxurious, handcrafted feel. It looks absolutely fantastic and is a testament to the power of simple materials combined with creative application!
Tips for Longevity and Care of Your DIY Mermaid Tote Bag:
- Setting the Ink: While Sharpie ink is permanent, for added durability, especially after the alcohol application, consider heat-setting your design. Place a cloth over the design and iron on a medium setting for a few minutes. Always test a small, inconspicuous area first.
- Washing Instructions: To preserve your beautiful creation, hand wash your tote bag in cold water with a mild detergent. Avoid harsh scrubbing or machine washing, which can cause the glitter to loosen and the colors to fade. Air dry thoroughly.
- Protecting Glitter: For extra glitter security, you can spray a clear fabric sealant over the glittered areas once the glue is completely dry. This helps prevent shedding and adds a protective layer.
Unleash Your Inner Ocean Goddess: Variations & Customizations
This project is incredibly versatile! While a mermaid theme is charming, feel free to adapt the Sharpie tie-dye and glitter technique to other designs. Imagine a cosmic galaxy tote, a vibrant floral explosion, or even abstract geometric patterns. You could also add other embellishments like fabric paint details, iron-on patches, or even small sewn-on charms to further personalize your bag. Experiment with different marker brands for varying effects, or try fabric paints for a different texture. The only limit is your imagination!
With your dazzling new mermaid tote bag complete and sparkling, you are now perfectly equipped to embrace all the adventures summer has to offer. Whether you’re heading to the beach, strolling through a sunny park, or simply running errands, this unique accessory will undoubtedly add a splash of personalized charm to your day. I, for one, can barely contain my excitement to flaunt my cute new tote bag – that is, if my ever-so-stylish teenage daughter doesn’t claim it for herself first! It seems I might be planning another trip back to Michaels very soon, perhaps to acquire another blank canvas so I can ensure I get to keep one of these delightful creations all to myself. Happy crafting, and may your summer be as bright and colorful as your new handmade tote!







