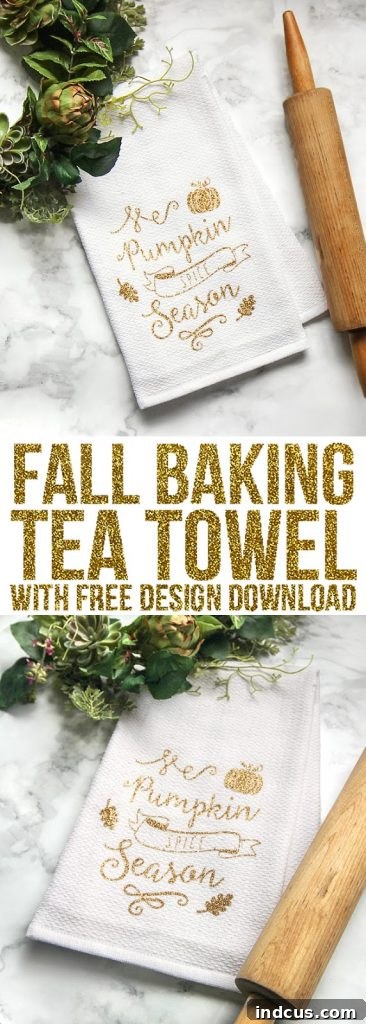
DIY Fall Tea Towel: Dazzling Glitter HTV Project for Silhouette & Cricut Enthusiasts
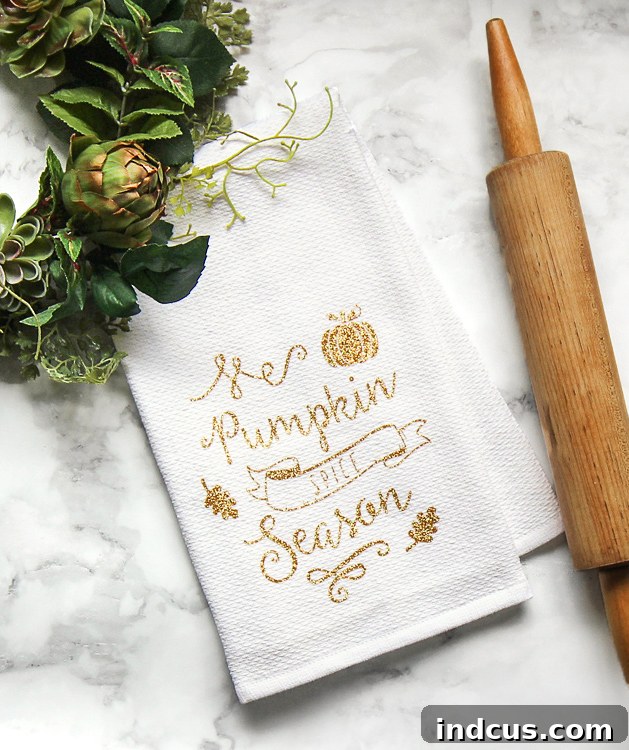
The crisp air and vibrant colors of autumn signal the perfect time to infuse your home with cozy, handcrafted charm. Fall crafting has officially begun, and there’s no better way to kick off the season than by creating beautiful, personalized decorations that capture the spirit of autumn. From now until Thanksgiving, imagine your home adorned with unique pieces that reflect your creativity and love for the season. Today, we’re diving into an incredibly fun and straightforward project: a custom fall tea towel, featuring the beloved “Pumpkin Spice Season” theme, brought to life with the dazzling sparkle of glitter heat transfer vinyl (HTV).
This project is designed to be accessible for both Silhouette and Cricut machine owners, guiding you through each step to ensure a flawless finish. Tea towels are wonderfully versatile – they’re practical in the kitchen, yet also serve as charming decorative accents. By adding a touch of glitter HTV, you elevate a simple fabric item into a statement piece that truly shines. We’re thrilled to partner with our friends at Expressions Vinyl, who provided the stunning glitter vinyl for this tutorial. Please note that this post may contain some affiliate links, which help support our crafting endeavors at no extra cost to you.
Why DIY Your Fall Tea Towels? The Benefits of Personalized Decor
There’s an unparalleled satisfaction that comes with crafting your own home decor. DIY tea towels offer numerous advantages over store-bought alternatives. Firstly, they allow for complete customization. You can choose your favorite fall phrases, colors, and even mix and match vinyl types to perfectly match your existing decor or create a unique look. Secondly, they make fantastic, thoughtful gifts. Imagine presenting a friend or family member with a handmade tea towel that celebrates their love for autumn or a specific fall theme. Lastly, creating these towels is often more cost-effective than purchasing high-end designer versions, especially when you can utilize free cut files and readily available materials. It’s a creative outlet that results in beautiful, functional art.
Gather Your Essential Materials for a Sparkling Finish
Before we embark on this exciting crafting journey, let’s ensure you have all the necessary supplies at hand. Having everything ready will make the process smooth and enjoyable:
- Blank Tea Towels: High-quality cotton or linen tea towels work best. Look for ones that are pre-shrunk and a light color to make your design pop.
- Glitter Heat Transfer Vinyl (HTV): For this project, we used the gorgeous glitter HTV from Expressions Vinyl. They offer a fantastic selection, including two beautiful gold glitter shades: “Old Gold” and “Gold.”
- Cutting Machine: A Silhouette Cameo, Silhouette Portrait, Cricut Explore Air, or Cricut Maker machine is essential for precision cutting.
- Cutting Mat: While some HTV can be cut without a mat, using one generally provides more stability and precision.
- Weeding Tool: A specialized weeding tool or a straight pin/craft knife is crucial for removing excess vinyl.
- Iron or Heat Press: A household iron will work, but a heat press offers more consistent temperature and pressure for professional results.
- Parchment Paper or Heat Transfer Cover Sheet: To protect your iron/heat press and the fabric during application. You can find specialized heat transfer cover sheets for optimal results.
- Free Cut File: The “Pumpkin Spice Season” design will be available for download at the end of this post in both PNG and Silhouette file formats.
Both gold colors from Expressions Vinyl are incredibly beautiful. The picture below showcases “Old Gold” at the top and the standard “Gold” at the bottom for comparison. For this particular project, I opted for the “Old Gold” hue, which has a lovely coppery undertone that perfectly complements fall aesthetics.
Step-by-Step Guide to Crafting Your Dazzling Fall Tea Towel
Step 1: Download and Prepare Your Design File
The foundation of any great vinyl project is the design itself. To begin, navigate to the bottom of this post and download the free “Pumpkin Spice Season” templates. You’ll find two file types: a PNG file and a Silhouette Studio file. If you own a Cricut machine or encounter any issues opening the Silhouette file, simply download the PNG version. Open this PNG file within your cutting machine’s design software (Cricut Design Space or Silhouette Studio) and utilize its trace feature to accurately outline the shapes and text. This ensures your machine knows exactly where to cut. If you’re using the Silhouette file, it should open directly, ready for the next step.
Step 2: Scale, Mirror, and Set Cut Parameters
Once your design is loaded into your software, the next critical step is sizing. Adjust the dimensions of the “Pumpkin Spice Season” graphic to perfectly fit your chosen tea towel. Measure your towel to ensure your design is neither too small nor too large for the fabric’s surface. A common size for tea towel designs is around 6-8 inches wide, but this can vary based on your preference. After scaling, it is absolutely essential to MIRROR THE IMAGE! This step cannot be overstated. If you forget to mirror your design, your text will appear backward when applied to the tea towel, rendering all your hard work futile. Always double-check this setting. With the mirroring confirmed, adjust your cut settings. For glitter HTV, a good starting point for Silhouette machines is typically: Blade – 4, Speed – 4, Thickness – 18. For Cricut users, select “Glitter Iron-On” from the material settings, which usually adjusts pressure automatically. Always perform a small test cut if you’re unsure, especially when working with a new type of vinyl.
Step 3: Load Your HTV and Initiate the Cut
Carefully place your glitter HTV onto your cutting mat (if using one), ensuring the shiny side is facing DOWN. The shiny side is the carrier sheet, which protects the vinyl and allows for easy transfer later. If you’re cutting without a mat (some machines and vinyl types allow this), ensure the vinyl is loaded correctly according to your machine’s instructions. Once the HTV is securely loaded into your machine, send your meticulously prepared design to be cut. Monitor the cutting process to ensure it’s proceeding smoothly. While the photo below shows HTV being cut without a mat, for beginners or for added security, using a cutting mat is generally recommended to prevent shifting and ensure a precise cut every time.
Step 4: The Art of Weeding Your Design
Weeding is the process of removing all the excess vinyl from your design, leaving only the parts you want to transfer to your tea towel. This step requires a steady hand and a keen eye. Begin by peeling off the large, surrounding pieces of extra vinyl first. Gently pull the vinyl away from the carrier sheet, allowing your design to emerge. This initial removal clears the bulk and makes the finer details more visible.
Once the larger pieces are removed, use a straight pin, a craft knife, or a specialized weeding tool to meticulously remove the smaller, intricate pieces within your design, such as the centers of letters like ‘P’, ‘u’, ‘i’, ‘c’, and ‘e’. Take your time with this step; patience is key to a clean transfer. Good lighting can significantly aid in spotting tiny pieces you might miss. When you believe you’ve removed all the necessary pieces, a clever trick is to flip the image over. Looking at the design from the adhesive side often makes it easier to spot any tiny flecks of vinyl that might have been overlooked from the front. A perfectly weeded design ensures a professional-looking finished product.
Step 5: Heat Application for a Lasting Bond
Now for the exciting part – transferring your glittery design to the tea towel! First, pre-press your tea towel for a few seconds to remove any moisture and wrinkles, creating a perfectly flat surface for adhesion. Next, carefully center your weeded design (still on its clear carrier sheet) onto your tea towel. Take a moment to ensure it’s straight and exactly where you want it. Once positioned, cover the entire design with a piece of clean parchment paper or a specialized heat transfer cover sheet. This protective layer prevents direct contact between your iron/heat press and the vinyl, safeguarding both the fabric and your heating element.
Using an iron or heat press set to approximately 325°F (160°C), apply firm, even pressure to the covered design for 10-15 seconds. If using a household iron, ensure you cover all areas of the design, moving the iron slowly and applying consistent downward force. Avoid sliding the iron around, as this can cause the vinyl to shift. If using a heat press, simply close the platen for the recommended time. The combination of heat and pressure is crucial for the adhesive on the HTV to bond properly with the fabric fibers. If after 15 seconds, the vinyl doesn’t seem fully adhered, you can apply heat for another 5-10 seconds, but be careful not to overheat, which can scorch the fabric or damage the vinyl.
Step 6: The Big Reveal – Peeling the Carrier Sheet
This is arguably the most satisfying part of the entire process! Once the heat application is complete, it’s time to peel away the clear plastic carrier sheet. For glitter HTV, it’s generally a hot peel, meaning you remove the carrier sheet while the vinyl is still warm. Gently and slowly peel back one corner of the clear plastic. If you notice any part of the vinyl lifting with the carrier sheet, immediately stop, lay the carrier sheet back down, and apply more heat and pressure to that area. Repeat this process until the vinyl is completely adhered to the fabric. A successful peel will leave behind a beautifully bonded, sparkly design that looks professionally applied. You’ll be truly amazed at how vibrant and sparkly this HTV is in person – the glitter effect is absolutely stunning and adds a fantastic dimension to your fall decor.
Care and Longevity Tips for Your Custom Tea Towel
To ensure your beautiful “Pumpkin Spice Season” tea towel remains vibrant and sparkling for many fall seasons to come, proper care is essential. The suggested washing instructions are designed to protect the integrity of the heat transfer vinyl. Always machine wash your tea towel on a gentle cycle, using cold water. Turning the tea towel inside out before washing can also provide an extra layer of protection for the vinyl. Avoid using harsh detergents, bleach, or fabric softeners, as these can degrade the adhesive and sparkle of the HTV over time. For drying, it is strongly recommended to hang the tea towel to dry. High heat from a dryer can potentially melt or warp the vinyl, causing it to peel. If air drying isn’t an option, use the lowest heat setting on your dryer. Following these simple care instructions will help preserve your custom tea towel, making it a cherished part of your fall decor year after year.
Creative Variations and Other HTV Project Ideas
The beauty of working with glitter heat transfer vinyl and cutting machines like Silhouette and Cricut lies in their endless versatility. While a “Pumpkin Spice Season” tea towel is a delightful start, don’t stop there! Consider making a set of matching towels with different fall-themed phrases like “Autumn Leaves & Pumpkin Please,” “Happy Fall Y’all,” or “Gather.” You could also experiment with other items for fall home decor or personalized gifts. Imagine glitter HTV designs on:
- Aprons: Perfect for the fall baker or chef.
- Tote Bags: A stylish way to carry groceries from the farmer’s market.
- Pillow Covers: Add a festive touch to your living room.
- Mugs or Tumblers: (Requires specialized permanent vinyl, not HTV, but uses similar cutting principles).
- T-shirts or Sweatshirts: Create custom apparel for fall outings or family photos.
By simply changing the design, the color of the vinyl, or the base item, you can create a wide array of stunning, personalized projects. The techniques you’ve learned for this tea towel project are directly transferable to many other HTV applications, opening up a world of creative possibilities for your seasonal crafting!
Your Sparkling Fall Decor Awaits!
Crafting this custom “Pumpkin Spice Season” tea towel is a simple yet incredibly rewarding project that adds a touch of personalized sparkle to your fall home decor. The process is straightforward, the materials are accessible, and the result is a beautiful, functional piece you’ll love showcasing throughout the autumn months. Don’t hesitate to download the free cut files below and begin your own fall crafting adventure. We can’t wait to see what dazzling creations you bring to life with glitter HTV and your trusty cutting machine!