
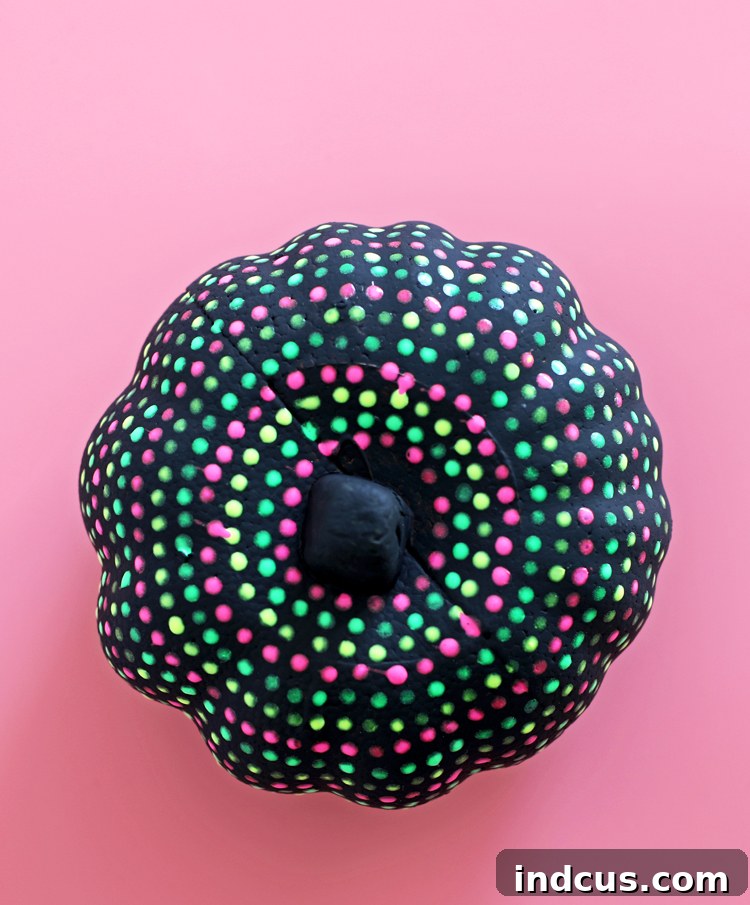
Unlock Halloween Magic: Crafting a Dazzling Glow-in-the-Dark Dot Painted Pumpkin
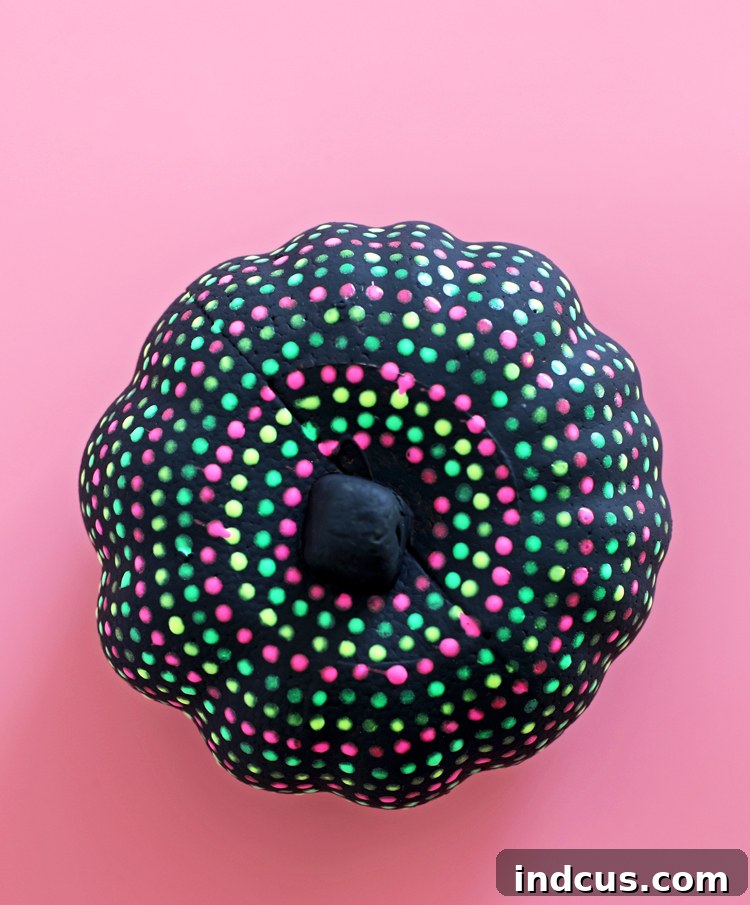
Halloween is a time for spooky delights, creative costumes, and, of course, enchanting decorations. While traditional pumpkin carving offers a classic experience, painting pumpkins has emerged as a wonderfully versatile, safer, and less messy alternative that allows for boundless creativity. Forget the gooey mess and sharp tools – with a brush and some vibrant colors, you can transform an ordinary pumpkin into an extraordinary piece of festive art. Whether you’re a seasoned crafter or just looking for a fun family activity, painted pumpkins offer endless possibilities for expressing your unique style. Be sure to explore a mega list of awesome painted pumpkins for inspiration; there’s truly a pumpkin painting style for every taste and skill level.
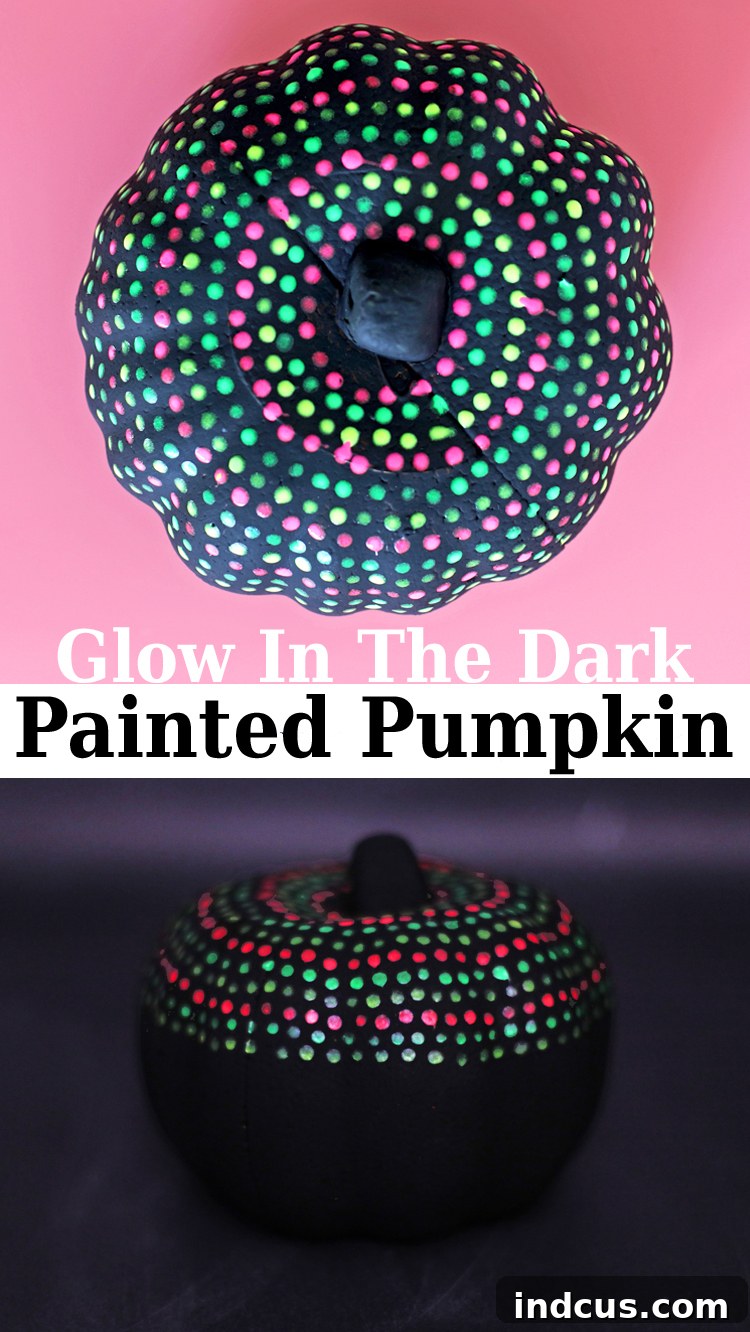
Today, we’re diving into a project that promises to bring an extra layer of magic to your Halloween night: a glow-in-the-dark pumpkin adorned with a playful and eye-catching dot pattern. This craft is not only simple to execute but also delivers a stunning visual impact when the lights go down, making it an absolute showstopper for trick-or-treaters and party guests alike. Imagine the delight as your intricately dotted pumpkin emits a mysterious, soft glow from your porch or living room, instantly elevating your holiday decor. Get ready to unleash your inner artist and create a truly unforgettable Halloween masterpiece!
Why Choose Painted Pumpkins Over Carved?
The debate between carving and painting pumpkins often comes down to personal preference, but painted pumpkins offer several distinct advantages that make them a top choice for many households, especially those with children. Firstly, safety is a major factor. Carving involves sharp knives and tools, which can be hazardous, particularly for younger participants. Painting, on the other hand, is a safe and accessible activity for all ages, allowing everyone to get involved without risk of injury. Secondly, painted pumpkins tend to last significantly longer than their carved counterparts. Once a pumpkin is carved, its flesh is exposed to the elements, accelerating decay and mold growth. A painted pumpkin, especially one that remains intact, can stay fresh for weeks, sometimes even months, allowing you to enjoy your festive creation for an extended period.
Beyond practicality, painting offers unparalleled creative freedom. The canvas of a pumpkin invites a myriad of artistic expressions, from intricate designs and whimsical characters to elegant patterns and abstract art. You’re not limited by the structural integrity of the pumpkin or the skill required to wield a carving tool. With paint, stencils, brushes, and even household items, you can achieve sophisticated or playful looks with ease. Plus, there’s no sticky, stringy mess to clean up! For these reasons, painted pumpkins have become a beloved tradition, offering a cleaner, safer, and more durable way to celebrate the Halloween season.
Glow-In-The-Dark Dot Painted Pumpkin Video Tutorial
Before we dive into the step-by-step instructions, we invite you to watch a short video tutorial that visually demonstrates each stage of this exciting project. Seeing the techniques in action can provide invaluable clarity and inspiration, helping you achieve the best possible results for your glow-in-the-dark masterpiece. The video titled “Glow in the Dark Painted Pumpkin” guides you through the process of making an awesome glow-in-the-dark painted pumpkin with a fun dot design. While we won’t embed the full interactive player here to maintain the pure HTML structure, we encourage you to seek out visual guides for the best crafting experience.
Essential Materials for Your Glowing Creation
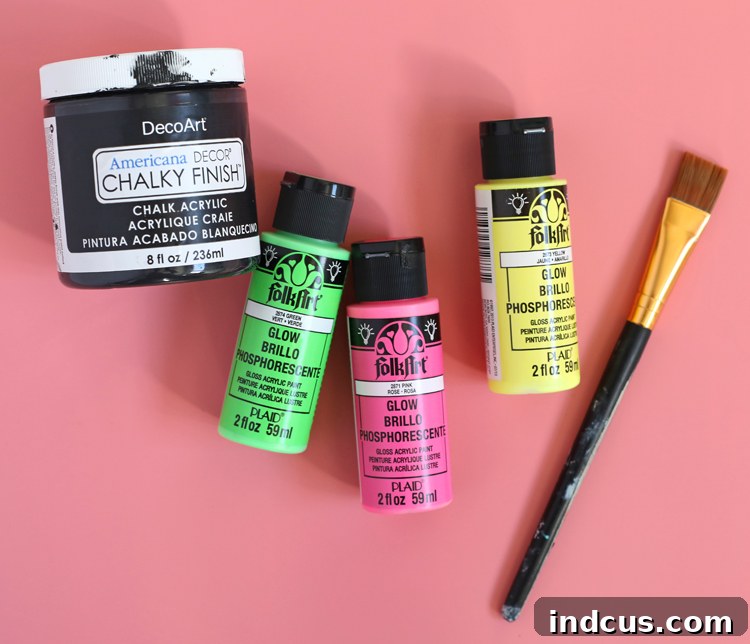
Gathering your supplies is the first exciting step toward crafting your dazzling glow-in-the-dark pumpkin. The beauty of this project lies in its simplicity, requiring only a few key items that are readily available at most craft stores or even online. Here’s what you’ll need to transform your pumpkin:
- Pumpkin (Real or Faux): The foundation of your project! You can use either a real pumpkin or a faux craft pumpkin. For this demonstration, an inexpensive foam pumpkin from a dollar store was used, offering a lightweight and long-lasting canvas. If opting for a real pumpkin, select one that is firm, free of blemishes, and has a smooth surface for optimal paint adhesion.
- Matte Black Chalk Paint: This will serve as your base coat. While other dark colors like deep indigo or forest green could work, matte black provides the perfect high-contrast backdrop that allows glow-in-the-dark paint to truly pop and achieve its maximum luminosity. Chalk paint is often preferred for its excellent coverage and matte finish, which enhances the glow effect.
- Glow-in-the-Dark Craft Paint: The star of the show! Look for high-quality acrylic glow-in-the-dark paint. These paints typically “charge” by absorbing light (from sunlight or artificial light) and then emit a soft glow in the dark. Various brands offer different intensities and shades of glow, so feel free to experiment.
- Paint Brushes: You’ll need at least one brush for applying the base coat (a wider flat brush works well) and a smaller brush, or even just the handle end of a brush, for creating the dot pattern. Precision is key for uniform dots.
Optional but Recommended Supplies:
- Dotting Tools: While the end of a paintbrush works perfectly, specialized dotting tools, pencil erasers, or even cotton swabs can create a variety of dot sizes and textures.
- Painter’s Tape: Useful for creating crisp lines if you decide to incorporate geometric patterns.
- Clear Sealant (Optional): A clear acrylic sealant spray can protect your finished design, especially if the pumpkin will be displayed outdoors. It helps prevent chipping and fading.
- Newspaper or Drop Cloth: Essential for protecting your workspace from paint splatters.
- Wet Wipes or Paper Towels: For quick clean-ups and refreshing your brush.
- Protective Gloves: To keep your hands clean, especially when working with glow paint.
You can easily purchase all the supplies you’ll need for this craft from your local craft store, online retailers, or even discount stores.
Step-by-Step Instructions: Crafting Your Glowing Pumpkin
Follow these detailed steps to bring your glow-in-the-dark dot painted pumpkin to life. Patience and careful application are key to achieving a professional and radiant finish.
- Prepare Your Pumpkin and Apply the Base Coat:
Begin by ensuring your pumpkin is clean and dry. If you’re using a real pumpkin, give it a thorough wash with soap and water to remove any dirt or debris, then dry it completely. For faux pumpkins, a quick wipe-down usually suffices. Lay down newspaper or a drop cloth to protect your work surface. Now, it’s time for the base coat. Using your matte black chalk paint and a wide brush, apply an even layer over the entire surface of the pumpkin. Ensure full coverage, paying attention to any crevices or textured areas. While black provides the most dramatic contrast for the glow paint, feel free to experiment with other dark hues like deep purple or navy blue if they better suit your aesthetic. Allow the first coat to dry completely – this usually takes 15-30 minutes, depending on humidity and paint thickness. For optimal coverage and a truly opaque finish, you may need to apply a second coat. Let this second coat dry thoroughly before moving on to the next step.
- Create Your Magical Dot Pattern with Glow Paint:
Once your base coat is completely dry, it’s time for the fun part: applying the glow-in-the-dark dots! Shake your glow paint well to ensure the pigments are evenly mixed. Dip the end of a clean paintbrush (or a specialized dotting tool, pencil eraser, or even a cotton swab) into the glow paint. You’ll want just enough paint on the tip to form a crisp, defined dot without dripping. Begin by creating a circular pattern around the top of the pumpkin, near the stem. Gently press the paint-laden tip onto the pumpkin, lift, and repeat. Aim for consistent pressure and spacing to create uniform dots. As you complete one row, move down to create the next, gradually working your way down the pumpkin in concentric circles. You can vary the size of your dots by using different tools or adjusting the amount of paint on your tip. Experiment with patterns: keep all dots the same size, create a gradient effect with smaller dots at the top and larger ones at the bottom, or arrange them in spirals or clusters. Continue adding rows of dots until you are satisfied with your design, ensuring an even distribution and a visually pleasing aesthetic. Remember, the more glow paint you apply (within reason, without making it too thick), the brighter the glow will be!
Of course, your creativity isn’t limited to just dots. You can paint any design you choose with glow-in-the-dark paint—think spooky spiderwebs, swirling ghosts, constellations, abstract squiggles, or even outlines of friendly monsters. Anything goes when it comes to expressing your Halloween spirit!
Displaying Your Masterpiece: The Grand Reveal
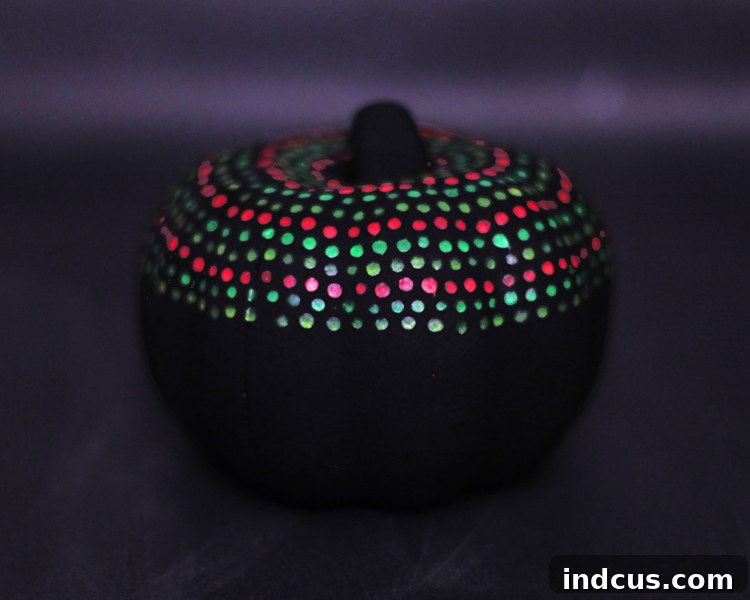
Once all your glow-in-the-dark paint is completely dry – which might take several hours, so consult your paint’s instructions – it’s time for the most exciting part: the grand reveal! To “charge” your pumpkin, expose it to a bright light source for at least 15-30 minutes. This could be sunlight, a bright lamp, or even a UV blacklight for an extra intense charge. The longer and brighter the charge, the more luminous and sustained the glow will be. When sufficiently charged, turn out the lights and immerse yourself in the magical glow! The transformation is truly mesmerizing, as your playful dots come alive with an ethereal luminescence.
Imagine these enchanting painted pumpkins gracing your porch on Halloween night, casting a warm, mysterious glow as trick-or-treaters approach. They’re guaranteed to be a huge hit and create an unforgettable festive atmosphere. Whether displayed indoors as a whimsical centerpiece or outdoors to welcome visitors, your glow-in-the-dark dot pumpkin will undoubtedly be a conversation starter and a beacon of Halloween cheer. Prepare for compliments and inquiries about your dazzling DIY creation!
Pin it so you don’t forget this amazing craft idea!
Creative Variations and Design Ideas
While the dot pattern is charming and effective, your glow-in-the-dark painting adventure doesn’t have to stop there! The beauty of this technique lies in its adaptability. Here are some more ideas to spark your imagination:
- Stellar Constellations: Instead of random dots, create star patterns or even constellations with varying dot sizes for a cosmic theme.
- Spooky Silhouettes: Use stencils to paint glow-in-the-dark bats, ghosts, spiderwebs, or spooky eyes peeking out from the dark base.
- Abstract Swirls and Lines: Freehand swirling patterns or geometric lines can create a modern, artistic glow effect.
- Gradient Glow: Experiment with multiple colors of glow paint (if available) to create a mesmerizing gradient effect from one shade to another.
- Hidden Messages: Paint words like “BOO!” or “Trick or Treat” with glow paint, revealing a secret message in the dark.
- Combined with Regular Paint: Incorporate non-glow paints for daytime appeal, then add glow accents that shine at night. For example, paint a detailed haunted house, and then add glow-in-the-dark windows or ghost figures.
- Monster Faces: Paint a simple monster face with regular acrylics, then use glow paint for the eyes, teeth, or a ghostly outline.
Tips for Best Results and Longevity
To ensure your glow-in-the-dark pumpkin shines its brightest and lasts the longest, consider these helpful tips:
- Work in Good Lighting: Even though you’re working with glow paint, it’s crucial to have ample lighting during the painting process to ensure precision and detail.
- Test Your Paint: Before applying to your pumpkin, test the glow paint on a scrap piece of paper or cardboard to get a feel for its consistency and glow intensity.
- Layer for Brighter Glow: For a more intense and prolonged glow, apply two to three thin coats of glow paint for your dots or design, allowing each layer to dry completely before adding the next.
- Proper Charging: Position your finished pumpkin in a spot where it can absorb plenty of light during the day or before it gets dark. Direct sunlight or a strong artificial light source works best.
- Use a Sealant (Outdoor Display): If your pumpkin will brave the elements outdoors, a clear, waterproof acrylic sealant spray will protect your paint from moisture and fading, extending its lifespan.
- Clean Brushes Immediately: Acrylic and glow paints dry quickly, so clean your brushes with soap and water immediately after use to keep them in good condition.
- Storing Faux Pumpkins: If using a faux pumpkin, store it carefully after Halloween so you can enjoy your glowing creation year after year.
Frequently Asked Questions About Glow-in-the-Dark Pumpkins
Here are some common questions about creating and maintaining your glowing Halloween decor:
- How long does glow-in-the-dark paint typically glow?
The duration of the glow depends on the quality of the paint and how long it was charged. Most good quality glow paints will glow noticeably for 15-30 minutes after a full charge, with a fading effect for several hours beyond that. Recharging is easy – just expose it to light again!
- Can I use glow-in-the-dark spray paint instead of craft paint?
Yes, glow-in-the-dark spray paint can be an option, especially for covering larger areas or creating a more diffused glow. However, for precise dot patterns or intricate designs, craft paint applied with a brush or dotting tool offers more control.
- How can I make the glow brighter or last longer?
To maximize the glow, ensure your base coat is a very dark, matte color (like black). Apply multiple thin layers of glow paint, allowing each to dry. Charge your pumpkin under a very strong light source for a prolonged period, or consider using a UV blacklight, which is exceptionally effective at activating glow paints.
- Is glow-in-the-dark paint safe for kids?
Most craft glow-in-the-dark paints are non-toxic and safe for children to use under adult supervision. Always check the product label for specific safety information and recommendations.
- How do I preserve a real pumpkin after painting?
To extend the life of a real painted pumpkin, ensure it’s clean and completely dry before painting. After painting, you can spray it with an acrylic sealant. Keep the pumpkin in a cool, dry place away from direct sunlight or excessive moisture. Avoid placing it directly on the ground; elevate it slightly for better air circulation.
This glow-in-the-dark dot painted pumpkin project offers a fantastic opportunity to add a truly unique and enchanting element to your Halloween decorations. It’s a testament to how simple materials and a touch of creativity can transform an ordinary object into something magical. We hope you have a blast crafting your own luminous masterpiece!
Looking for more fun ways to paint a pumpkin? Don’t miss this huge pumpkin painting idea list for endless inspiration and creative possibilities! Happy crafting and Happy Halloween!







