
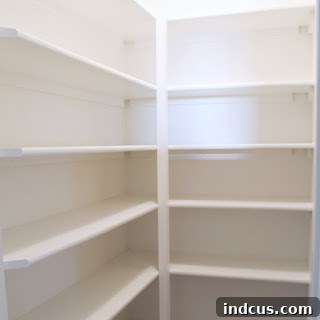
Discover How to Build Exceptionally Strong & Beautiful DIY Pantry Shelving (Perfect for Walk-in Closets or Garage Storage Too!)
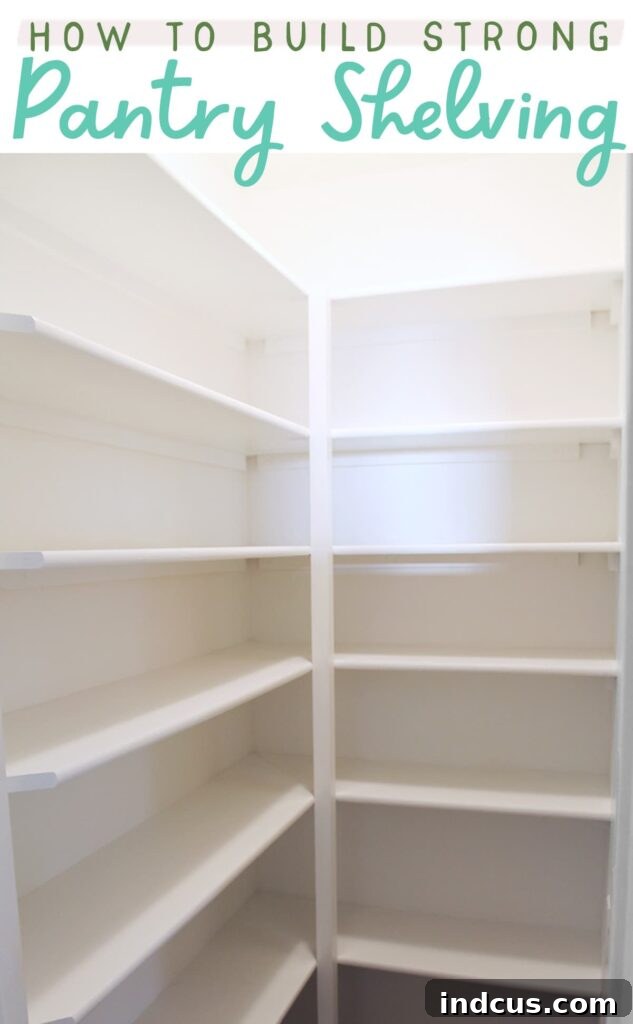
After four months in our new home, we’re thrilled to be putting the finishing touches on our long-awaited Pantry Project. This transformation has been a labor of love, and while the full reveal is just around the corner, today we’re diving deep into the most critical component: building the incredibly sturdy and functional pantry shelving. If you’re new to our journey, you simply must see the “before” of this space to truly appreciate the incredible metamorphosis!
One of the most frequent questions we receive is about the size of this specific storage area. For reference, our pantry measures a compact yet efficient 3 feet by 4 feet. Don’t let the small footprint fool you; with smart design and robust DIY shelving, we’ve maximized every inch to create an organizational dream.
Crafting your own custom pantry shelves not only ensures they perfectly fit your space and storage needs but also guarantees a level of durability far superior to most off-the-shelf solutions. This detailed tutorial will guide you through every step, ensuring your shelves are built to last, whether they’re destined for a bustling pantry, a neat walk-in closet, or a hard-working garage.
Essential Materials & Tools for Your DIY Shelving Project
To successfully build these robust and attractive shelves, gather the following high-quality materials and reliable tools:
- Shelving Material: The choice of shelving material significantly impacts both the cost and the final aesthetic. All these options are suitable; select based on your budget, desired look, and ease of cutting:
- Bullnose Particle Board Shelves: An economical choice, often pre-finished with a rounded front edge, saving you trim work. Be mindful that particle board can be prone to crumbling at cut edges if not handled carefully.
- White Laminated Wood Shelves: Offers a clean, modern look with a durable, easy-to-clean surface. These are typically pre-finished, similar to bullnose particle board, but with a smoother, more resilient laminate layer.
- Solid Pine Boards (1×12″): A classic, sturdy, and natural option. Pine can be stained or painted to match any decor and offers excellent long-term durability. It’s generally easier to cut cleanly than particle board.
- Furring Strips (1×2″): These thin strips of wood will serve as the primary support cleats for your shelves, attaching directly to your wall studs. They distribute weight evenly and are essential for stability.
- Vertical Support Post (2×2″): Crucial for reinforcing inside corners where two shelves meet, this post provides an anchor point for L-brackets, ensuring the corner remains strong and level.
- Measuring Tape: For precise measurements of your space and materials. Accuracy is key for a professional finish.
- Stud Finder: Absolutely essential for locating wall studs, ensuring your support cleats are securely fastened into structural elements, not just drywall.
- Electric Drill: Much more efficient and secure than manual screwdrivers for driving screws into studs and wood.
- Wood Screws: Select screws appropriate for wood construction and sufficient length to penetrate through furring strips and into wall studs (typically 2.5-3 inches).
- Miter Saw or Circular Saw: For making clean, straight, and angled cuts on your shelving material and furring strips. A miter saw is ideal for precise corner cuts.
- Paintable Caulk: Used to fill gaps, seams, and imperfections, giving your finished shelves a seamless, built-in appearance.
- Wood Filler: To patch screw holes and any minor dents or imperfections in the wood before painting.
- Primer: A crucial first coat for paint adhesion, especially on particle board or raw wood, ensuring a smooth, durable, and even paint finish.
- Paint: Choose a high-quality paint, ideally one designed for trim, cabinets, or furniture, for maximum durability and a washable surface. Sherwin-Williams Emerald Urethane Trim Enamel is a highly recommended option for its hardness and excellent finish.
- Painter’s Tape: Useful for masking off areas you don’t want painted, creating crisp lines, and for providing a clean cutting line on particle board.
We emphatically recommend against wire shelving for any long-term storage solution, especially in a pantry. In our previous experience, wire shelves were frustratingly unstable; items frequently tipped over, they lacked aesthetic appeal, and their overall durability was questionable. We’ve been systematically replacing all wire shelving in our home for solid wood alternatives, and the difference is truly transformative. Wooden pantry shelves are simply superior in every aspect!
For pantry applications, we’ve found that 12-inch deep shelves strike the perfect balance. This depth comfortably accommodates a wide range of items, from canned goods and cereal boxes to small appliances, without being so deep that items get lost or forgotten in the back. You want to see everything at a glance to maintain an organized and efficient pantry.
Throughout this project, the use of screws and an electric drill is non-negotiable for strength and stability. Nails and a hammer, while quicker, simply don’t offer the same secure hold for shelves that will bear significant weight over time.
Thoughtful Shelf Spacing: The Key to a Functional Pantry
Before any cutting or drilling began, significant time was dedicated to planning the optimal shelf spacing. This step is critical for a truly functional pantry. My primary considerations included:
- Ensuring the bottom shelf allowed ample vertical clearance for large items like a five-gallon food storage bucket.
- Allocating a few larger shelves for bulkier, oversized items.
- Maximizing the number of shelves in this compact space to boost overall storage capacity.
To achieve this, I meticulously measured the height of various common pantry staples: canned goods, mason jars, cake mixes, cereal boxes, soda bottles, and different storage bins. This practical approach helped define the necessary clearance for each level. Once a preliminary plan was formed, I employed a simple yet highly effective visualization technique: using blue painter’s tape to mock up the shelves directly on the walls:
This visual mockup proved invaluable, allowing us to see the proposed layout in real-time, make adjustments, and confirm the functionality before committing to construction. It’s a step I highly recommend for any shelving project.
Here’s the final shelf spacing configuration we implemented, which has proven exceptionally practical:
Update 8 years later: We are thrilled to report that this pantry continues to function exceptionally well. The carefully planned spacing has stood the test of time, proving to be perfectly suited for our needs. We wouldn’t change a thing if we were to build it again today!
Building Your Custom Pantry Shelves: A Step-by-Step Guide
With the planning complete, it was time to transform ideas into reality. Here’s how we constructed these durable shelves:
Step 1: Installing the Furring Strip Supports
The first critical step involves securely attaching the 1×2 furring strips to the walls, which will act as the primary support cleats for your shelves. Start by using a stud finder to meticulously locate and mark the wall studs. It is paramount that each furring strip is screwed into at least two studs to ensure maximum weight-bearing capacity and stability. Once the studs are marked, use your electric drill and screws to firmly attach the furring strips, ensuring each one is perfectly level. We were able to avoid using drywall anchors entirely by consistently hitting studs.
Hindsight Tip: For a more aesthetically seamless appearance, I would recommend cutting your furring strips to extend fully to the side and back walls. While not impacting functionality, this minor adjustment would create a more integrated, built-in look.
At this stage, before installing the shelves themselves, I took the opportunity to paint the installed furring strips. This decision proved highly efficient, as it’s significantly easier to paint exposed wood than to maneuver around installed shelves later on.
Step 2: Preparing and Painting the Shelf Boards
Next, we moved on to cutting the actual shelving material. We opted for particleboard due to its cost-effectiveness. When working with particleboard (or MDF), exercise patience during cutting, as edges can crumble if rushed. A useful trick is to apply painter’s tape along your cut lines; this can help minimize chipping and create a cleaner edge.
Just as with the furring strips, I highly recommend priming and painting all your shelf boards before installation. This pre-painting step streamlines the entire process, yielding a much smoother and professional finish. Always use a high-quality primer to ensure excellent paint adhesion, especially on porous materials. With a good quality paint, such as the Sherwin-Williams Emerald Urethane Trim Enamel we used, a separate polyurethane or topcoat is generally not necessary for durability.
Step 3: Constructing Corner Shelves with Mitered Edges
Corner pantry shelves can be particularly tricky, but our solution ensures a beautiful, seamless finish. If you’re using boards with a pre-fabricated bullnose (rounded) edge, simply butting them together at the corner would create an unsightly dip where the bullnose meets a flat cut. To circumvent this, we chose to miter the edges where the two shelves meet in the corner. This approach allows the attractive rounded bullnose edge to continue uninterrupted along the front of both shelves, providing a custom, finished look without the need for additional trim pieces. We reinforced this mitered seam with wood glue for added strength.
Step 4: Installing the Vertical Support Post and L-Brackets
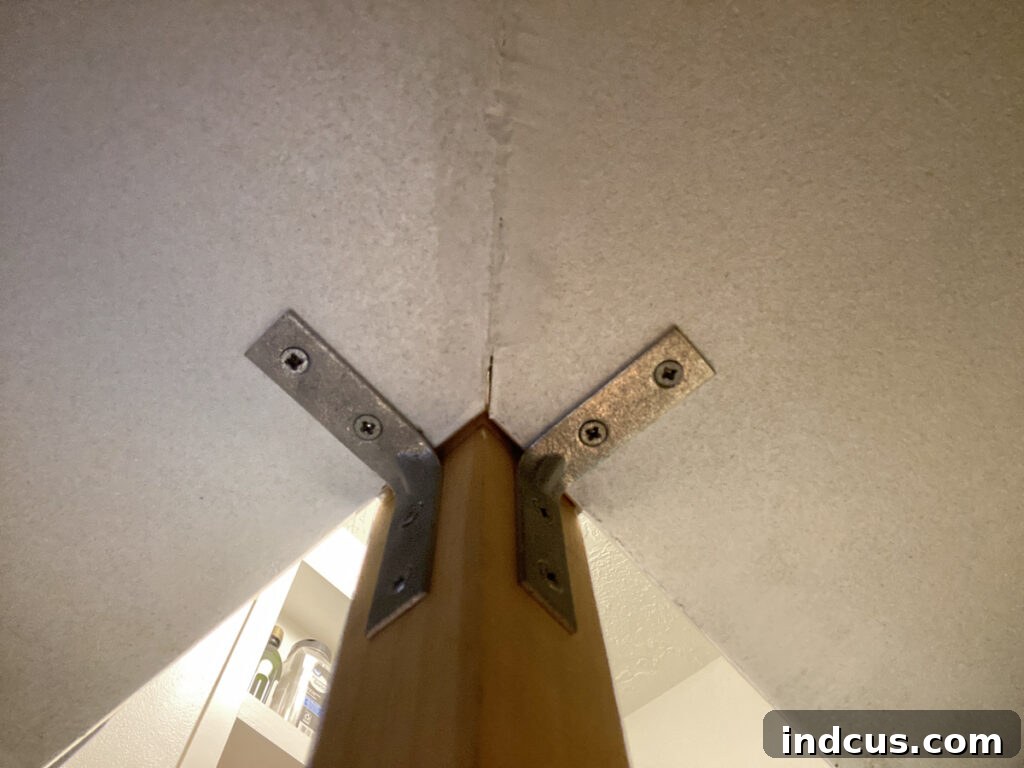
To provide robust reinforcement for the back corner where the mitered shelves converge, we installed a 2×2 piece of wood as a vertical support post. This post serves as a critical anchor point. The shelves are then securely attached to this 2×2 post using metal L-brackets. For each shelf level, you’ll need two L-brackets at the corner – one for each of the two intersecting shelf boards – ensuring both sides are firmly braced to the vertical support. This construction method guarantees maximum stability for your corner shelves.
Here’s a closer look at the L-bracket installation from an upward perspective within the shelves. Notice how two brackets are used per level, one for each board forming the corner, ensuring a solid connection to the 2×2 vertical post. This thoughtful detail prevents any sagging or movement in the corner, a common weak point in less sturdy shelf designs.
Step 5: The Finishing Touches: Caulking, Filling, and Final Painting
Once all the shelving was installed, the real magic happened with the finishing work. This stage is absolutely crucial for transforming functional shelves into a truly custom, built-in feature. I dedicated considerable time to thoroughly caulking all seams, joints, and gaps, and meticulously filling every screw hole with wood filler. This diligent effort makes an incredible difference, creating a smooth, seamless transition between components and eliminating any visible imperfections.
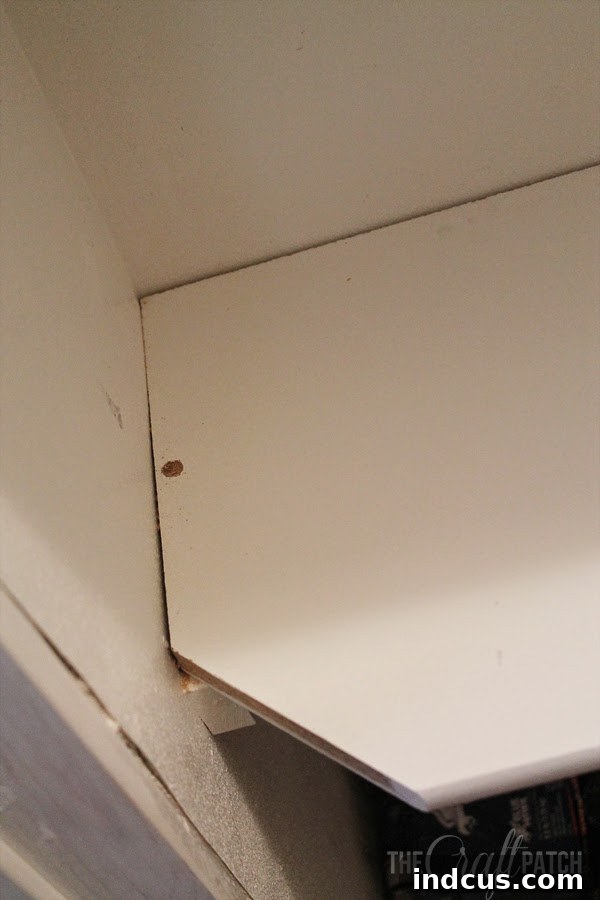
Side Note: You might notice an angled cut on one of the front corners in the photos. This was a specific customization required to navigate around existing door trim near the pantry entrance, allowing the shelf to integrate seamlessly without obstructing the door. Such custom cuts highlight the versatility of DIY shelving.
The caulk and wood filler effectively erased all evidence of screw holes, cracks, and minor flaws, leaving us with impeccably clean and crisp shelving. A final touch-up with paint ensured a uniform and professional finish. After allowing sufficient time for the paint to fully cure, our beautiful, custom pantry was ready to be organized and stocked!
The Unveiling: A Pantry Transformed
Is it truly breathtaking? Perhaps “breathtaking” is strong language for shelving, but when you invest your vision and effort into a project like this, the results are nothing short of glorious! Witnessing this once-overlooked space come to life with perfectly tailored, robust shelving has been incredibly rewarding. It’s safe to say, this project has ignited a serious remodeling bug!
And here is the ultimate satisfaction – the pantry fully stocked, organized, and ready for action:
Remarkably, even after relocating all the food from our kitchen cupboards and an entire shelf from the linen closet, there are still empty shelves in here! It’s astonishing how much storage capacity we were able to create within this modest 3×4-foot footprint. This pantry truly embodies the phrase “small but mighty.” We absolutely adore our organized and efficient new pantry!
To summarize, here are the simplified steps to build strong, custom pantry shelves:
- Plan Your Layout: Determine ideal shelf heights and mark their positions on the walls, using a visual aid like painter’s tape for accuracy.
- Install Wall Supports: Securely screw 1×2 furring strips to the wall studs at your marked shelf positions, ensuring they are perfectly level.
- Cut Shelf Boards: Measure and cut your chosen shelving material to length. If creating corner shelves, miter the ends where they will meet.
- Reinforce Corners: Install a vertical 2×2 post in the back corner where two shelves converge to provide essential structural support.
- Attach Shelves: Secure the shelf boards to the furring strips and the 2×2 corner post using metal L-brackets. Remember to use two brackets per corner level for intersecting boards.
- Finish for Perfection: Apply paintable caulk to all seams and fill all screw holes with wood filler. Once dry, prime and paint the entire shelving unit for a professional, durable finish.
For the pantry’s third wall, which doesn’t feature traditional shelving, we devised another ingenious storage solution: a shelf built directly between the wall studs! This innovative design offers valuable storage without protruding into the limited floor space. Learn how to build this amazing space-saving feature HERE!
We’re also nearing completion on the exterior aesthetics of the pantry. Two of the three walls are already textured and primed. All that remains is to install molding and baseboards, trim the door, texture the final wall, and then apply a fresh coat of paint to everything. We can’t wait to share the complete transformation with you!







