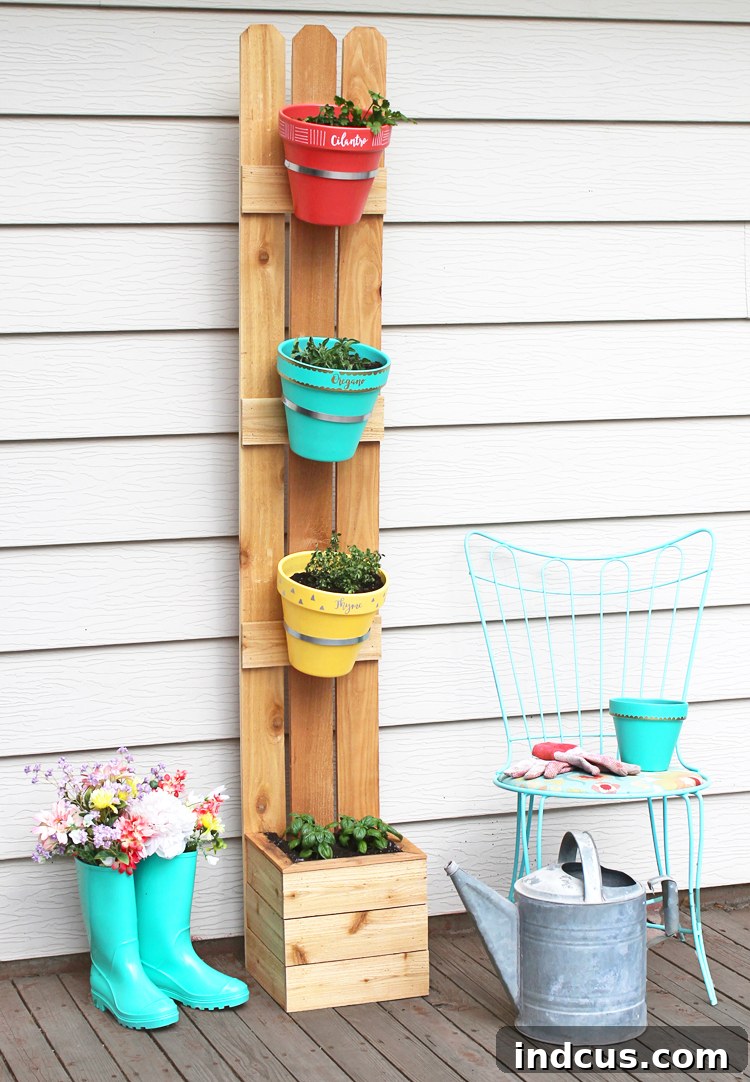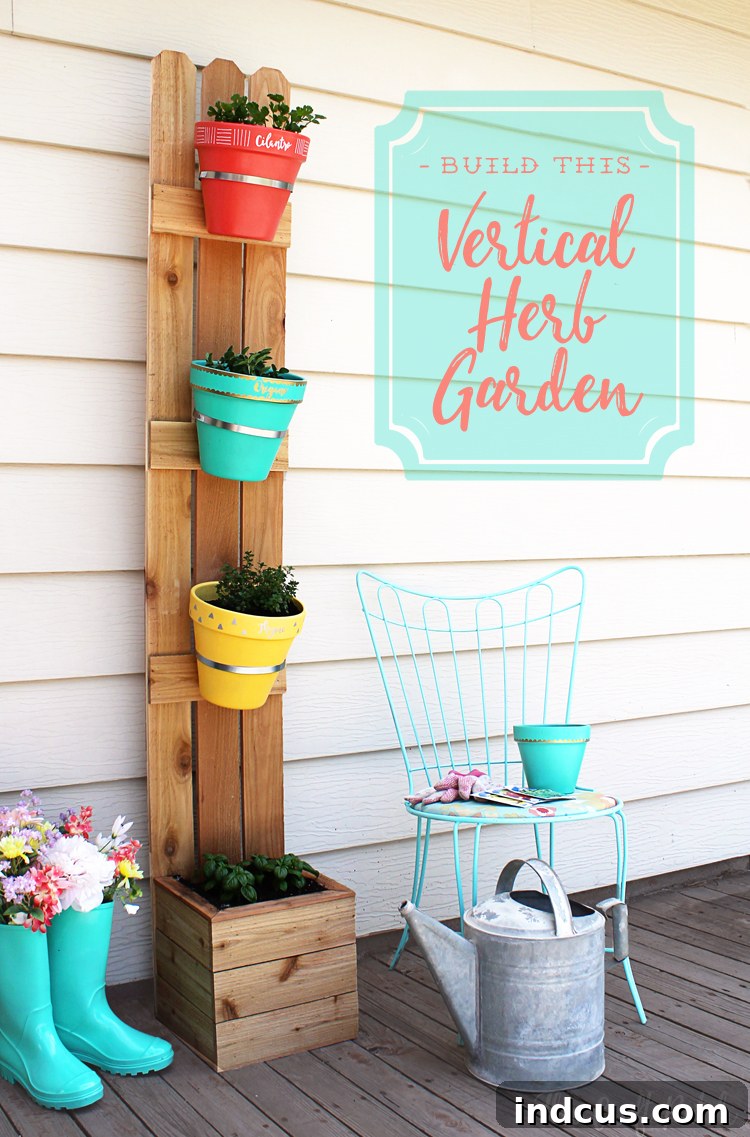
Craft Your Own Stunning Cedar & Terracotta Vertical Planter: The Ultimate DIY Guide for Small Spaces and Stylish Outdoor Decor
Transform your outdoor living area with a charming and highly functional vertical planter! This innovative design, crafted from durable cedar fencing and vibrant terracotta pots, is not just a gardening solution but a statement piece for any porch, patio, or balcony. Ideal for those with limited space, it allows you to cultivate a flourishing herb garden, display colorful annuals, or even grow small vegetables, adding both height and lush greenery to your decor. If you’ve been dreaming of fresh herbs right outside your kitchen door or a captivating focal point for your outdoor entertaining space, this DIY vertical planter offers the perfect blend of rustic charm and practical design. Get ready to embark on a rewarding woodworking project that will enhance your home’s curb appeal and bring endless enjoyment. Here are the comprehensive, step-by-step instructions to build your very own!
Why Choose a DIY Vertical Planter?
Vertical planters have surged in popularity, and for good reason. They are an ingenious way to maximize gardening potential in compact urban environments or simply add an exciting dimension to traditional garden layouts. By building one yourself, you gain the freedom to customize its dimensions, choose materials that complement your home’s aesthetic, and enjoy the profound satisfaction of a handmade creation. This particular cedar and terracotta design boasts natural resilience against the elements, ensuring your vertical garden remains a beautiful feature for many seasons to come. It’s an accessible project for DIY enthusiasts of all skill levels, promising a beautiful and functional addition to your outdoor oasis.
Essential Materials for Your Cedar Vertical Herb Garden
Gathering all your materials before you begin is crucial for a smooth and efficient building process. For this robust and attractive vertical planter, we’ve opted for cedar fencing due to its natural resistance to rot and insects, giving your planter longevity outdoors. Terracotta pots are chosen for their classic appeal and excellent breathability, which is beneficial for healthy plant roots. Here’s a detailed list:
- 5 Cedar Fence Pickets: Each measuring approximately 3 1/2 inches wide. These form the main structure and vertical backing of your planter. Choose pickets that are straight and free from major defects for the best results.
- 1 48-inch Piece of Wood Lathe: This slender strip of wood will be used for the decorative top trim of your planter box, providing a clean, finished edge.
- 3 Metal Hose Clamps: Opt for a 5-7 inch size. These adjustable clamps are surprisingly effective for securely holding your terracotta pots in place along the vertical panel.
- 1 1×2 Board, 6 Feet in Length: This piece will serve as a crucial back support for the tall fence pickets, preventing them from warping or becoming unstable over time.
- Scrap Piece of MDF (Medium-Density Fiberboard): Approximately 1/2 inch thick, cut to a 10×10 inch square. This will form the sturdy base of your main planter box.
- Scrap Pieces of 2×4 Lumber: These are essential for constructing the internal support frame of the planter box, providing strength and a foundation for the cedar panels.
- 3 Terracotta Pots (8-inch size): The classic clay pots are perfect for planting herbs or small flowers and will be customized with paint and markers.
- Spray Paint: Choose outdoor-friendly colors that complement your garden or patio decor to personalize your terracotta pots.
- Sharpie Oil-Based Paint Markers: These specialized markers are fantastic for adding durable, decorative labels or designs to your painted terracotta pots. Available at most art supply stores.
- Plastic Sheeting: A roll of durable plastic sheeting is needed to line the main planter box, protecting the wood from moisture and extending its lifespan.
- Wood Screws: Various lengths suitable for outdoor use, primarily for assembling the internal frame and attaching the back support.
- Nails: Galvanized nails are recommended for securing the cedar pickets, offering better resistance to rust and weather.
Tools You’ll Need for Planter Construction
Having the right tools at hand will make this project significantly easier and more enjoyable. While some tools can be swapped for manual alternatives, power tools will greatly speed up the process and improve precision.
- Hammer or Pneumatic Nail Gun: A nail gun (air-powered or cordless) is highly recommended for quickly and securely attaching the cedar pickets. If you don’t have one, a good old-fashioned hammer and nails will work, though it will take more time and effort.
- Screwdriver (or Power Drill with Driver Bit): Essential for driving screws, especially when assembling the internal 2×4 frame and attaching the 1×2 support. A power drill will make this task much quicker.
- Hand Saw or Miter Saw: A miter saw offers unparalleled precision for cutting your lumber to exact lengths and angles (especially for the trim). A hand saw is a perfectly viable alternative but requires more careful measuring and cutting technique.
- Staple Gun: Necessary for securely attaching the plastic liner inside the planter box.
Step-by-Step Instructions: Building Your Vertical Garden Planter
Follow these detailed steps carefully to construct a beautiful and durable vertical planter that will be the envy of your neighborhood. Precision in cutting and assembly will ensure the longevity and aesthetic appeal of your finished project.
1. Construct the Internal Support Frame
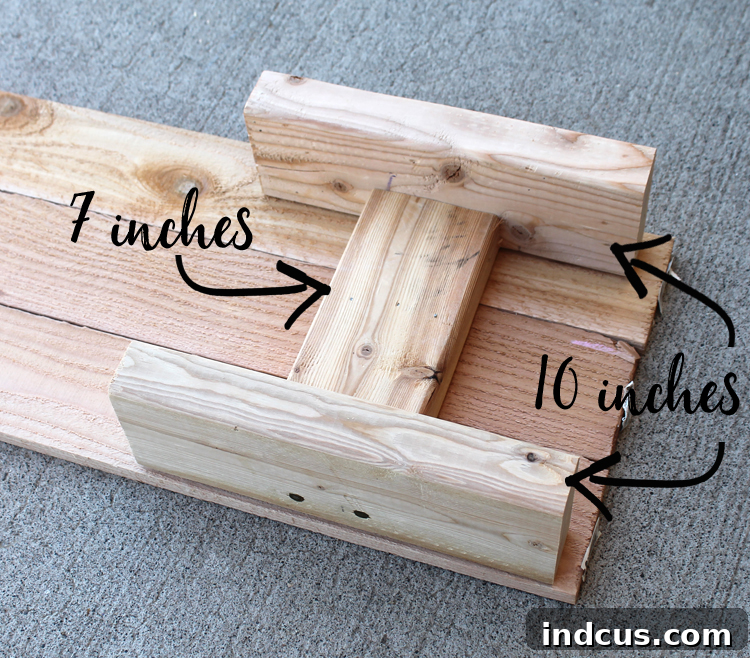
Begin by meticulously cutting your 2×4 lumber. You’ll need four pieces, each precisely 10 inches long, and two additional pieces, each measuring 7 inches. Accuracy in these initial cuts is paramount for a stable and aesthetically pleasing planter. These pieces will form the robust internal support frame for the planter box. Assemble them by positioning the two shorter 7-inch pieces centrally between the 10-inch pieces, forming a sturdy rectangular base. Secure these joints firmly using wood screws or a pneumatic nail gun, ensuring the frame is perfectly square. This foundational frame will provide essential structural integrity for the entire vertical planter.
2. Attach the MDF Base
Next, take your 10×10 inch square of 1/2-inch MDF. This piece will form the bottom of your main planter box, offering a flat and stable surface. Carefully align the constructed 2×4 frame onto the MDF square. Ensure the edges are flush and the frame is centered before you begin fastening. Using nails, securely attach the 2×4 frame to the MDF. Drive nails through the bottom of the MDF into the 2×4 pieces, making sure they are spaced evenly for a strong connection. This step creates the essential foundation of your planter box.
3. Mount the Vertical Back Pickers
Now, it’s time to add the defining vertical element of your planter. Take the full-length cedar fence pickets – these will serve as the tall backing for your hanging pots. Position these pickets vertically along the back side of the 2×4 box you just assembled. Ensure they are evenly spaced and perfectly straight before securing them. Use nails to attach each picket firmly to the back of the 2×4 frame. This creates the backdrop against which your terracotta pots will hang, giving the planter its impressive height.
4. Encase the Planter Box with Cedar
To create the planter box walls, you’ll need to cut more cedar fence pickets. Measure and cut six pieces, each 10 inches long, and three pieces, each 11 inches long. The six 10-inch pieces will be used for the two side walls of the planter box (three on each side), while the three 11-inch pieces will form the front wall. Carefully nail these smaller cedar pieces along the exterior of the 2×4 frame, starting with the sides and then moving to the front. A pneumatic nail gun will make this step incredibly quick and ensure tight, professional-looking joints, but a hammer can also be used with care.
As mentioned, a pneumatic nail gun truly simplifies this step, allowing for rapid and consistent fastening, which is especially useful when working with many small pieces of wood.
5. Trim the Top Edge of the Planter Box
For a refined and finished appearance, the top edge of your planter box requires a decorative trim. Take your wood lathe piece and carefully cut it down to size, creating four pieces that will frame the top perimeter of the box. For a professional look, miter the corners at a 45-degree angle where they meet, ensuring a seamless fit. Once cut, secure the wood lathe trim pieces along the top edge of the cedar-clad box using small nails. This adds a subtle, elegant detail that elevates the overall craftsmanship of your vertical planter.
6. Reinforce the Vertical Backing
The tall fence pickets, while visually appealing, can lack rigidity on their own. To significantly enhance their stability and prevent any wobbling or warping, reinforce the vertical backing. Take your 1×2 strip of wood and screw it horizontally along the back center of the tall pickets. This single strip provides considerable strength. For even greater durability and peace of mind, consider adding additional 1×2 strips behind each individual fence picket, ensuring a robust and long-lasting structure capable of supporting your filled terracotta pots.
7. Add Horizontal Support Pieces for Pots
To provide stable attachment points for your terracotta pots, you’ll need to add horizontal fencing pieces across the tall vertical pickets. Cut three additional 11-inch pieces of cedar fencing. Carefully space these pieces evenly across the vertical pickets, determining the optimal height for your pots. Once their positions are marked, nail them securely into place. These horizontal supports will be instrumental in the next step, serving as a solid anchor for the metal hose clamps.
8. Attach the Metal Hose Clamps
Now, it’s time to install the ingenious mechanism that will hold your terracotta pots: the metal hose clamps. Each clamp requires two screws for secure attachment. Crucially, avoid screwing them directly into the horizontal support pieces, as this might cause the pots to lean too far forward. Instead, position each clamp approximately one inch above the horizontal support, screwing them into the vertical pickets. This slight adjustment ensures that your pots sit upright and securely. Adjust the clamps to be wide enough to accommodate your 8-inch terracotta pots.
9. Line the Planter Box with Plastic
To protect your cedar planter box from soil and moisture, a plastic liner is essential. Drape the plastic sheeting inside the bottom planter box, ensuring it covers all interior surfaces. Form it tightly into the corners and against the sides. Critically, cut a few small drainage slits in the very bottom of the plastic liner. Proper drainage is vital to prevent waterlogging and root rot for your plants. Once positioned and cut, use your staple gun to securely fasten the plastic liner to the internal 2×4 frame, ensuring it is held firmly in place.
10. Trim Excess Plastic Liner
After the plastic liner is stapled in place, you will likely have some excess material extending above the top edge of the planter box. Carefully trim away this excess plastic using scissors or a utility knife. The goal is to ensure the plastic liner is not visible once the dirt is added to the planter box, maintaining a clean and natural aesthetic for your cedar planter.
Personalizing Your Terracotta Pots: The Fun Part!
Now that the structural build is complete, it’s time to unleash your creativity and personalize your terracotta pots. This is where your vertical planter truly comes to life with a splash of color and custom charm.
11. Spray Paint Your Pots
Select your favorite outdoor-friendly spray paints in colors that will pop against the natural cedar or complement your existing outdoor decor. Apply an even coat of spray paint to each terracotta pot. For best results and vibrant color, you might need two thin coats. Allow the paint to dry thoroughly, ideally overnight, to ensure it’s completely cured and ready for the next step.
12. Design and Label with Sharpie Paint Markers
This is where your pots get their unique character! If you’re confident in your freehand drawing, go ahead and start directly with your Sharpie Oil-Based Paint Markers. However, for those who prefer a guide (like many of us!), it’s highly recommended to first sketch your design or desired labels onto the dried, painted pots with a pencil. This allows you to perfect your lettering or artwork before committing to the permanent marker.
Once you’re satisfied with your pencil outline, carefully fill in the design using the Sharpie Paint Marker. These markers are perfect for this project because their oil-based formula offers exceptional durability. They stand up remarkably well to sun exposure, water, and general abrasion, making them ideal for outdoor use on terracotta pots. They also dry quickly, which is a fantastic bonus for impatient crafters! The versatility of these markers means they work on a wide array of surfaces including wood, metal, plastic, stone, glass, and more, promising many future DIY opportunities. This simple step adds an incredibly cute and functional detail to your vertical garden.
The subtle personalization of these pots adds such a charming touch, don’t you think? Here are close-up views of the three unique, hand-labeled pots:
Planting and Enjoying Your New Vertical Garden
With your beautiful cedar planter constructed and your terracotta pots uniquely decorated, it’s time for the final, most rewarding step: planting! Choose high-quality potting mix that is appropriate for your chosen plants. For the main bottom box, you can plant larger herbs, small flowers, or even trailing plants. For the hanging terracotta pots, consider individual herbs like oregano, thyme, and cilantro as shown, or perhaps colorful annuals that will cascade beautifully. Gently place your plants into their new homes, water thoroughly, and admire your handiwork.
Customization and Scaling Your Design
One of the greatest advantages of a DIY project like this is its inherent flexibility. The dimensions provided in this guide are merely a starting point. Feel free to customize the measurements to perfectly fit any specific space you have in mind – whether you need a taller, wider, or narrower planter. You can adjust the number of vertical pickets, the size of the planter box, and the quantity of hanging pots to suit your needs and desires. This adaptability allows you to create a truly bespoke vertical garden that seamlessly integrates with your outdoor aesthetic.
A Rewarding Addition to Your Outdoor Living
I am absolutely delighted with how this vertical planter turned out. It has completely transformed my back patio, adding not only a vibrant burst of natural beauty but also the undeniable convenience of fresh herbs just steps away. The combination of raw cedar and brightly painted terracotta pots offers a unique aesthetic that complements any outdoor decor. The joy of harvesting fresh herbs all summer long, or simply relaxing on the deck surrounded by living greenery, is truly immeasurable. This project is more than just building a planter; it’s about creating a personal sanctuary and enhancing your everyday outdoor experience. Imagine sipping lemonade, watching the kids play, and enjoying delicious grilled meals, all while surrounded by the beauty you created yourself. It’s a project that brings lasting joy and functionality to your home.