
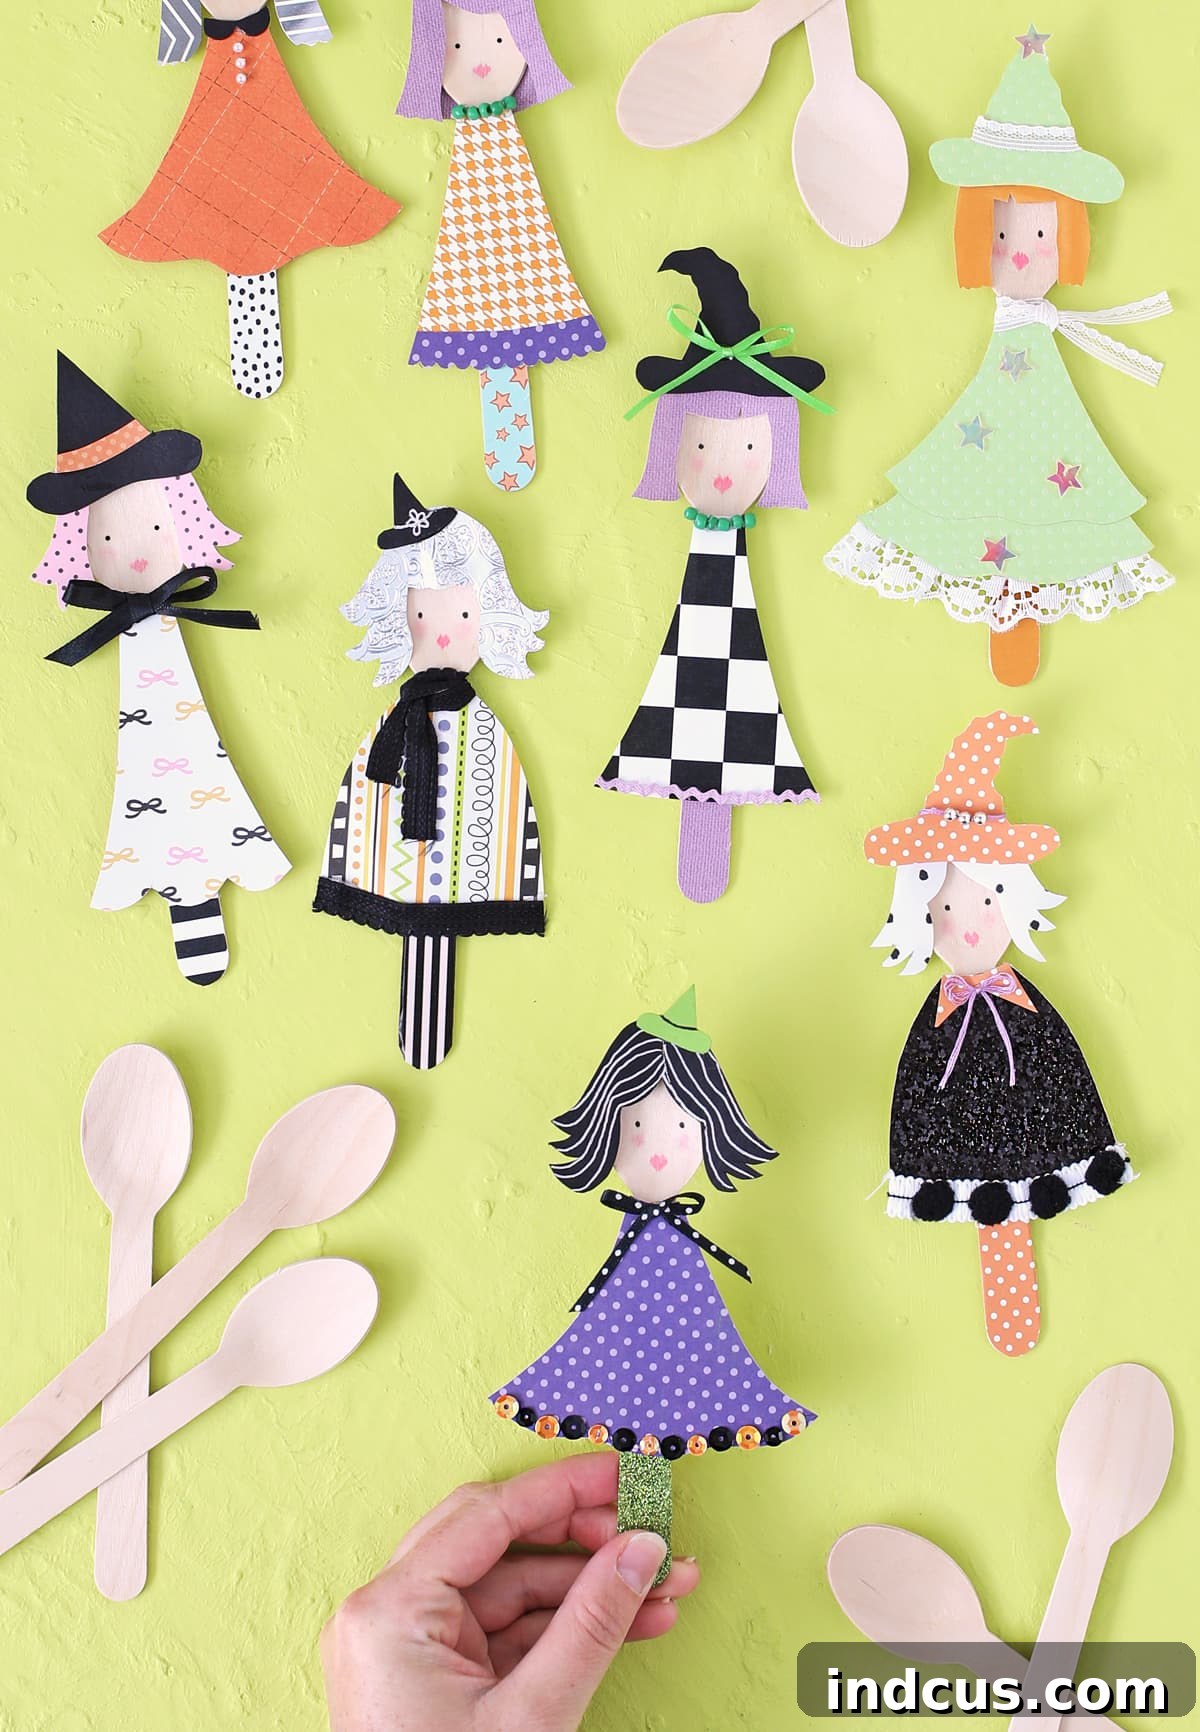
Enchanting Whimsy: Crafting Adorable Wooden Spoon Witches for Halloween Fun
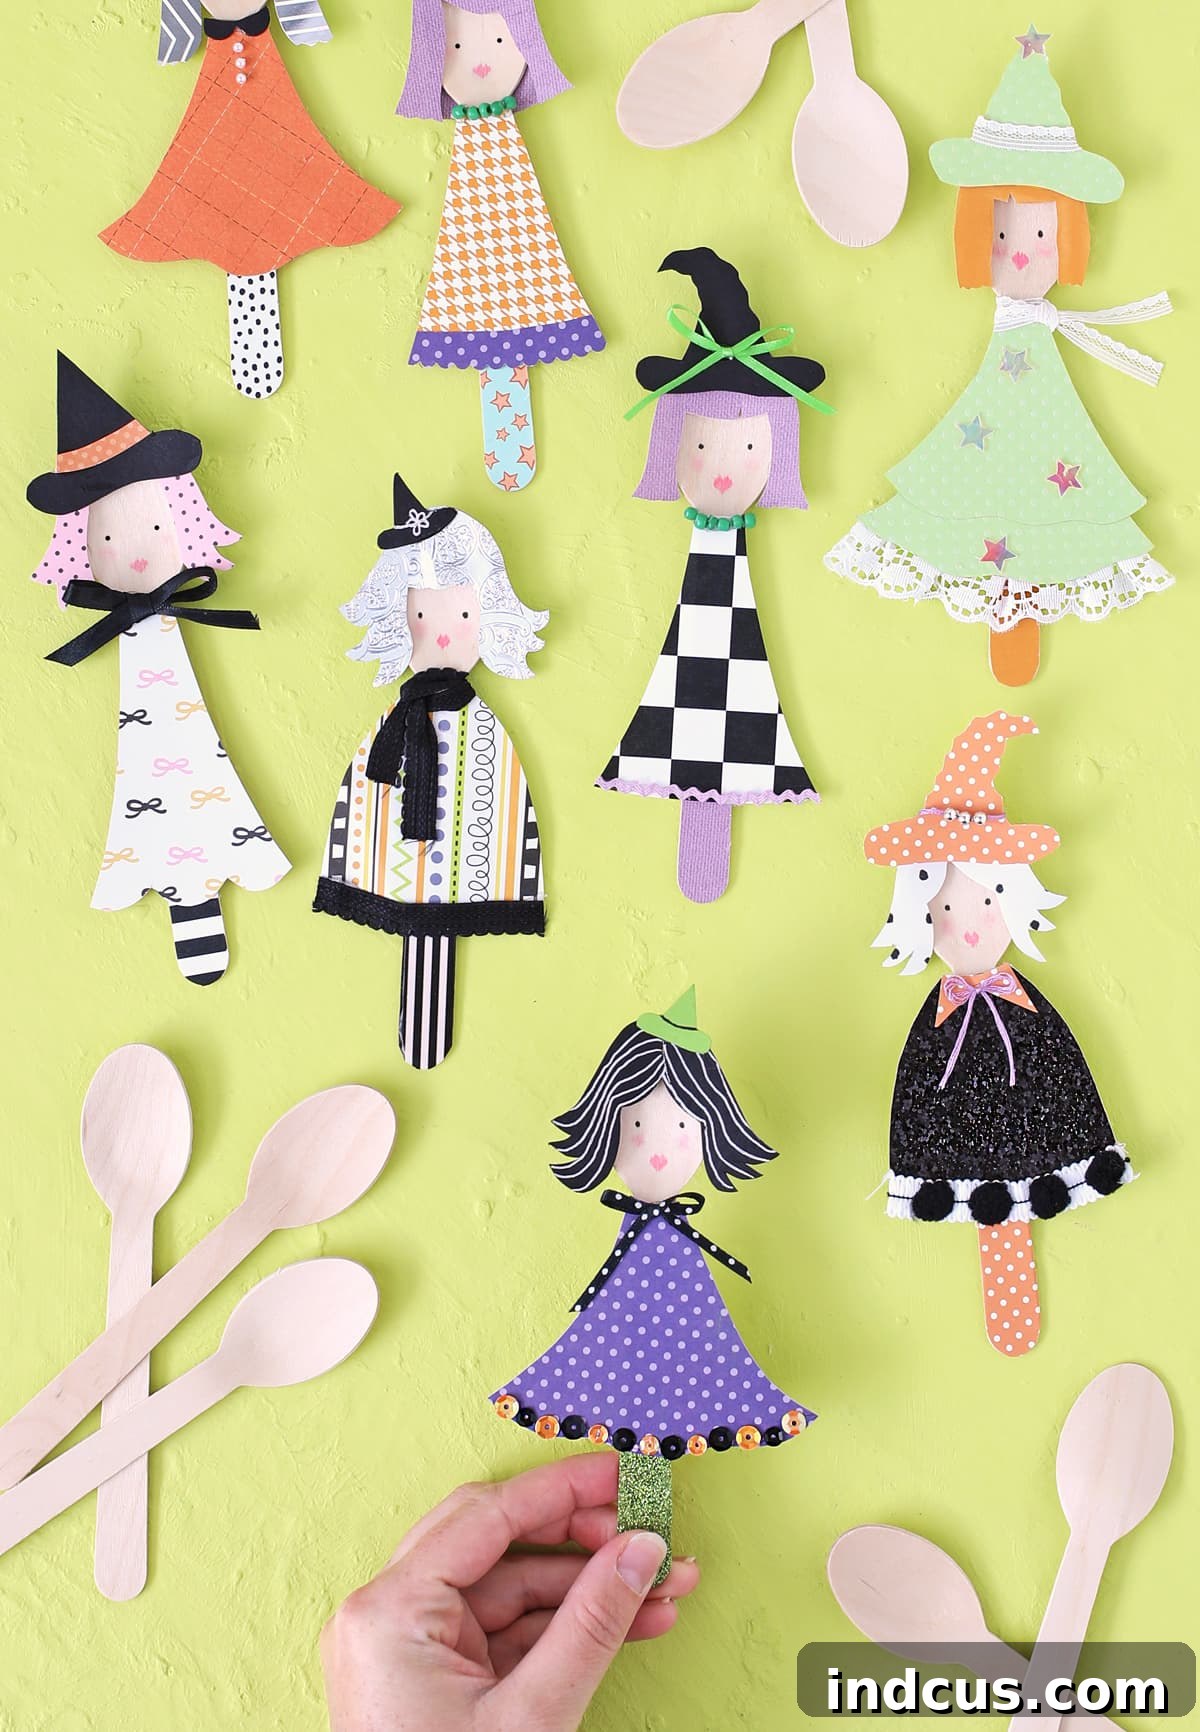
As the leaves begin to turn and a crisp chill fills the air, our thoughts often drift to the magic and mystery of Halloween. What better way to usher in the spooky season than with a delightful, hands-on crafting project? Today, we’re thrilled to share an absolutely charming Halloween craft idea that’s guaranteed to spark joy and unleash your inner artisan: creating whimsical witches from humble disposable wooden spoons! This project is wonderfully easy, incredibly cute, requires no elaborate tools or expensive materials, and promises hours of creative fun for crafters of all ages.
Whether you’re looking for a simple DIY decoration, a fun activity to share with children, or a relaxing creative outlet for yourself, these wooden spoon witches are an ideal choice. They transform everyday items into unique, personalized Halloween figures, perfect for adding a touch of handmade charm to your seasonal decor. Get ready to gather your supplies and let your imagination take flight as we dive into making these enchanting little characters!
Why This Craft is Spellbindingly Fun
There are countless reasons to fall in love with making wooden spoon witches. Firstly, it’s an incredibly budget-friendly endeavor. You’re likely to find many of the necessary items already tucked away in your craft stash or readily available at local discount stores. This makes it a fantastic option for group activities, school projects, or simply when you want to get creative without breaking the bank.
Secondly, this Halloween craft offers immense creative freedom. Each witch can be uniquely designed, reflecting different personalities and styles. From vibrant dresses to quirky hats and expressive faces, the possibilities for customization are endless. This allows for a truly personalized touch, making every witch a unique piece of art. It’s also a fantastic way to utilize leftover scraps of paper, ribbon, and other embellishments that might otherwise go to waste.
Finally, the process itself is wonderfully therapeutic. The focused activity of cutting, gluing, and decorating can be a relaxing escape, helping to alleviate stress and boost creativity. It’s a craft that encourages mindfulness and allows you to immerse yourself in the joy of making. Plus, the rewarding feeling of seeing your adorable little witches come to life is simply priceless!
Gather Your Enchanting Supplies
To embark on this delightful crafting journey and create your very own coven of charming wooden spoon witches, you’ll need a few key materials. The beauty of this project lies in its simplicity and the accessibility of its components.
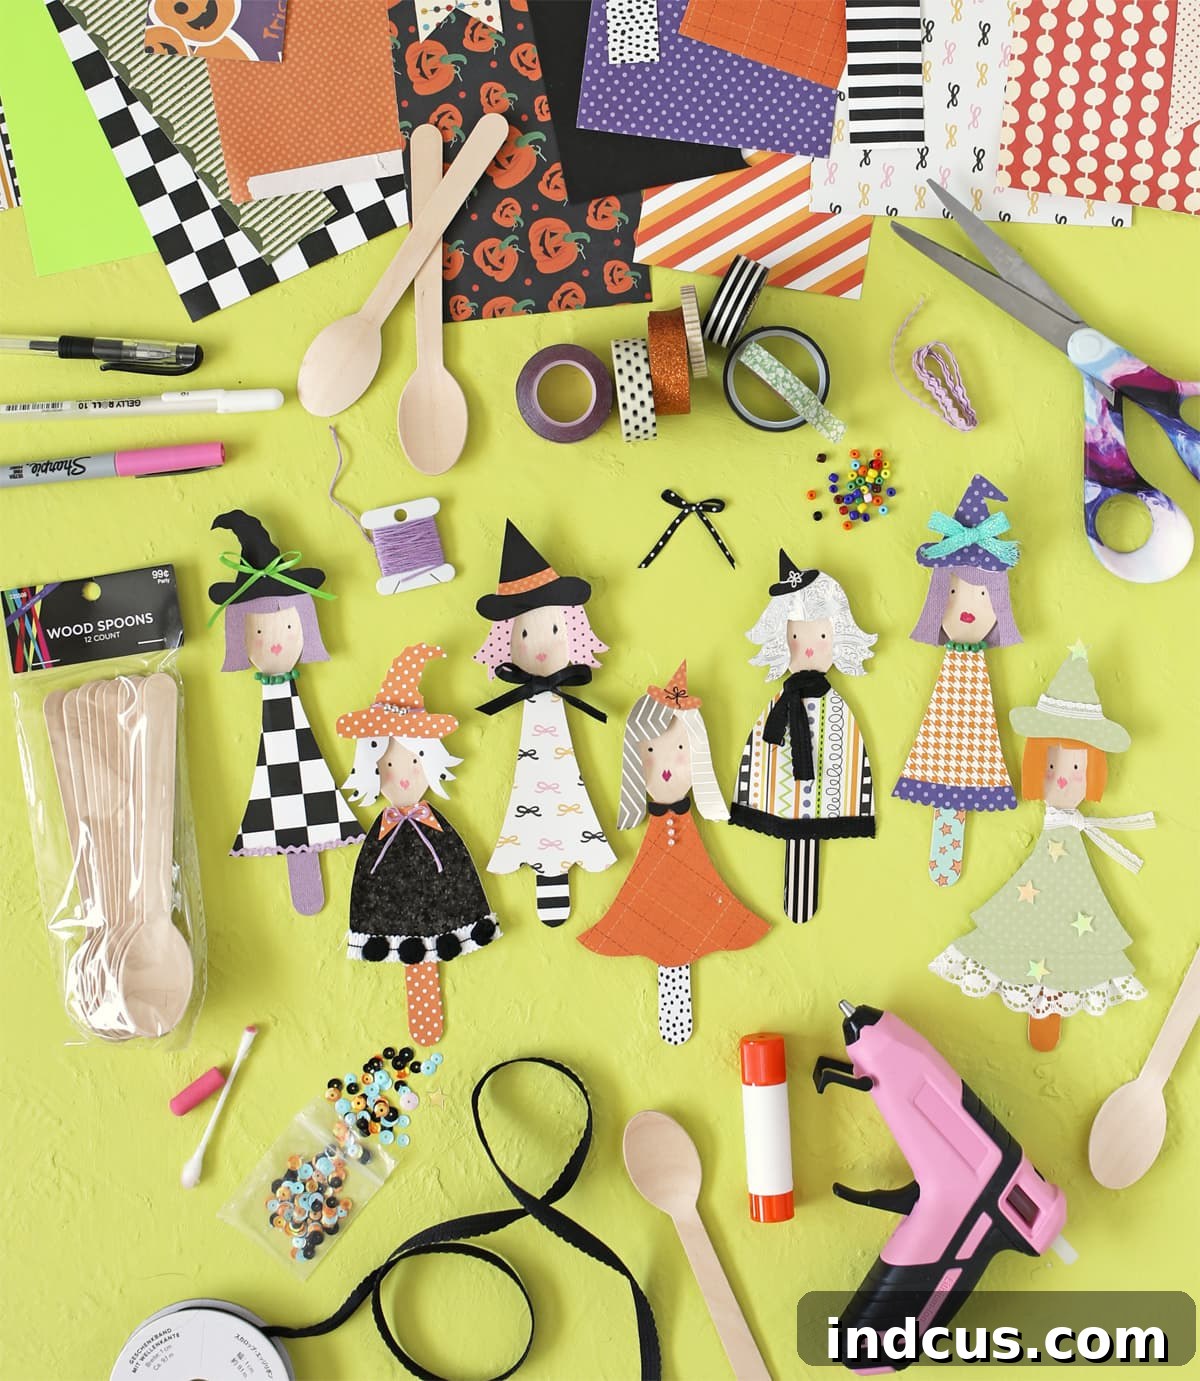
Materials List:
- Disposable Wooden Spoons: These form the body and head of your witches. Look for sturdy, smooth spoons that provide a good canvas for decorating.
- Assorted Scrapbook Paper: Perfect for dresses, hats, hair, and other accessories. Dive into your stash for patterned, textured, or colorful scraps.
- Hot Glue Gun + Glue Sticks: Essential for quickly securing larger pieces like hair and hats, especially where precision and strong adhesion are needed.
- School Glue Stick or Glue Pen: Ideal for attaching paper cutouts like dresses and smaller details, offering a cleaner application for paper-to-paper or paper-to-wood bonds.
- Paint Pens or Gel Pens: These are best for drawing facial features, as they provide opaque, vibrant lines that stand out on wood without bleeding.
- Cotton Swab and Pink Chalk: Your secret weapon for creating those adorable, rosy witchy cheeks.
- Assorted Embellishments: Unleash your creativity here! Think ribbons, beads, lace, sequins, buttons, tiny felt shapes, googly eyes, glitter, small charms, or even washi tape.
You can often find disposable wooden spoons in the party supply section of most craft stores, or even in bulk online, making them a very affordable starting point for your Halloween craft. As a seasoned crafter, I’ve found that these wooden spoons offer excellent value and quality for this project.
Before you even begin, take a moment to explore your existing craft supplies. This project is a fantastic opportunity to repurpose those charming little doodads and patterned paper scraps you’ve been hoarding. It’s amazing what treasures you can unearth from your creative stash!
Crafting Your Whimsical Witches: A Step-by-Step Guide
Now that you have all your magical ingredients, it’s time to bring your wooden spoon witches to life. Follow these simple steps, and remember to enjoy the process—each witch will be a unique reflection of your imagination!
Instructions:
Step 1: Conjuring the Wardrobe & Hat
Begin by sketching the foundational elements of your witch’s attire onto the back side of your chosen scrapbook paper scraps. This ensures that any stray pencil lines remain hidden once the pieces are glued in place. Consider drawing whimsical dress shapes, classic pointed witch hats, and various hairstyles that will suit your spoon’s proportions. A clever trick is to trace the spoon itself onto the paper to help you achieve the perfect sizing for the body, ensuring everything fits snugly. Don’t be afraid to experiment with different patterns and colors to give each witch a distinct personality.
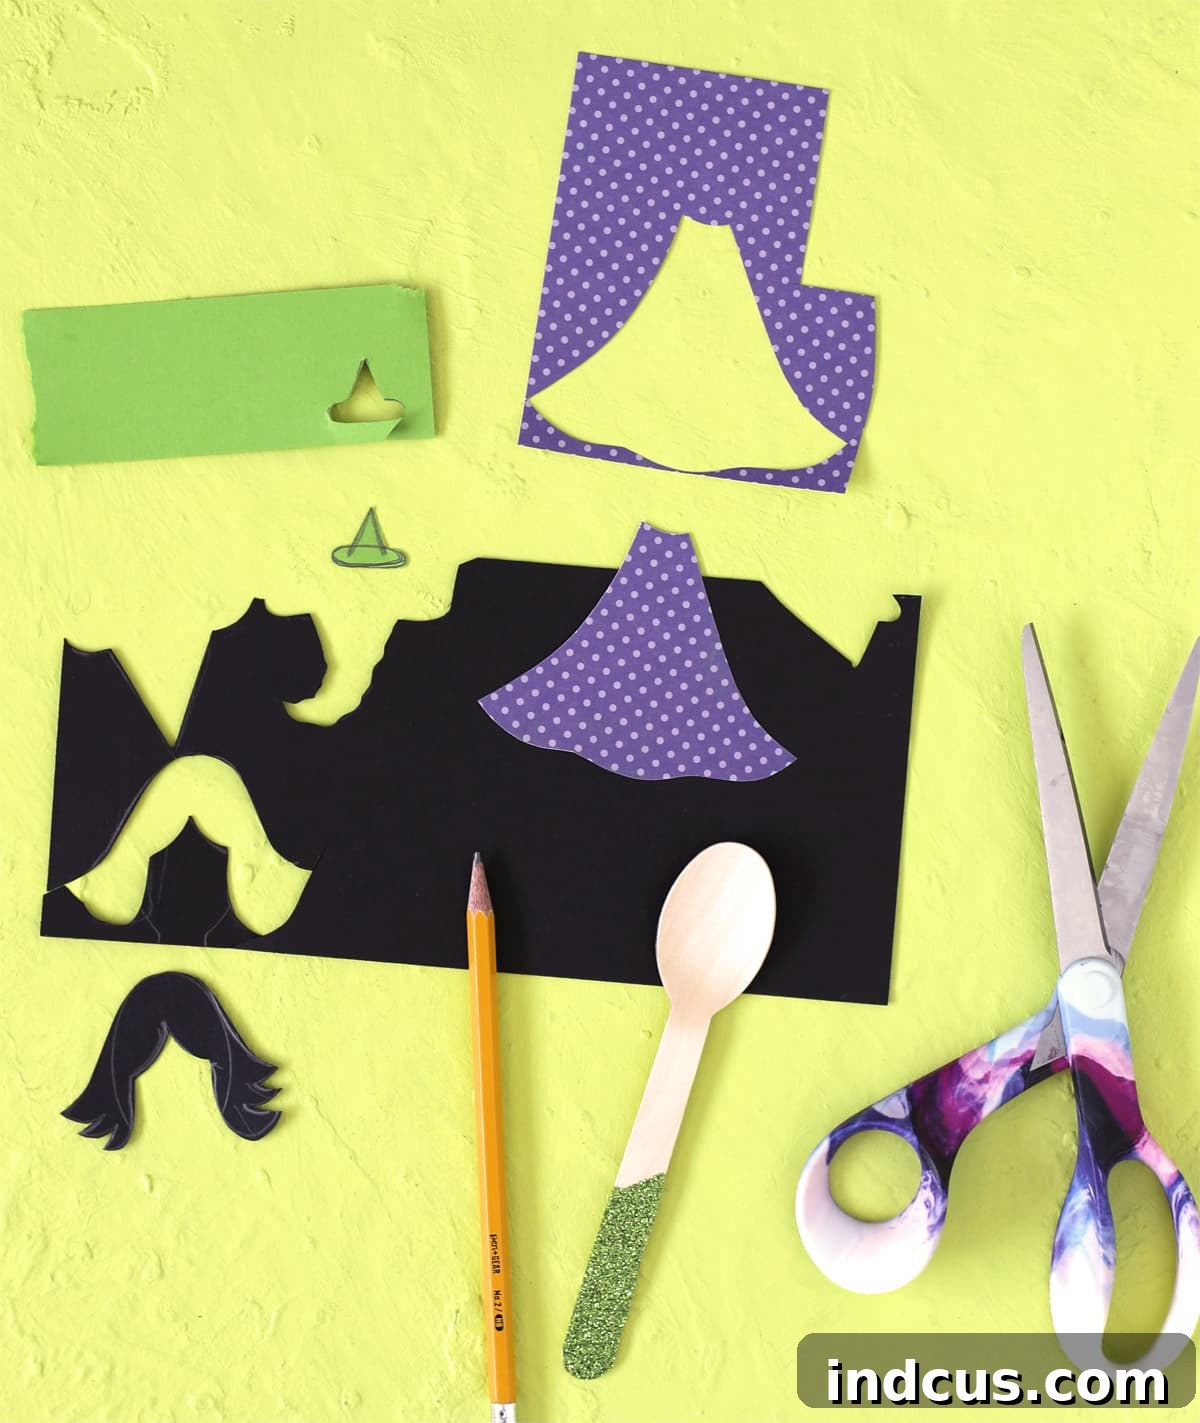
Step 2: Assembling Your Little Witch
With all your paper pieces carefully cut out, it’s time to start assembling! The key to a neat finish is to work from back to front, layering your elements in a logical order. First, use a school glue stick or glue pen to attach the “legs” (if your design includes them) and the dress to the spoon. These glues are great for flat paper surfaces. For the hair and hat, which often have less surface area for adhesion and require a stronger, quicker bond, a hot glue gun is your best friend. Remember to attach the hair first, then the hat on top, creating a layered, professional look. Always exercise caution when using a hot glue gun, especially if crafting with children.
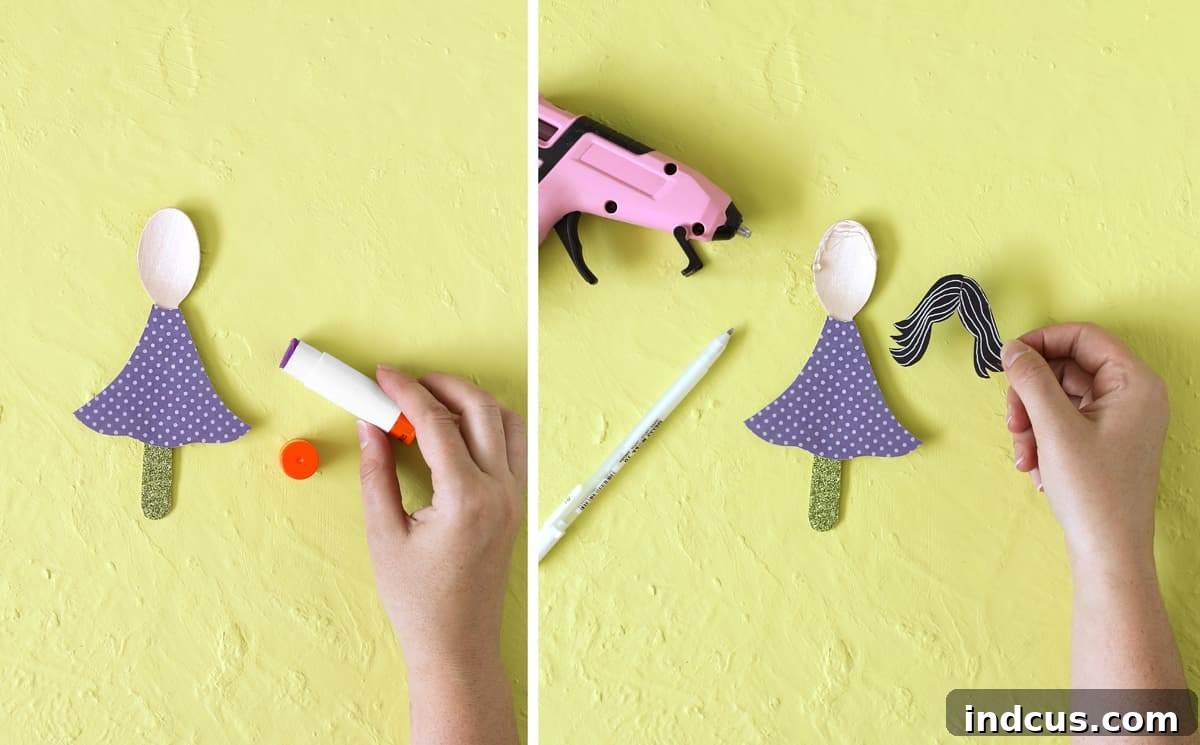
Step 3: Bewitching Embellishments
This is arguably the most exciting part of the process – adding all the intricate details and embellishments that bring your witch to life! Let your creativity run wild as you adorn your spoon with bows, beads, buttons, tiny fabric scraps, glitter, sequins, or even miniature faux spiders. Consider giving your witch a tiny broom made from twigs and string, or a little charm on her hat. Ribbons can be tied around the spoon’s neck to create a scarf or bow, and small pieces of lace can add elegant trim to her dress or hat. Think about the overall theme you want for your witch—is she classic, spooky, whimsical, or glamorous? Each embellishment adds to her unique story and personality.
Step 4: Bringing Your Witch to Life with a Face
The final touch is giving your witch an expressive face. For the eyes, a black gel pen or fine-tipped paint pen works wonders, offering clean, crisp lines. While a Sharpie can work in a pinch, be aware that its ink tends to bleed slightly into the wood grain, which can make the lines less defined. Paint pens or gel pens provide a smoother, more controlled application for delicate details like eyes, eyebrows, and mouths. For the perfect rosy cheeks that give your witch a charming blush, dab a tiny bit of pink chalk onto the end of a cotton swab and gently rub it onto the wooden surface. This simple technique creates a soft, natural flush that truly brings your witch’s character to life!
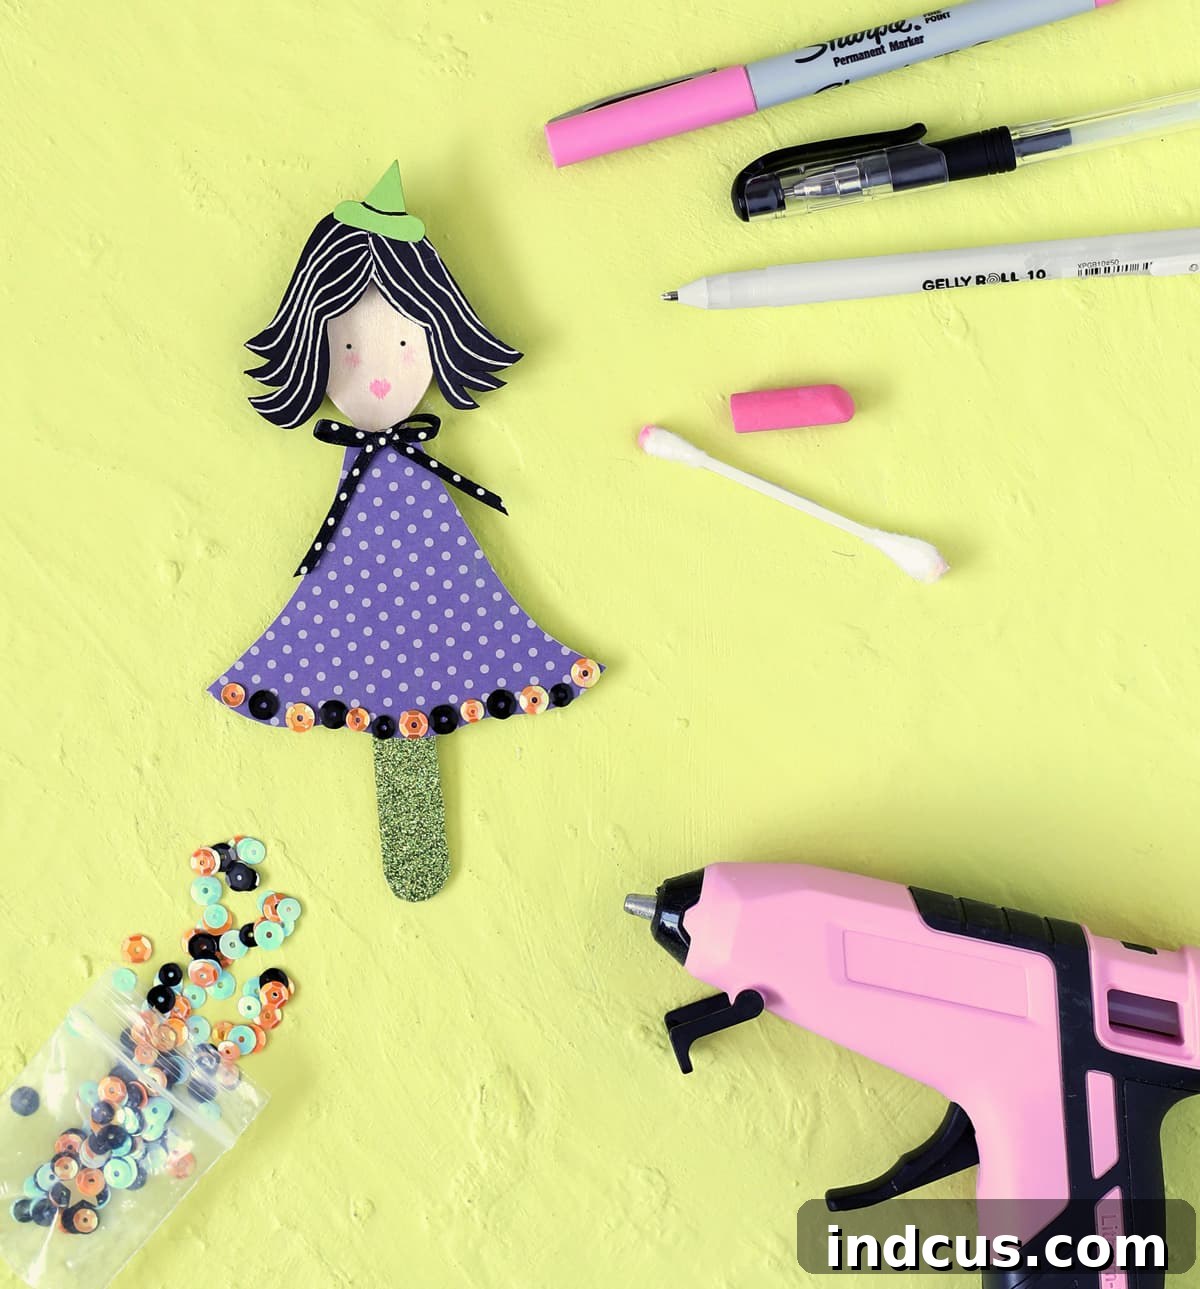
Aren’t these little ladies just adorable? Take a moment to admire all the unique details you’ve crafted. Each one tells a story!
Tips for a Perfectly Bewitching Outcome
- Embrace Imperfection: Remember, these are handmade crafts. Slight variations and “imperfections” add to their charm and character.
- Pre-plan Your Design: Before gluing, lay out your paper pieces and embellishments to visualize the final look. This helps prevent mistakes and ensures a cohesive design.
- Layering is Key: When applying paper elements, always think about the order. Background pieces first, then foreground details. For instance, hair often goes on before the hat.
- Glue Wisely: Use school glue for large paper areas and hot glue for quick, strong bonds on smaller, trickier pieces like hair, bows, or tiny embellishments. Always supervise children with hot glue guns.
- Let It Dry: Allow sufficient drying time for all glues before handling your witches extensively or adding further embellishments.
- Involve the Kids: This is a fantastic family activity! Let children choose their own paper patterns and embellishments to foster their creativity.
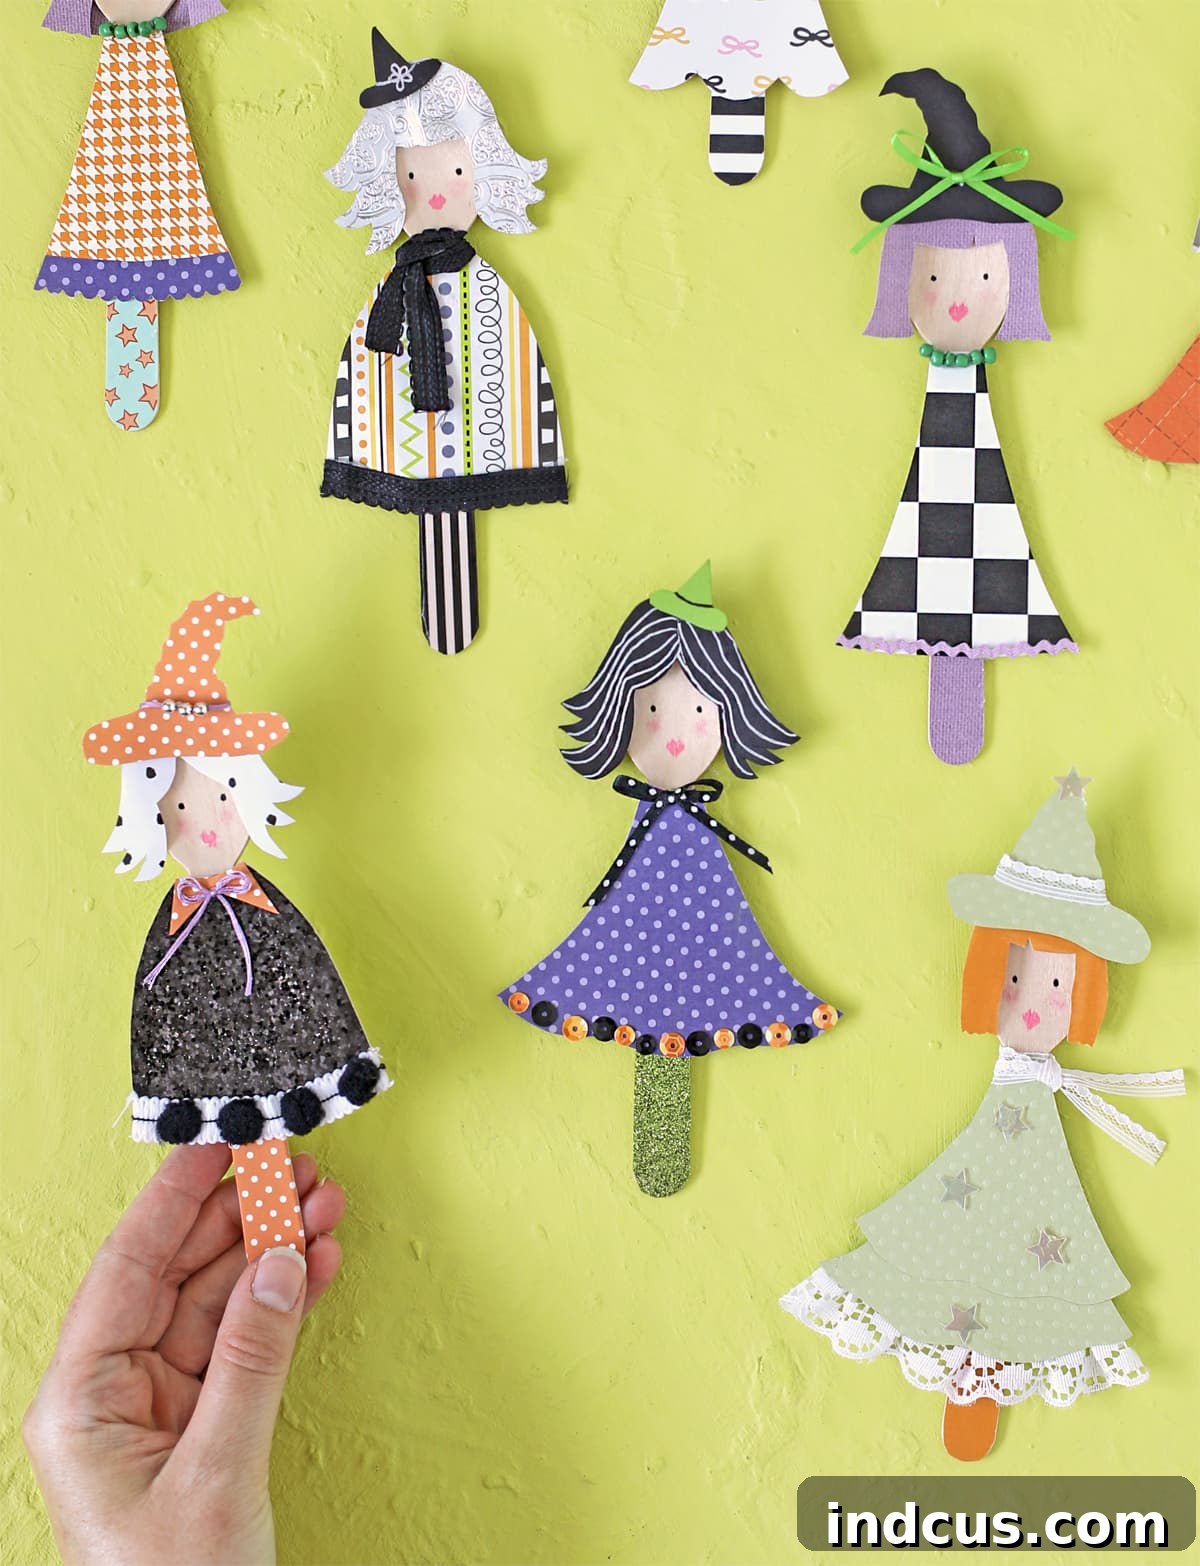
Showcasing Your Coven of Witches
Once your enchanting collection of wooden spoon witches is complete, it’s time to display them and spread some Halloween cheer! These versatile little figures can be used in numerous creative ways:
- Spooky Centerpiece: Arrange them in a small vase or a mini pumpkin for a charming table centerpiece.
- Halloween Garland: Attach a string to the back of their hats and string them together to create a delightful witch garland for your mantel or doorway.
- Plant Picks: Tuck them into potted plants or flower arrangements to add a festive touch indoors or on a covered porch.
- Gift Toppers: Use them as unique, handmade embellishments on Halloween gifts or party favors.
- Tiered Tray Decor: They fit perfectly within a tiered tray display, adding height and character to your seasonal vignettes.
- Bookmark Buddies: While perhaps a bit bulky, they can make fun, whimsical bookmarks for larger, older books.
However you choose to display them, these handmade witches are sure to bring smiles and compliments from all who see them.
Beyond the Cauldron: Personalizing Your Witches
The true magic of this craft lies in its adaptability. Don’t feel confined to traditional witchy themes. Experiment with different concepts:
- Color Palettes: Try an elegant black and white theme, a vibrant rainbow coven, or soft pastels for a fairy-tale witch.
- Character Traits: Give your witches specific personalities. One might be a “glam witch” with lots of glitter and sequins, another a “forest witch” with natural elements like tiny leaves and twine, or a “steampunk witch” with gears and metallic accents.
- Props and Accessories: Beyond brooms, consider tiny spell books, miniature cats, or even tiny glasses made from wire for an intellectual witch.
- Seasonal Adaptations: While perfect for Halloween, with a change of colors and accessories, these wooden spoons could transform into angels, fairies, or even Santa’s elves for other holidays!
This creative flexibility ensures that no two witches will ever be exactly alike, making your crafting experience uniquely yours.
Conclusion: Embrace the Crafting Magic!
We hope this guide has inspired you to grab some wooden spoons and dive into the wonderful world of Halloween crafting. Creating these adorable wooden spoon witches is more than just a craft; it’s an opportunity to engage your imagination, enjoy a therapeutic creative process, and add a truly personal touch to your holiday decorations. It’s a fantastic, inexpensive Halloween craft for kids and adults alike, fostering creativity and providing a delightful sense of accomplishment.
Whether you’re a seasoned crafter or just starting your DIY journey, you’ll find immense joy in bringing these charming characters to life. So, this Halloween season, give this enchanting project a try. It’s a wonderful way to scratch that creative itch and infuse your home with handmade magic. Happy crafting, and may your Halloween be filled with delightful spells and spooky fun!







