
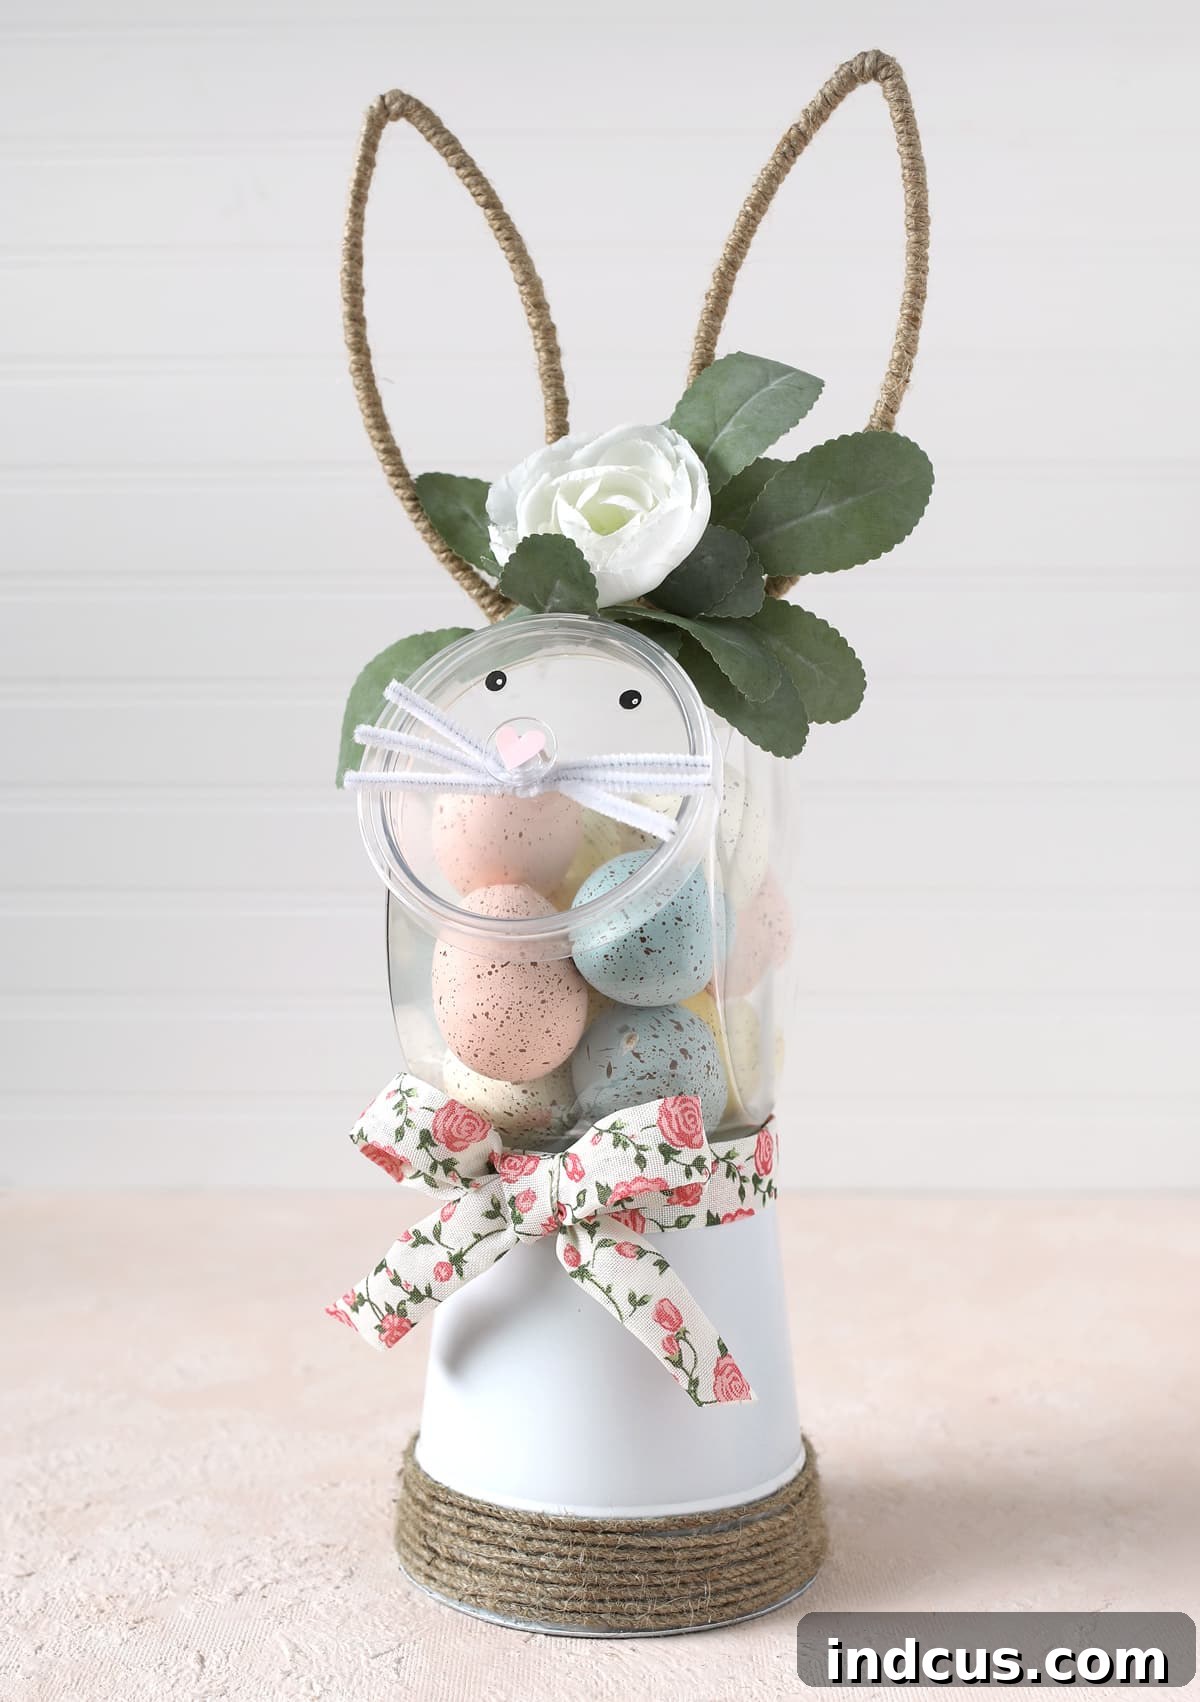
Transform a Simple Candy Jar into an Adorable DIY Easter Bunny Decoration
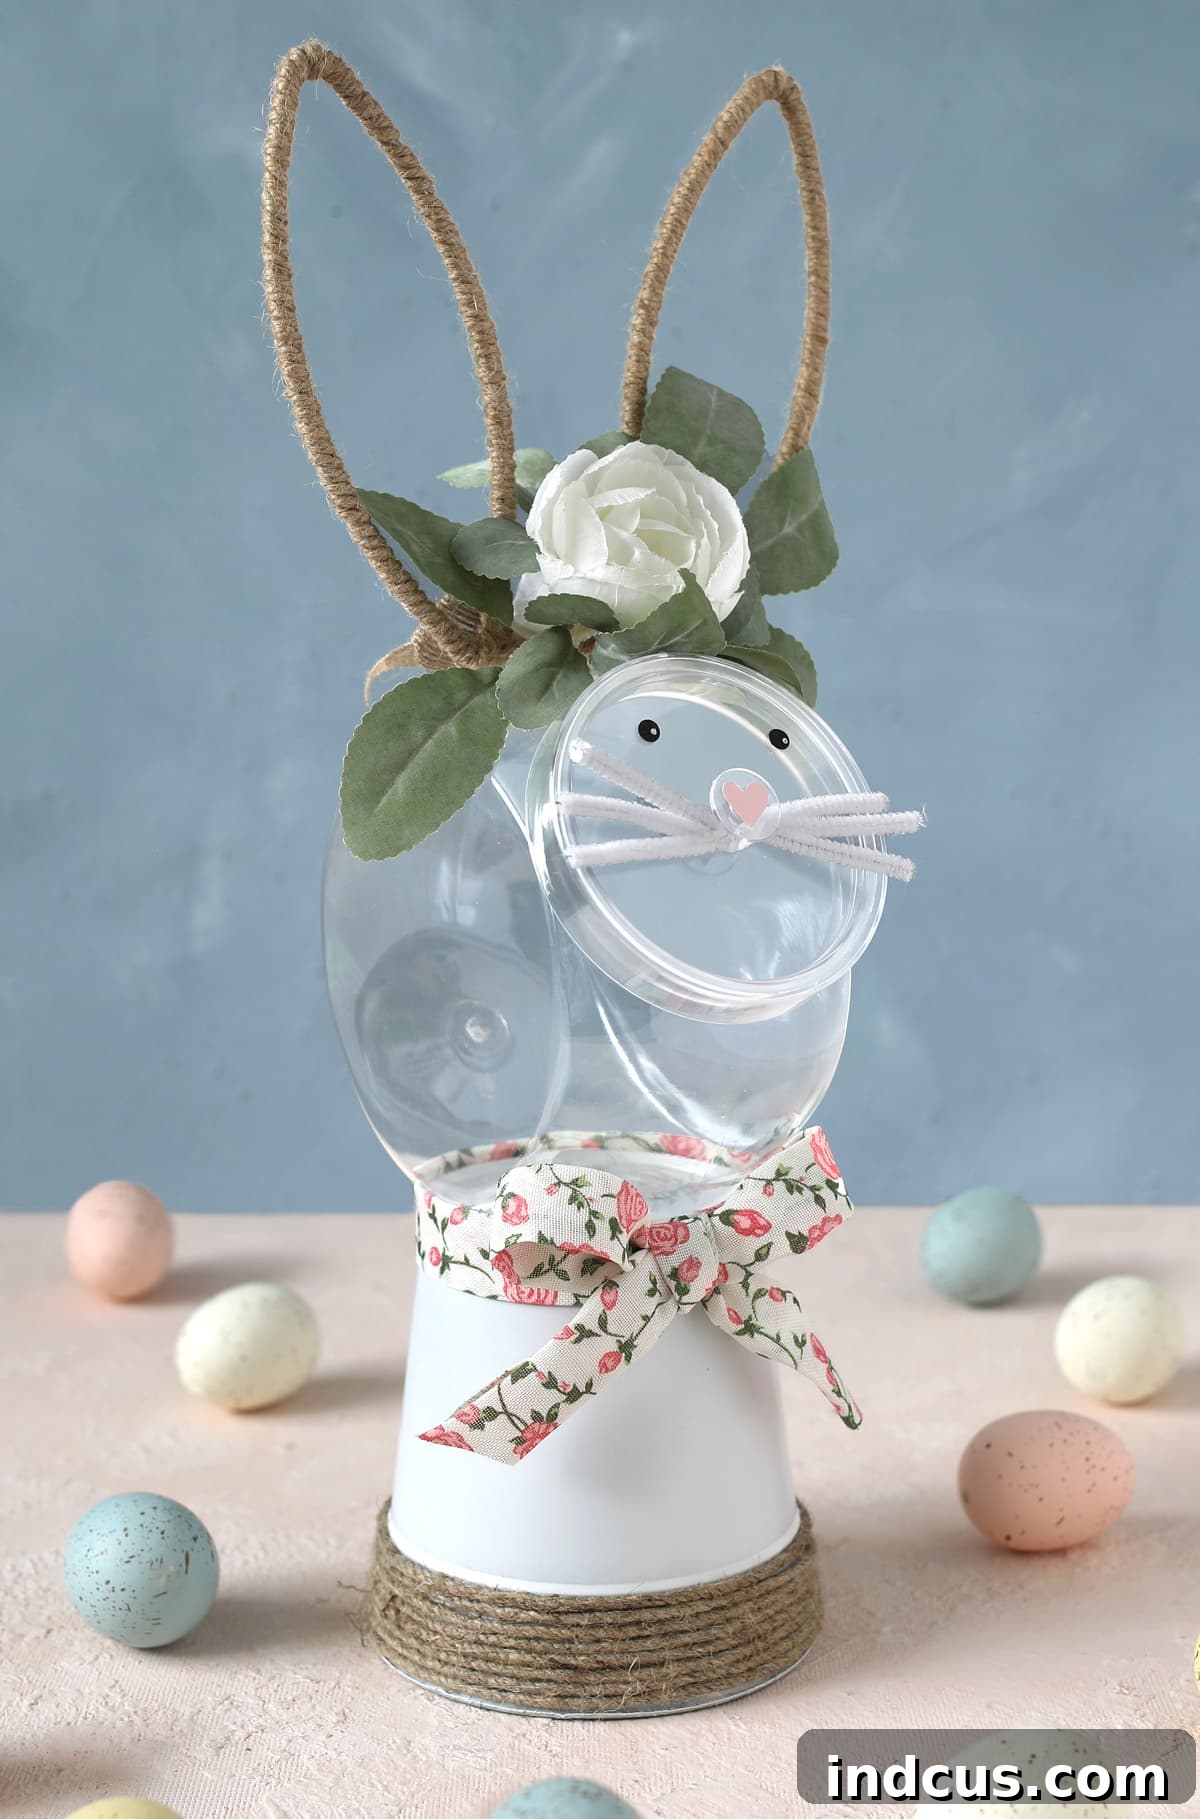
Get ready to infuse your home with the delightful spirit of spring and Easter! Today, we’re embarking on a charming DIY project that promises to bring smiles: crafting a captivating Easter bunny candy jar. This simple yet incredibly rewarding decoration is perfect for adding a touch of whimsy to your holiday decor, whether as a festive centerpiece, a thoughtful gift, or a fun way to store your favorite seasonal treats.
The idea for this project sparked from a desire to create a unique, bunny-themed candy holder using readily available and inexpensive supplies. After a bit of creative experimentation, including a few valuable learning curves (like discovering the ideal paint and the perfect way to attach those adorable bunny ears!), I’ve ironed out all the details. Now, you can follow along with a clear, straightforward guide to create your very own darling Easter bunny candy jar, avoiding any of the little mishaps I encountered!
Why You’ll Love Crafting This Easter Bunny Candy Jar
This DIY Easter bunny candy jar isn’t just a craft; it’s an opportunity to create something truly special for the spring season. It offers a wonderful blend of simplicity and charm, making it accessible for crafters of all skill levels. Here’s why this project is sure to become a favorite:
- **Budget-Friendly:** Most materials can be found at dollar stores or craft shops, ensuring a beautiful result without breaking the bank.
- **Personalization Potential:** While we provide a specific design, the project is highly customizable. You can easily adapt colors, ribbons, and embellishments to match your personal style or existing home decor.
- **Versatile Decoration:** Once complete, your bunny jar can serve multiple purposes. Fill it with colorful Easter candies, decorative eggs, or even small floral arrangements to brighten any room.
- **Engaging Crafting Experience:** Perfect for a quiet afternoon solo project or a fun activity to share with family and friends. It’s a fantastic way to get into the Easter spirit!
- **Handmade Charm:** There’s something uniquely satisfying about displaying a piece you’ve created yourself. This bunny jar adds a warm, handmade touch that factory-produced items simply can’t replicate.
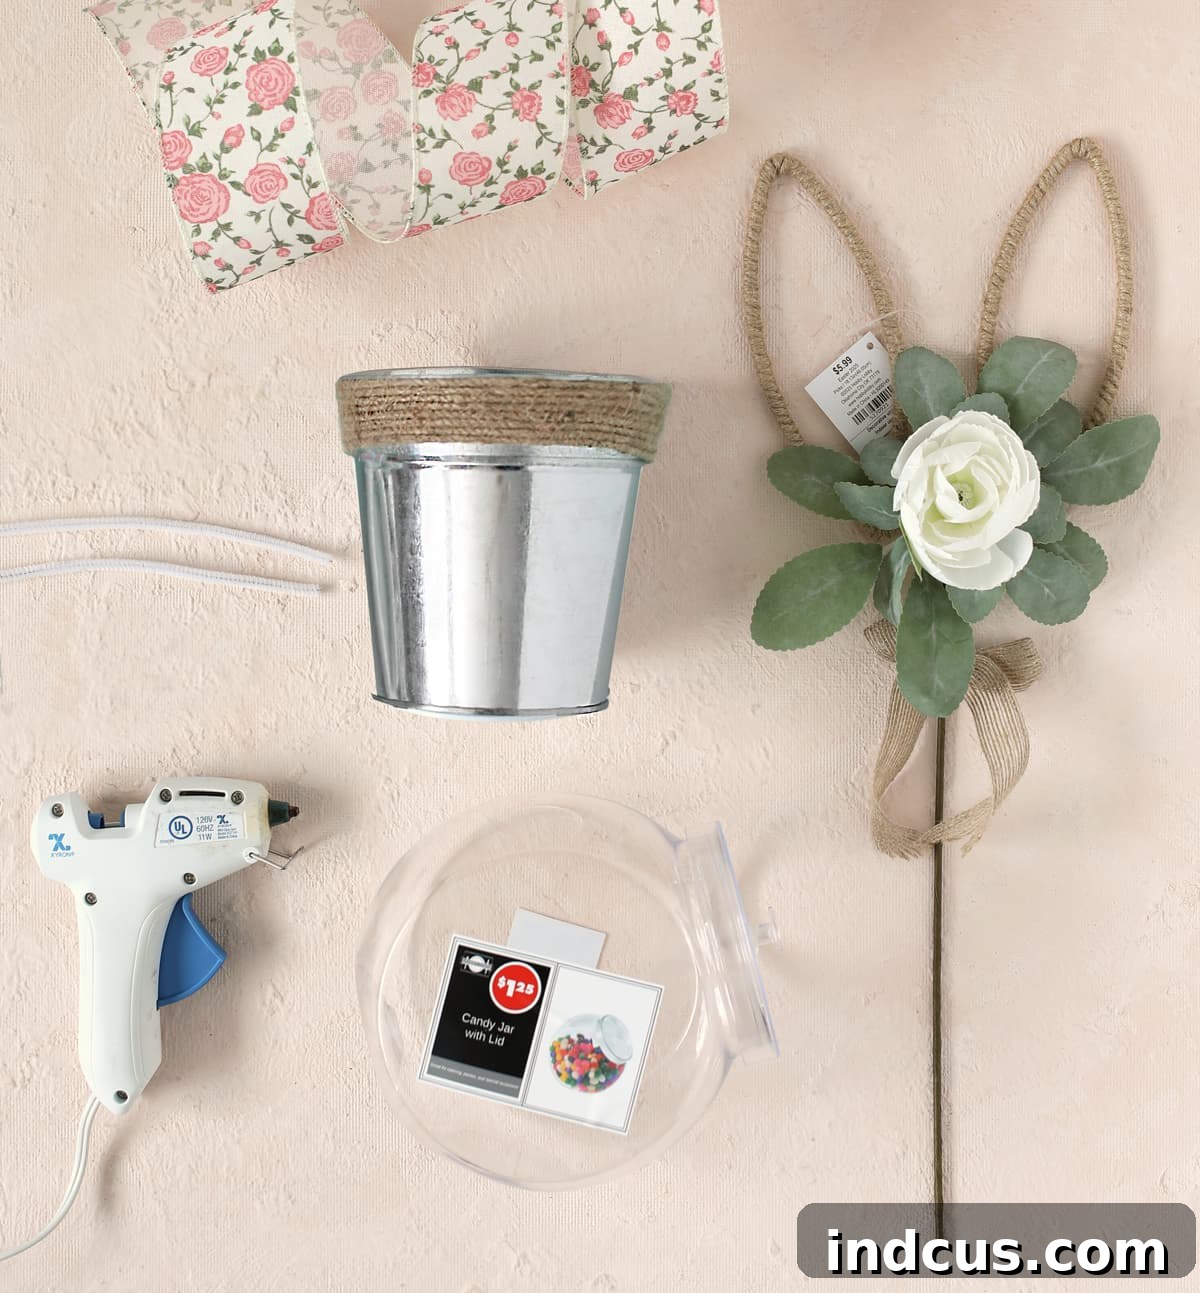
Gathering Your Supplies: What You’ll Need for Your Bunny Candy Jar
Before we dive into the creative process, let’s gather all the necessary materials. I’ve carefully selected these items for their ease of use and ability to help you achieve a beautiful, professional-looking result. Remember, you can always substitute items based on what you have on hand or what best fits your aesthetic!
- Dollar Tree Candy Jar with Lid (55oz): This plastic jar is lightweight and safe, perfect for holding treats. A glass jar can also be substituted for a more classic feel.
- Dollar Tree Metal Bucket (5.5 inch with Rope Accents): This will form the base of your bunny, providing stability and a charming rustic touch with its rope handle.
- Bunny Ears Pick: The star of our bunny transformation! I found a beautiful jute and eucalyptus pick that added a sophisticated touch, but simpler bunny ear headbands from Dollar Tree (like these) work wonderfully too and offer a different look.
- Spray Paint: Opt for a high-quality white or heirloom white spray paint. This ensures smooth, even coverage and excellent adhesion on metal surfaces, unlike acrylic craft paints which can be streaky.
- White Pipe Cleaner: Essential for crafting those delicate bunny whiskers.
- Spring Ribbon: I highly recommend a 7/8″ size ribbon for a balanced look. While a wider ribbon can be used, it might overwhelm the craft unless folded. Choose a lovely spring color like pink or pastel green.
- White Pom Pom (1.5 inch): For the cutest, fluffiest bunny tail!
- Scrap Colored Cardstock: Black for the eyes and pink for the nose. Small scraps are all you need.
- Paper Hole Punch: To create perfectly circular eyes.
- Scissors: For cutting cardstock and ribbon.
- Floral Stem Cutter or Wire Cutter: Crucial for safely removing the metal stick from your bunny ear pick.
- Hot Glue Gun + Gluesticks: Your best friend for this project, providing quick and strong adhesion. Ensure you have plenty of glue sticks!
Step-by-Step Guide: Crafting Your Adorable Easter Bunny Candy Jar
Let’s get crafting! Follow these detailed instructions to assemble your charming Easter bunny candy jar. Remember to take your time and enjoy the creative process.
General Tip Before Starting: Always work in a well-ventilated area when using spray paint. Protect your work surface with newspaper or a drop cloth. For hot glue, ensure you have a safe resting place for your glue gun and be mindful of your fingers to avoid burns.
Step 1: Preparing Your Metal Base (Painting Tips)
Begin by preparing your Dollar Tree metal bucket. If your bucket has a rope handle or decorative twine, carefully cover this portion with painter’s tape. This protects the natural texture and prevents it from being painted. Once taped, spray paint the entire metal part of the bucket white (or heirloom white if you prefer a softer, antique look). Ensure you paint the bottom of the bucket as well for a consistent finish. I learned through trial and error that spray paint adheres far better to metal and provides a smooth, streak-free result compared to acrylic craft paint. Allow the paint to dry completely according to the manufacturer’s instructions. Patience here ensures a durable and beautiful base for your bunny. If you’re tempted to remove the twine, reconsider! I tried that, only to painstakingly re-glue it later. Taping is much simpler and equally effective.
Step 2: Securing the Candy Jar (Foundation Building)
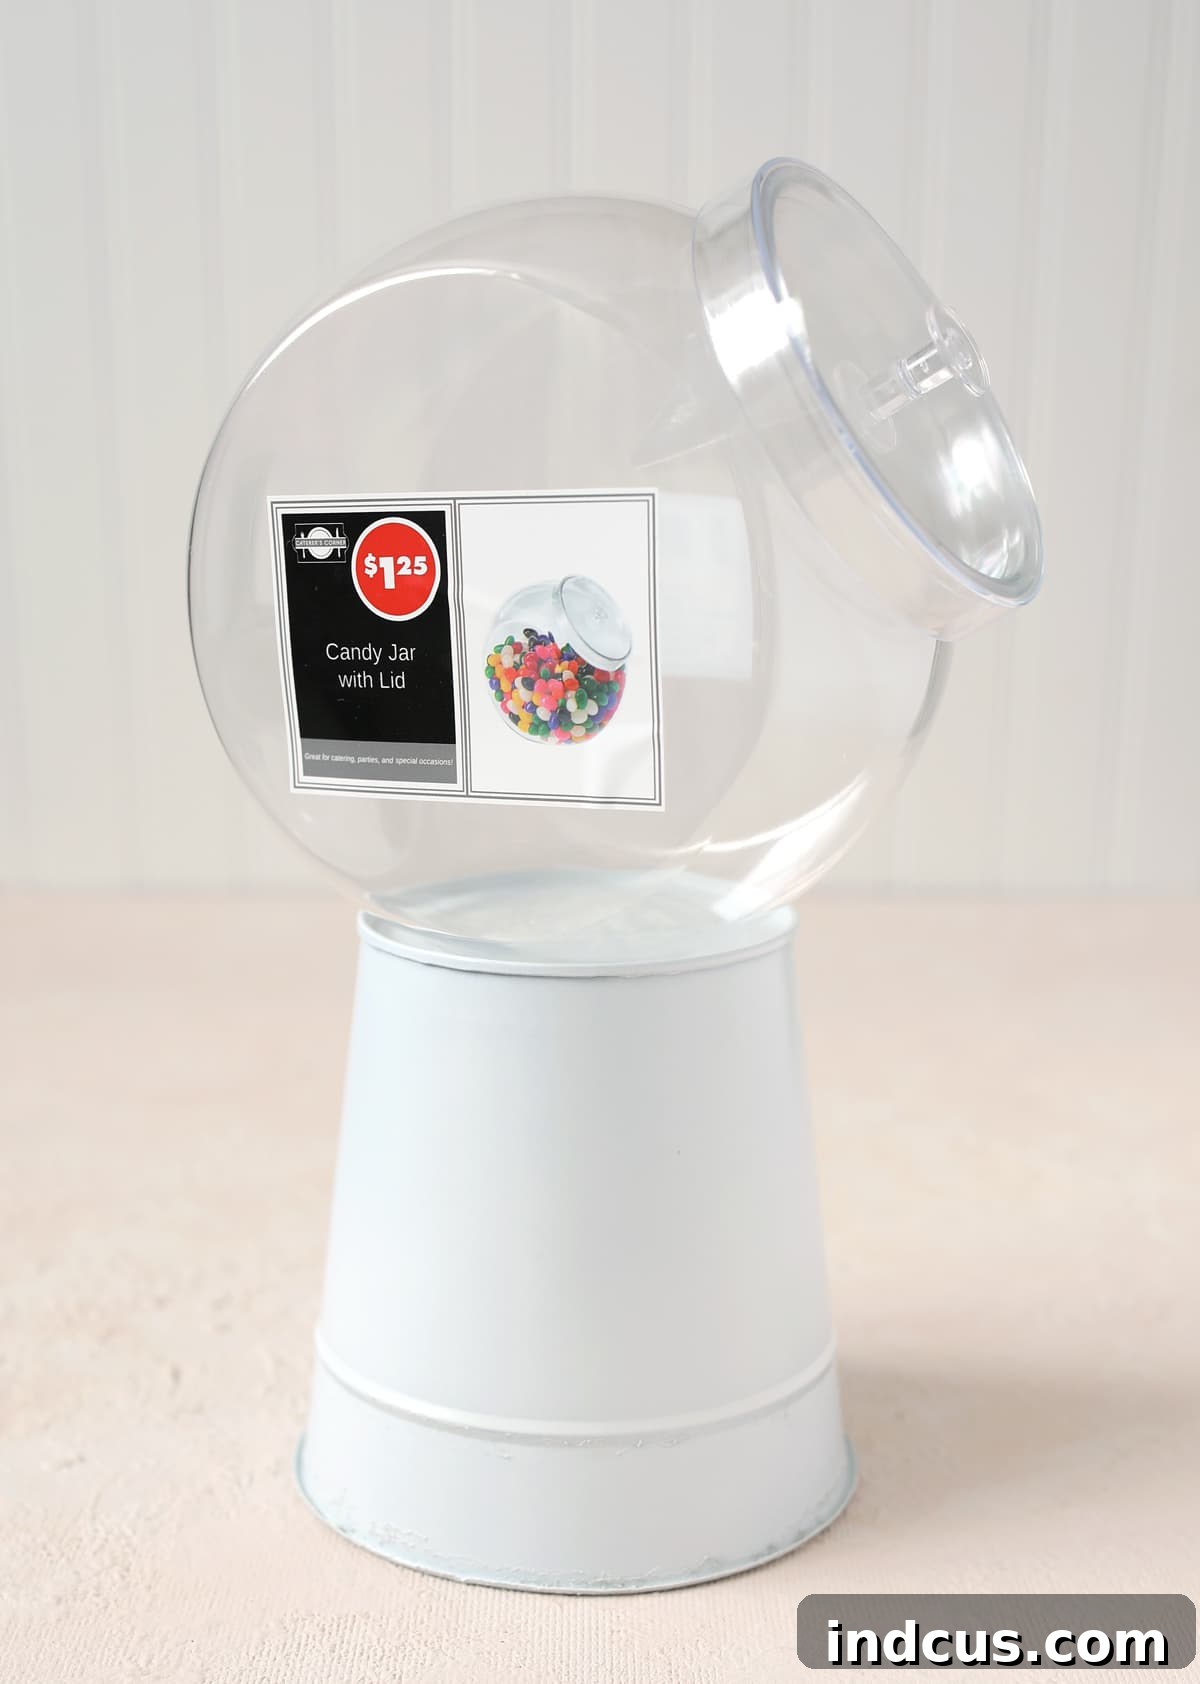
Once your painted metal bucket is thoroughly dry, flip it upside down. This upside-down bucket will serve as the sturdy base for your candy jar. Take your candy jar (with its lid removed for now) and apply a generous amount of hot glue to the center of the upside-down bucket’s base. Carefully center the candy jar on top of the glue and press down firmly. Hold it in place for a good minute or two, allowing the hot glue to cool and create a strong bond. A stable foundation is key for your bunny’s longevity!
Step 3: Transforming Bunny Ears (From Pick to Perch)
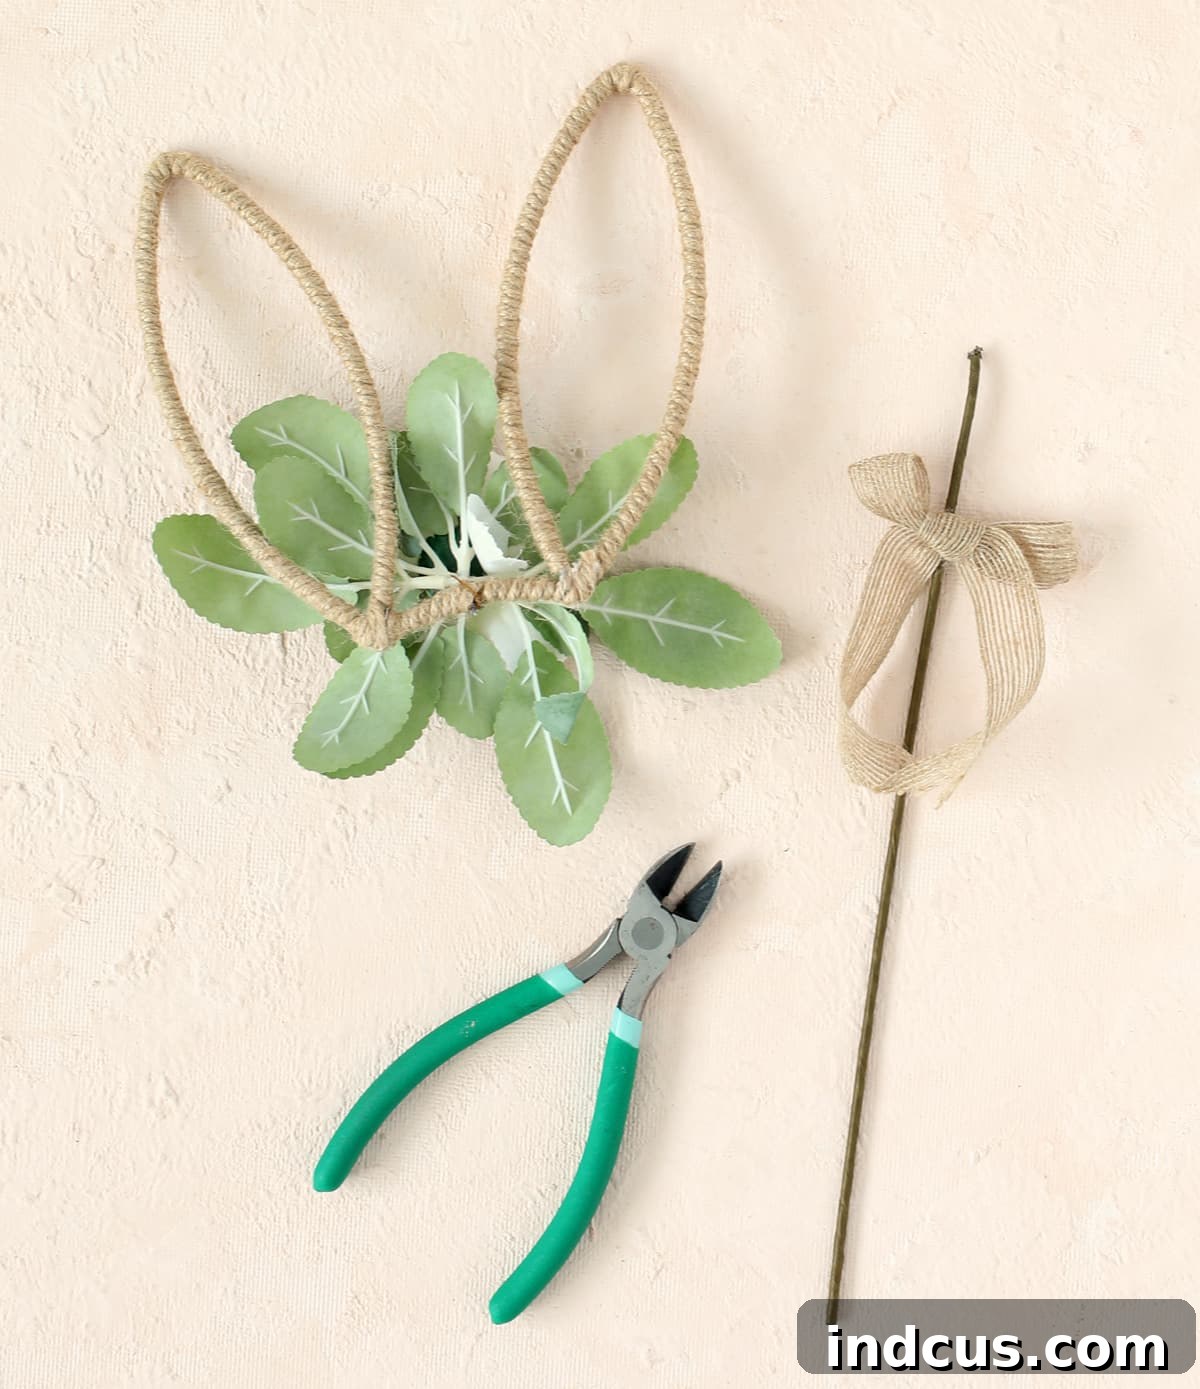
Now, let’s prepare the bunny ears. If you’re using a bunny ear pick, you’ll notice it has a long metal stem designed for floral arrangements. This needs to be carefully removed. Using floral stem cutters or a strong wire cutter, snip off the metal stick as close to the base of the ears as possible. You may need to apply firm pressure from a few different angles, then bend the metal back and forth until it cleanly separates. Exercise caution when using cutters to avoid injury. Once the stem is off, gently reshape the ears if needed to ensure they stand nicely.
Step 4: Attaching the Ears and Hiding Imperfections
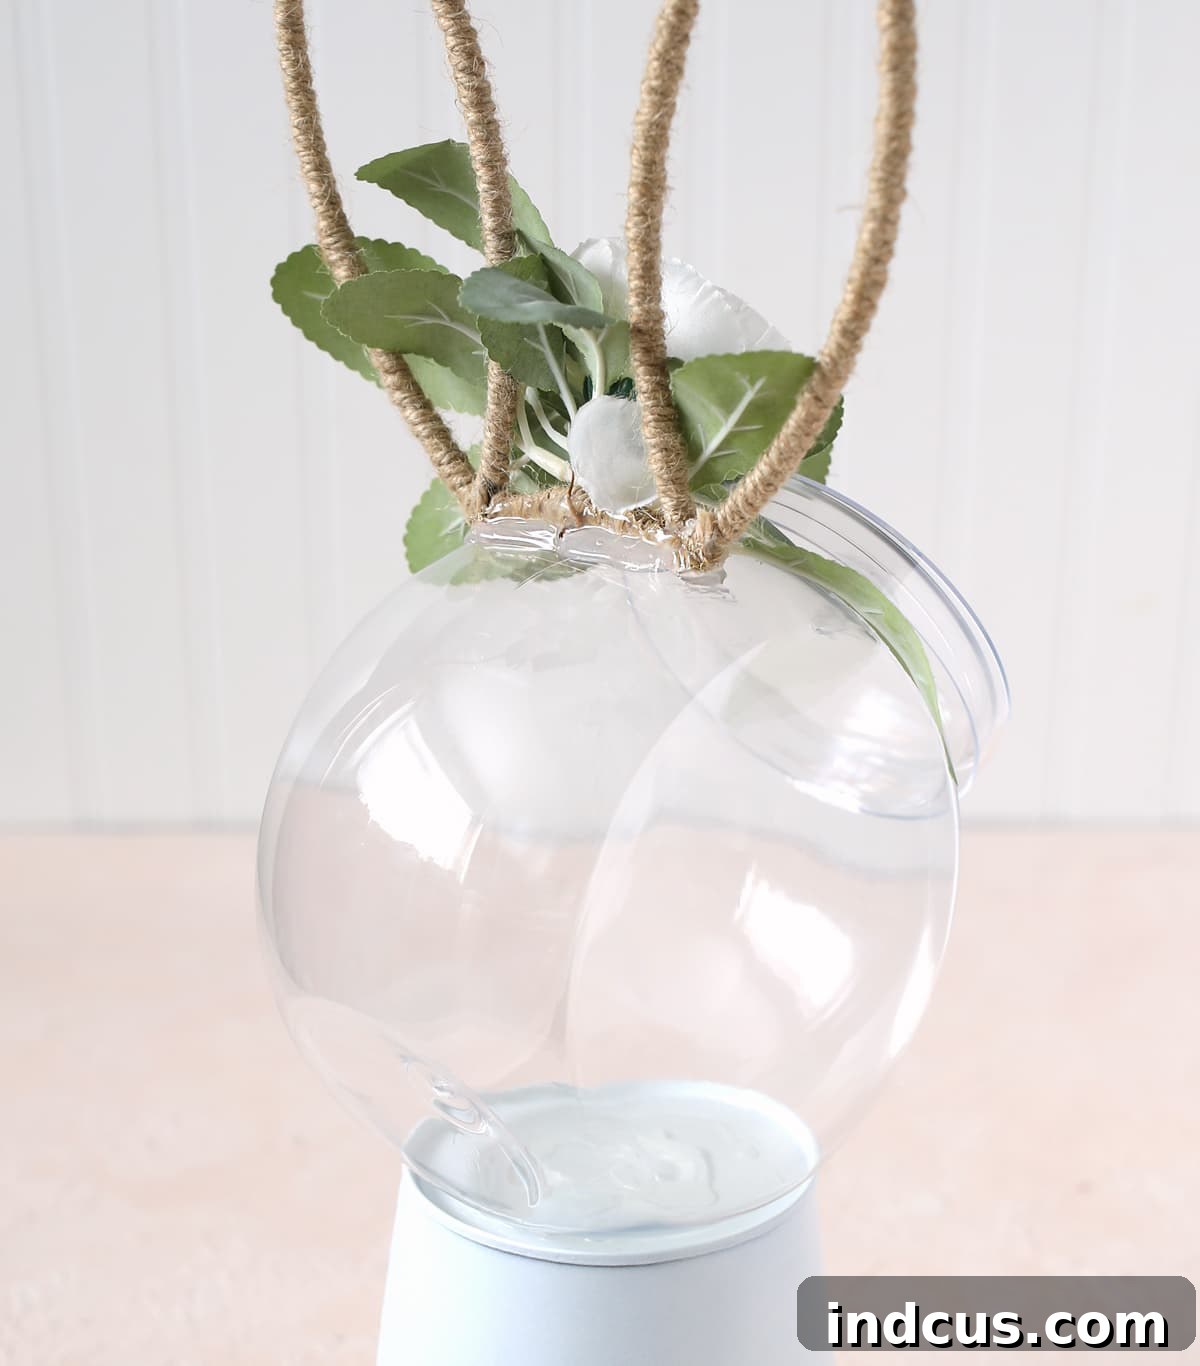
It’s time to give our candy jar its distinct bunny silhouette! Apply a generous, thick blob of hot glue to the very top center of the candy jar. Immediately press the base of your bunny ears firmly into this glue. Once the ears are in place, apply more hot glue around the edges of the ear base to create a secure bond. Hold the ears steady for an extended period – the longer you hold, the more securely the glue will set, preventing any wobbling later. Don’t worry if the hot glue looks a bit messy at this stage; we have a clever trick to hide it!
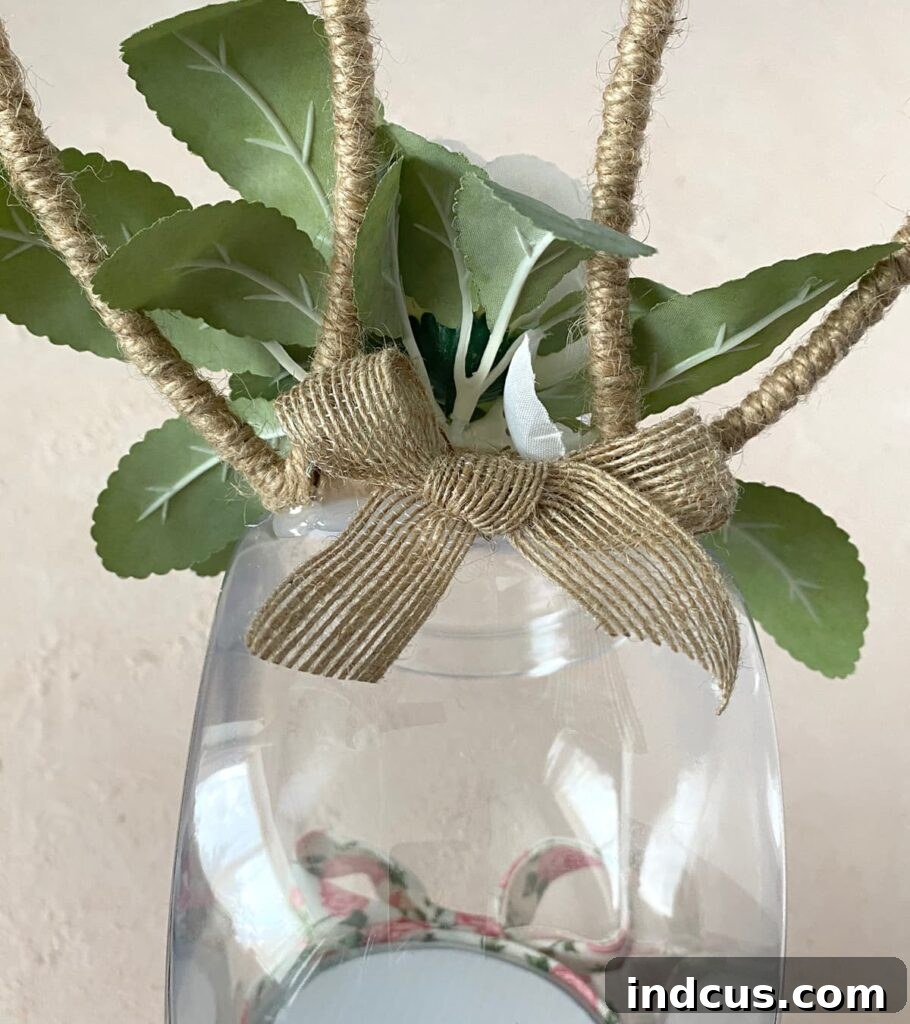
To camouflage any unsightly glue, take the jute bow that likely came with your bunny ear pick (or use a small decorative bow of your choice). Slip it off its original metal rod if necessary. Apply a dab of hot glue to the back of the bunny ears, directly over the hidden glue blob, and firmly press the bow into place. This small detail adds a touch of charm while expertly concealing any imperfections. Mission accomplished!
Step 5: Bringing the Bunny Face to Life
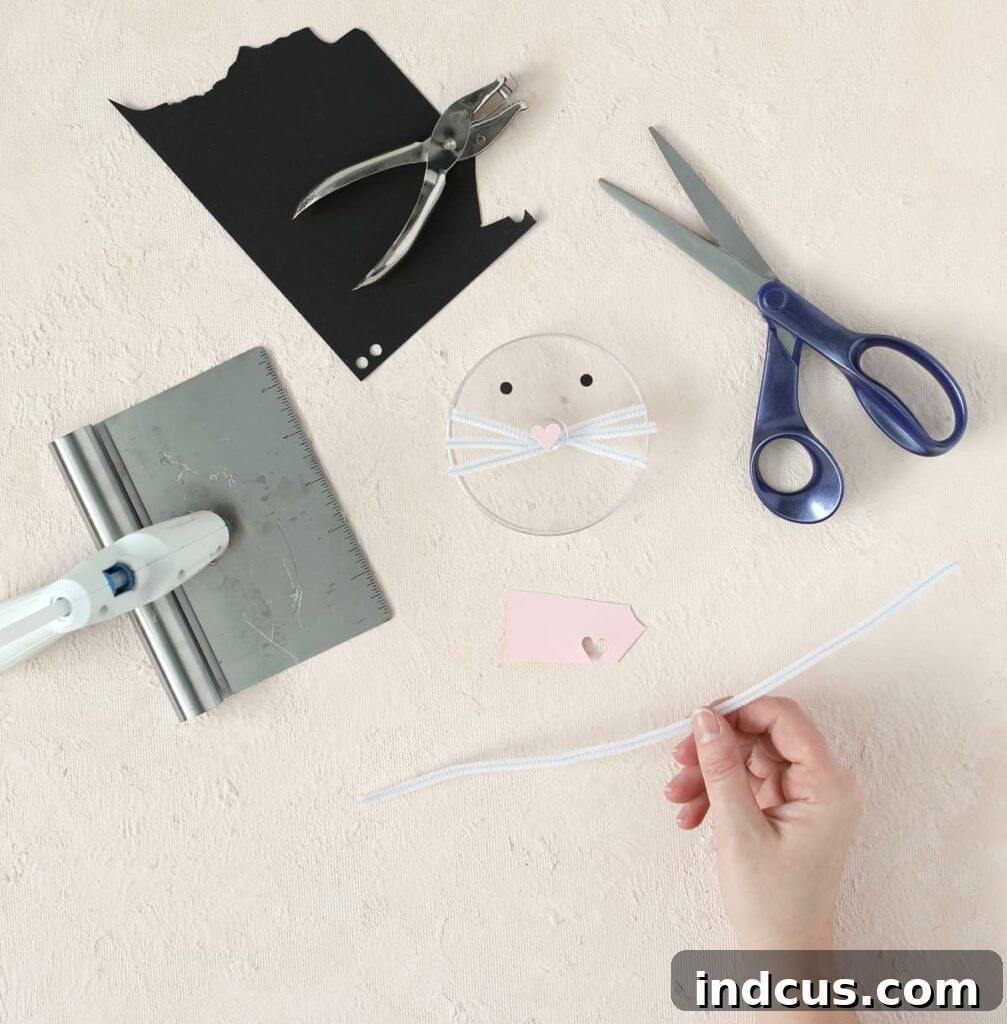
Now for the most endearing part: giving our bunny its face! Retrieve the lid of your candy jar. First, create the whiskers: cut a white pipe cleaner into three equal pieces. Twist these three pieces together at their centers to form a neat fan of whiskers. Apply a dot of hot glue to the underside of the knob on the candy jar lid and press the twisted center of the pipe cleaner firmly into place, allowing the ‘whiskers’ to splay out. For the eyes, use a standard paper hole punch to create two black circles from your black cardstock. For an extra touch of life, use a white paint pen or a dab of white paint to add tiny reflective dots to each black circle. Finally, cut a small heart shape from pink cardstock for the nose. Glue the black eyes and the pink heart nose onto the top of the lid’s knob, carefully positioning them to create an adorable bunny expression.
Step 6: The Perfect Pom-Pom Tail and Finishing Ribbon
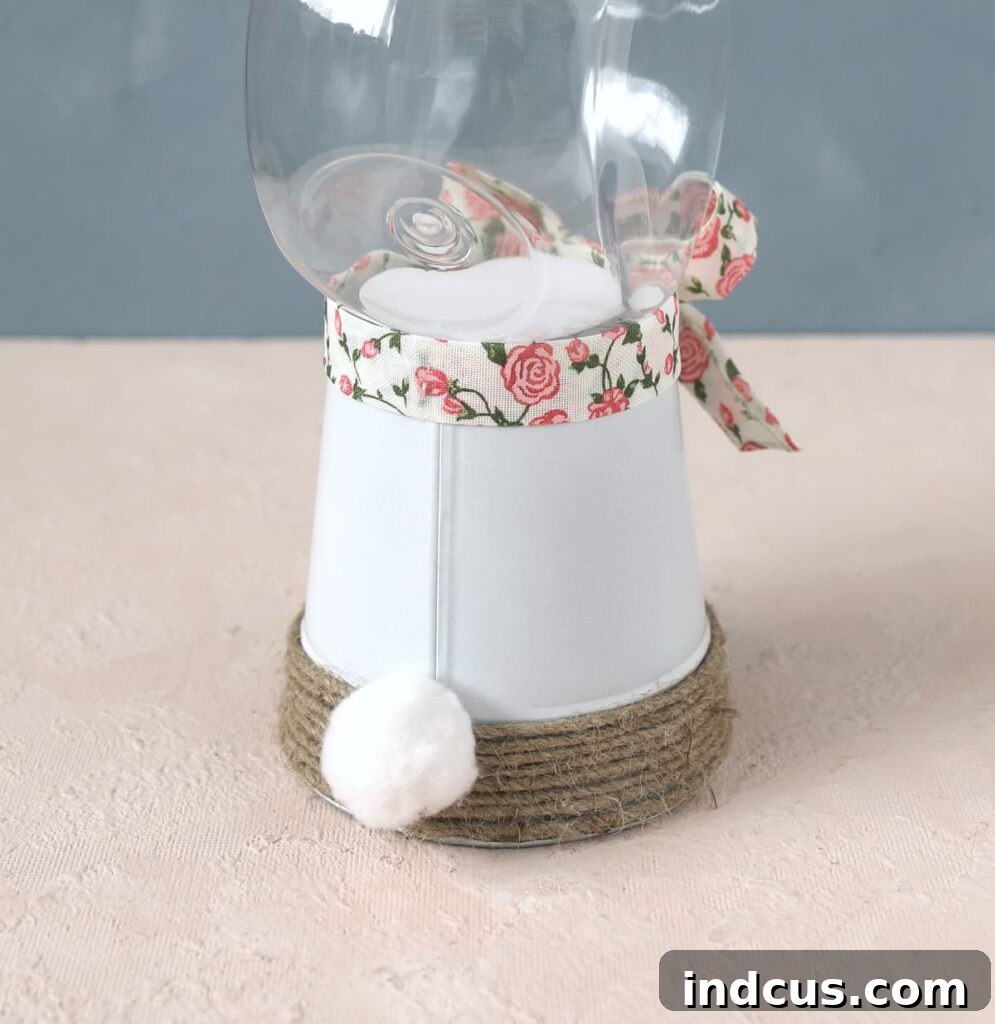
Almost done! Let’s add the final touches that make this bunny truly irresistible. Using hot glue, attach the 1.5-inch white pom-pom to the back of the candy jar, positioning it where a bunny’s tail would naturally be. Press firmly until secure. Next, it’s time for the ribbon. Take your chosen spring ribbon (the 7/8″ size works best for a balanced look, as I discovered after a wider ribbon proved too overwhelming!). Tie a beautiful bow around the middle section of the candy jar, between the base and the jar itself. Adjust the bow until it looks perfectly symmetrical and charming. This ribbon adds a lovely pop of color and completes the festive Easter aesthetic.
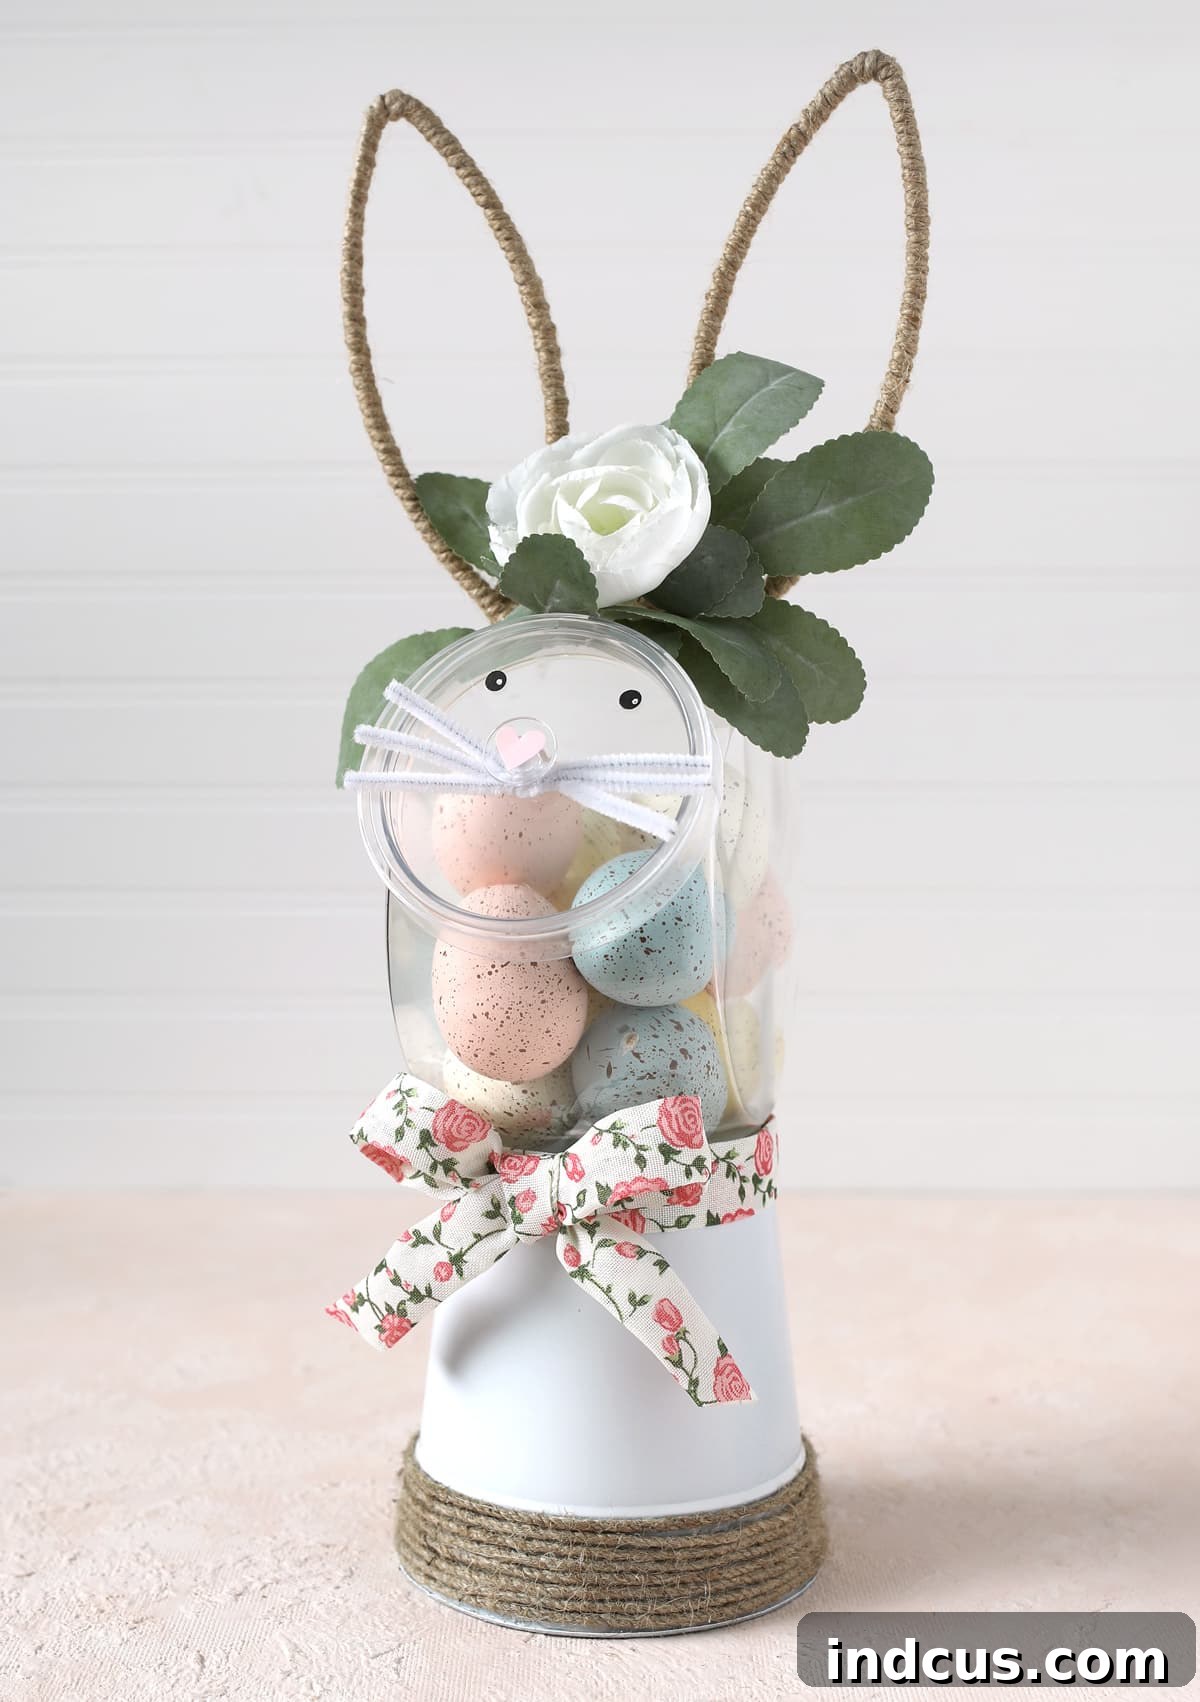
And just like that, behold your absolutely adorable Easter bunny candy jar! Isn’t it just bursting with personality and charm? You’ve transformed simple materials into a delightful piece of holiday decor that’s sure to capture hearts.
Filling Your Easter Bunny Candy Jar
Now that your charming bunny candy jar is complete, it’s time for the fun part: filling it! For decorative purposes, I initially filled mine with colorful faux decorative eggs, which perfectly complement the Easter theme. However, as the holiday draws closer, my plan is definitely to fill it to the brim with irresistible Cadbury Mini Eggs! They’re a classic Easter treat that nobody can resist. Just a word of warning from personal experience: if you buy them too early, they might mysteriously disappear before Easter even arrives. Alternatively, you could fill your jar with jelly beans, pastel M&Ms, or even small wrapped chocolates. For a non-edible option, consider small craft supplies, cotton balls, or anything that brings a smile to your face. It also makes a fantastic gift basket when filled with goodies!
Customization Ideas for Your Unique Bunny Jar
The beauty of DIY crafts lies in the ability to make them truly your own! While this guide provides a wonderful starting point, there are endless ways to customize your Easter bunny candy jar. Here are a few ideas to spark your creativity:
- Vary the Paint Colors: Instead of white, consider painting the metal bucket a soft pastel pink, a gentle robin’s egg blue, or even a pale mint green for a different spring vibe.
- Different Bunny Ears: Explore various bunny ear picks or headbands. Fabric ears, glitter ears, or even ears you craft from felt or pipe cleaners can offer a unique look.
- Embellishments and Flowers: Add small faux flowers, greenery, or tiny bows around the base of the ears or at the ribbon knot. Daisy or tulip accents would be particularly charming.
- Alternative Faces: Experiment with different eye and nose styles. You could use googly eyes for a playful look, draw on rosy cheeks, or use a fabric scrap for the nose.
- Textural Additions: Consider adding a strip of faux fur around the base of the jar or on the bunny’s head for extra texture and a plush feel.
- Ribbon Galore: Play with different ribbon widths, patterns (like gingham or polka dots), and materials (burlap, satin, lace). You could even layer two different ribbons for added flair.
- Themed Variations: Adapt the concept for other holidays or seasons! A snowman for winter or a pumpkin for fall, using the same jar-on-a-bucket technique.
Let your imagination lead the way! The goal is to have fun and create something that brings you joy.
Tips for a Smooth Crafting Experience
To ensure your crafting journey is as enjoyable and successful as possible, keep these general tips in mind:
- Read Through All Steps First: Before you start, read the entire tutorial to get a clear understanding of the process.
- Gather All Supplies: Ensure you have every item listed before you begin to avoid interruptions.
- Work in a Well-Lit Area: Good lighting is essential for precision, especially when working with small details like the bunny’s face.
- Patience with Hot Glue: Always give hot glue adequate time to cool and set. Rushing can lead to pieces coming apart.
- Protect Your Surfaces: Use old newspapers or a craft mat to protect your table from paint or glue.
- Safety First: Be careful with scissors, wire cutters, and the hot glue gun. Adult supervision is recommended for children.
Frequently Asked Questions (FAQ)
Here are answers to some common questions you might have about this DIY Easter bunny candy jar:
- Q: Can I use a glass candy jar instead of plastic?
A: Absolutely! A glass jar provides a more substantial feel and a classic look. Just ensure it’s securely glued to the metal bucket. - Q: How durable is this craft?
A: With proper hot gluing, your bunny jar will be quite durable for display and light handling. It’s not meant for rough play. - Q: Can I clean the jar once it’s assembled?
A: For the jar itself, you can gently wipe the inside with a damp cloth. Avoid submerging the entire craft in water or placing it in a dishwasher, as this could damage the paint and glue. - Q: What if I can’t find the exact bunny ears listed?
A: Don’t worry! Any decorative bunny ears, whether from a craft pick, a headband, or even handmade felt ears, can be adapted for this project. The key is finding a way to securely attach them. - Q: Can children help with this craft?
A: Yes, with adult supervision! Children can help with painting, gluing larger pieces, picking out ribbons, and filling the jar. Adult assistance is recommended for cutting and hot gluing.
Conclusion: Happy Crafting!
We hope you’ve enjoyed this journey of transforming a simple candy jar into a delightful Easter bunny decoration. This project is a testament to how a few inexpensive materials and a dash of creativity can bring so much joy and festive charm into your home. It’s a perfect addition to your spring decor, a lovely homemade gift, or simply a fun way to engage your crafting spirit.
So gather your supplies, put on some cheerful music, and create your very own Easter bunny candy jar. We encourage you to share your creations and any unique twists you add! Happy crafting, and may your Easter be filled with sweetness and charm!







